Subscribe to Our Youtube Channel
Summary of Contents for Rank Arena M-788
- Page 1 MULTIFUNCTION ROBTIC AUTO VACUUM CLEANER MODEL NO.: M-788 Auto Charging With Remote Controller , Mop And UV Lamp...
- Page 2 Thank you for purchasing M-788! Please read carefully this manual before using! Please follow the safety precautions below: These safety precautions are provided to avoid human or property damages, so please read carefully and observe the following Means the following symbols:...
-
Page 3: Bottom Of The Robot
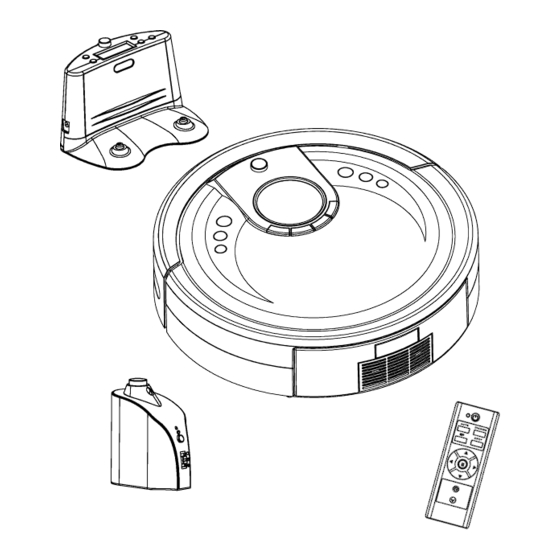
Components Auto Vacuum Cleaner Virtual Wall Charging Dock station Remote Controller Power Adapter Filter Side Brush Cleaning Brush User’s Manual Mopping part (rag and holder) Names of Parts Top of the Robot: Front bumper IR receiver LED Display Mode Select Run /Pause Dustbin Bottom of the Robot:... - Page 4 Names of Parts 1. Charging Dock station Floor skidproof pads Clock Power switch Adjuster Timing Full go IR sending window Charging terminals Power adapter socket 2. Remote Controller 3. LED Display Indicator Power Auto Docking Digital display Wall-following Spot Auto Time Forward Spot...
- Page 5 Installation and Disassembly of the Mopping part 01. Attach the enclosed mopping rag to the mopping holder. (See figure 1) 02. Align the protruding fastener at end of the holder (See figure 2) to the sunken positions on the inner sides of the 2 wheels (See figure 3) and press them down.
-
Page 6: Manual Charging
Charging : A. Manual Charging 01. You can directly charge the cleaner with its power adapter or with the charging dock station. 02. When charging directly via the power adaptor, please connect the output plug of the adapter with the charging socket on the robot. - Page 7 The cleaner can find the charg- ing dock station when it reaches the area about 3 meters in front of the base within the 90° fan- shaped region . How to use the function of the button on the cover : 01.
-
Page 8: Auto Button
Control with the Remote Controller : 1. The power button “ ” When the power switch of cleaner is on, press this button can ensure the robot enter the sleep status. which can save electricity and all indicators will be off, press this button again to enter the standby status. - Page 9 04. The robot will enter the standby status when the power supply is cut off during the charging process. 05. While the robot is being recharged on the station, if the preset time is reached, the robot will draw back from the station and turn around to walk 1m ahead, and then it will enter the AUTO mode for working.
-
Page 10: Time Setting
1. Time setting : In normal operation status, press the clock button “ ” to enter the time setting status; press once to switch between settings of minutes and hours, the current value of the selected item being set will flash, by using this button, you can set the standard time. -
Page 11: Virtual Wall
Virtual Wall The virtual wall is an accessory , it sends some special IR signals to form a blocked area to prevent the cleaner from entering unnecessary areas, it is so named “virtual wall” because this function acts like a wall. Before using the virtual wall, install the batteries as shown in figure 3, open the bottom cover of the virtual wall, install 2 pcs A batteries (pay attention to the correct polarity). -
Page 12: How To Use The Virtual Wall
How to Use the Virtual Wall 01. The virtual wall should generally be placed at the doorway of the room you planned to clean 02. You can also place the virtual wall in any proper place to prevent the cleaner entering the blocked area. -
Page 13: Side Brush
How to Replace and Clean the Filter Removal and cleaning: 01. Hold the middle part of the filter bracket located on the suction inlet by hand (See figure 1) and then draw horizontally (See figure 2). 02. Take out the scouring pad (See figure 3) and the filter sponge (See figure 3) in order. 03. -
Page 14: Main Brush
Main Brush How to Remove the Main Brush 01. Hold the brush and push it slightly leftward. (See Figure 1) 02. Then take out the brush. (See Figure 2) Figure 1 Figure 2 How to Install the Center Brush 01. Hold the brush(the end which the brush axis stuck out will be insert in the cleaner first ), See Figure 1. 02. -
Page 15: Troubleshooting
To ensure a more effective cleaning of this robot, please clean the sensors regularly. Storing the Robot The robot should be stored in ventilated and dry places. Trouble shooting Below inspections by yourself to this product before you request a repair. A. - Page 16 Meaning Error Code Solution E F 10 11 12 13 14 15 16 17 18 19 5 1D 1E Technic Parameter Model M-788 Standard Color Red/Silver Dimensions Diameter: 35cm Ht: 11cm Weight 3.5kg Speed 23cm/Sec Charging Time...


Need help?
Do you have a question about the M-788 and is the answer not in the manual?
Questions and answers
Won't go back to docking station
The Rank Arena M-788 may not go back to the docking station for these reasons:
1. The area in front of the base (within 3 meters) and 0.5 meters on each side is blocked.
2. The IR sending window on the base is dirty or covered.
3. The adapter is not properly connected to the dock station.
4. The electric wire is obstructing the robot’s movement.
Ensure the area is clear, the IR window is clean, the dock is powered, and no wires are in the way.
This answer is automatically generated
J aimerait bien savoir comment télécharger l application de i robot vacuum cleaner M788