Table of Contents
Advertisement
Advertisement
Table of Contents

Related Manuals for Samsung Verizon Gear S3 frontier


Summary of Contents for Samsung Verizon Gear S3 frontier
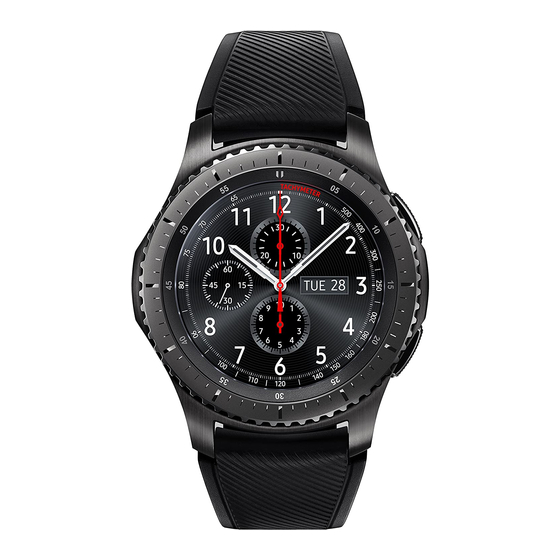
- Page 1 User guide.
-
Page 2: User Manual
W E A R A B L E User Manual Please read this manual before operating your device and keep it for future reference. -
Page 3: Table Of Contents
Samsung Gear App . . . . . . . . . . . . . . . . . . . - Page 4 Samsung Pay . . . . . . . . . . . . . . . . . . .
- Page 5 Samsung Support . . . . . . . . . . . . . . . . . . .
- Page 6 Legal . . . . . . . . . . . . . . . . . . . . . . . . . . . . . . . . . . . . . . . . 103 Legal Information .
-
Page 7: Special Features
Special Features Learn about your mobile device’s special features. -
Page 8: Water And Dust Resistance
Water and Dust Resistance This device is rated IP68 using the Ingress Protection rating system. For more information, see “Maintaining Water and Dust Resistance” on page 107. Military Specification This device passed military specification (MIL‑STD‑810G) testing. For more information, see “Legal Information” on page 104. Special Features... -
Page 9: Getting Started
Getting Started Learn about your mobile device hardware, assembly procedures, and how to get started using your new device. -
Page 10: Set Up Your Device
Set Up Your Device Learn how to set up your device for the first time. -
Page 11: Assemble Your Device
Assemble Your Device This section helps you to assemble your device. Wireless Charger Wireless charging surface USB charger port LED indicator *Devices and software are constantly evolving — the illustrations you see here are for reference only. Set Up Your Device... -
Page 12: Charge The Battery
Charge the Battery 1. Insert the USB cable into the USB charger port. Your device is powered by a rechargeable, standard Li-Ion battery. Warning: Do not disassemble, modify, or repair your device. Placing objects, such as magnetic stripe cards, including credit cards, phone cards, passbooks, and boarding passes, next to the device or charger may cause damage from the charger or device’s magnetic field. - Page 13 2. Wait for the device to cool down and then begin LED indicator flashes red. Disconnect the Gear from the charging the device again. wireless charger dock, and then reconnect. If the error occurs again, contact a Samsung Service Center for service support. Set Up Your Device...
- Page 14 Wear the Gear Replace the Strap 1. Open the buckle and place the strap around Detach the strap from the Gear to replace it with a new your wrist. one. 2. Fit the strap to your wrist, insert the pin into an 1.
-
Page 15: Start Using Your Device
Start Using Your Device 2. Insert one end of the spring bar into the lug, slide the spring bar inwards, and connect the strap. Turn Your Device On or Off The instructions below explain how to turn your device on or off. To turn the device on: ►... -
Page 16: Set Up Your Device
Set Up Your Device Lock or Unlock Your Device Use your device’s screen lock features to secure your device. Use the Set Up Wizard When you turn on the Gear for the first time or reset it, To lock the device: a pop-up window is displayed. -
Page 17: Samsung Gear App
2. From the Apps screen of the smartphone, tap Samsung Gear. Download and Install Gear Manager • If necessary, update the Samsung Gear app to the latest version. To connect your Gear to a smartphone, install the Samsung Gear app on the smartphone. -
Page 18: Remote Connection
• From the Apps screen of the smartphone, tap disconnect it from the smartphone and connect a Samsung Gear > Settings tab > About Gear > new one. Back up and restore > Backup data. 1. From the Apps screen of the smartphone, tap 2. - Page 19 Auto Switch Device If you have connected two or more wearable devices to your smartphone, they are remembered in the Samsung Gear app. If a connected wearable device is disconnected, the Samsung Gear app searches for another remembered wearable device and connects to it.
-
Page 20: Learn About Your Device
Learn About Your Device Learn some of the key features of your mobile device, including the screens and icons, as well as how to navigate the device and enter text using the keyboard. -
Page 21: Front View
Front View Bezel Back button Microphone (behind) Power button Bezel Back button Microphone (behind) Power button *Devices and software are constantly evolving — the illustrations you see here are for reference only. Learn About Your Device... - Page 22 • Power key Press and hold to turn the Gear on or off. Press to turn on the screen. Press and hold for more than seven seconds to restart the Gear. Press to open the Apps screen when you are on the Watch screen.
-
Page 23: Back View
Back View Heart rate sensor Speaker Heart rate sensor Speaker *Devices and software are constantly evolving — the illustrations you see here are for reference only. Learn About Your Device... - Page 24 Watch Screen and Widgets *Devices and software are constantly evolving — the illustrations you see here are for reference only. Learn About Your Device...
-
Page 25: Status Panel
Status Panel Status bar Verizon Wireless Brightness Music player Sound Call forwarding Do not disturb Airplane mode *Devices and software are constantly evolving — the illustrations you see here are for reference only. Learn About Your Device... -
Page 26: Indicator Icons
To open the Status panel: Bluetooth connected ► On the Watch screen, swipe downward from the top edge of the screen. Bluetooth headset connected Status Bar Indicator icons display at the top of the screen in the Status bar. The icons listed in this table are most common. - Page 27 Adjust the Brightness Airplane Mode You can adjust the Gear’s display brightness to suit the Airplane mode disconnects your device from all environment. networks and turns off connectivity features, such as phone calls and Wi-Fi. ► On the status panel, tap Brightness and adjust the brightness by rotating the bezel.
-
Page 28: Notifications
Notifications Delete Notifications 1. Rotate the bezel left to view notifications. Stay up to date with events, notifications, and 2. Swipe upward from the bottom edge of the screen messages from your smartphone. to delete all notifications. View Notifications Block Notifications When you receive a notification, it is displayed at the top of the screen and disappears after a few seconds 1. - Page 29 1. From the Apps screen of the smartphone, tap notifications. Samsung Gear > Settings tab > Notifications. • Smart relay: Set the smartphone to display 2. Tap On/Off to activate it, and then tap to select...
-
Page 30: Customize Your Home Screen
Screen 1. From the Apps screen of the smartphone, tap Samsung Gear > Settings tab > Watch faces. The Watch screen is the starting point for the Home screens. Rotate the bezel to view items on the screen, 2. Tap a desired watch type. The watch face you such as notifications and widgets. - Page 31 Widgets You can add widgets to the Home screens. Widgets are small apps that offer limited functionality to provide information and convenient access. Add Widgets You can add more widgets on the Home screen. 1. Rotate the bezel to the end of the Widget screens, and tap Add widget.
-
Page 32: Navigation
Navigation Touchscreen Navigation Please note that a touch screen responds best to a Learn the basics for how to navigate through your light touch from the pad of your finger or a capacitive device. stylus. Using excessive force or a metallic object when pressing on the touch screen may damage the Bezel Navigation tempered glass surface and void the warranty. - Page 33 Touch and Hold Drag Touch and hold items on the screen to activate them. Touch and hold an item, and then move it to a new location. • Touch and hold a widget on a Home screen to • move it. Drag an app shortcut to add it to a Home screen.
-
Page 34: Entering Text
Entering Text Default keyboard Select a default keyboard type for text input. Text can be entered by speaking or by using a keyboard. You can also select emojis. 1. From the Apps screen, rotate the bezel to Settings. A text input screen is displayed automatically when you are able to enter text. - Page 35 Voice Input Voice input is not supported in some languages. When the Gear is connected to a smartphone using ► Tap Voice input and speak the message you Bluetooth, the language settings applied on the want to enter. Tap Send when you are finished. smartphone are applied to the Gear.
- Page 36 Emojis Keyboard You can add emojis to your message. Use the keyboard to enter your message. ► Tap Emojis, and select an emoji to include in Handwriting Mode your message. ► Tap Keyboard, and then use your finger to • To draw your own image, tap Doodle.
- Page 37 Enter Characters Add Input Languages 1. Tap Keyboard, and then rotate the bezel to 1. Rotate the bezel to change the input mode to character mode. number mode or punctuation mode. 2. Tap the corresponding key repeatedly until the 2. Tap Settings >...
- Page 38 Vibration: Set the Gear to vibrate when you • Check for updates: Set the Gear to check for tap a key. and download the latest version of the Samsung • Reset keyboard settings: Reset the Samsung keyboard. keyboard settings.
-
Page 39: Apps
Apps Learn how to change the way apps are displayed and uninstall or disable apps. -
Page 40: Using Apps
Using Apps Open Apps The Apps list displays all preloaded apps and apps that you downloaded. You can uninstall, disable, or hide On the Apps screen, tap an app icon to open the app. apps from view. To open an app from the list of recently used apps: Access Apps ►... - Page 41 Get more apps. From your Smartphone: • 1. From the Apps screen of the smartphone, tap The Samsung Gear Apps store automatically Samsung gear > Settings tab > Apps. launches on your Gear. 2. Tap More > Reorder. You can also download apps for your Gear from your 3.
- Page 42 2. Tap More > Uninstall, and then select apps to 2. Tap View more apps to view options. remove from the Gear. Download History View your app download history from the Samsung Gear app. 1. From the Apps screen of the smartphone, tap Samsung gear > Settings tab > Apps.
-
Page 43: Alarm
Alarm Set an Alarm Delete an Alarm 1. From the Apps screen, rotate the bezel to 1. From the Apps screen, rotate the bezel to Alarm. Alarm. 2. Tap Add alarm and enter the time. 2. Tap and hold an alarm, and then tap Delete. 3. -
Page 44: Alti-Barometer
Alti-Barometer Customize Settings Measure the altitude and atmospheric pressure in your current location. 1. From the Apps screen, rotate the bezel to Alti‑barometer. Measure Altitude 2. Rotate the bezel to the Settings screen, and then ► From the Apps screen, rotate the bezel to tap Change. - Page 45 • Altitude unit: Customize the unit of measurement for altitude. • Pressure unit: Customize the unit of measurement for pressure. • Help: View help topics for the Alti-barometer. Apps...
-
Page 46: Contacts
Add Emergency Contacts View your smartphone’s contact list. 1. From the Apps screen of the smartphone, Find a Contact Samsung Gear > Settings tab > Send SOS requests. You can search for a contact or scroll through the list to find one by name. - Page 47 Call or Message a Contact You can send a message or make a phone call from Contacts. 1. From the Apps screen, rotate the bezel to Contacts. 2. Tap the contact you want to connect with, and tap an option: •...
-
Page 48: Email
Email Reply to Emails View emails received on the smartphone and reply to them. 1. From the Apps screen, rotate the bezel to Email. 2. Tap an email to open the email screen. Read Emails 3. Scroll to the bottom of the email and tap Reply. -
Page 49: Find My Phone
Samsung gear app. 1. From the Apps screen, rotate the bezel to Find my phone. 1. From the Apps screen of the smartphone, tap Samsung Gear > Settings tab > Find my gear. 2. Tap Start. • 2. Tap Start. -
Page 50: Gallery
Gallery Delete Images View and manage images stored on the Gear. 1. From the Apps screen, rotate the bezel to View Images Gallery. 1. From the Apps screen, rotate the bezel to 2. Touch and hold an image to delete. Gallery. - Page 51 To sync images on your smartphone with your Gear: 1. From the Apps screen of the smartphone, tap Images can exchanged between your Gear and Samsung Gear > Settings tab. smartphone. 2. Tap Send content to Gear > Auto sync under Photos Export Images to Your Smartphone to enable.
-
Page 52: Messages
Messages View messages and reply to or call the sender using the 5. Enter text using one of the available methods. Gear. • If you use the bezel to view the one-word messages, the message is automatically sent to Send Messages the recipients when you tap it. - Page 53 Quick Messages 1. From the Apps screen of the smartphone, Samsung Gear > Settings tab > Edit or add templates used for replying to messages. Send SOS requests. 1. From the Apps screen of the smartphone, 2. Tap On/Off to enable this feature, and then Samsung Gear >...
- Page 54 Read Messages Reply to Messages 1. From the Apps screen, rotate the bezel to 1. From the Apps screen, rotate the bezel to Messages. Messages. 2. Tap a conversation to view it. 2. Tap a conversation to view it. 3. Tap More options for additional options: 3.
- Page 55 Message Settings Change the message feature settings. 1. From the Apps screen, rotate the bezel to Settings. 2. Tap Messages and select an option: • Send as audio: Use voice input to send messages. • Block list: View and edit blocked numbers and messages.
-
Page 56: Music Player
Music Player Volume Output Fast-forward Rewind More options Play/Pause Playlist *Devices and software are constantly evolving — the illustrations you see here are for reference only. Apps... - Page 57 1. From the Apps screen, rotate the bezel to Music player. 1. From the Apps screen of the smartphone, tap Samsung Gear > Settings tab. 2. Tap Output to change it to the Gear icon. 2. Tap Send content to Gear > Select tracks.
-
Page 58: News Briefing
News Briefing Create and access your personalized magazines. 1. From the Apps screen, rotate the bezel to News Briefing. 2. Rotate the bezel to search through trending articles. Apps... -
Page 59: Phone
Phone Keypad Contacts More options Call log *Devices and software are constantly evolving — the illustrations you see here are for reference only. Apps... -
Page 60: Receive Calls
• Depending on your Call settings, you can use your Gear Contacts, select a contact, and then tap device to initiate outgoing calls, answer calls, and to Dial or select a phone number. complete conversations. • Scroll through the log list, tap a log entry, and then tap Dial. - Page 61 Reject a Call Missed Calls Reject an incoming call and send a rejection message If a call is missed, a notification is displayed on the to the caller. screen. ► Drag ► From the Watch screen, rotate the bezel left to view Reject to the left to reject a call.
- Page 62 Call Settings Change the call feature settings. 1. From the Apps screen, rotate the bezel to Settings. 2. Tap Call and select an option: • Voice answer: Set your Gear to answer or reject calls using voice commands. • Voicemail: Access and customize your voicemail. •...
-
Page 63: Reminders
Reminders Complete a Reminder Add reminders for events, and set alarms outside of the Calendar app. To mark a reminder as complete: 1. From the Apps screen, rotate the bezel to Create a Reminder Reminders. 1. From the Apps screen, rotate the bezel to 2. -
Page 64: S Health
1. From the Apps screen of the smartphone, tap provided information, placement of the sensor on Samsung Gear > Settings tab. the body, and other end-user interactions. For more information on proper wear and use, see: 2. Tap Samsung Health to access the S Health app. samsung.com/us/heartratesensor. Apps... - Page 65 Before You Start Exercising Before beginning your exercise regimen check with your doctor if you have symptoms suggestive of heart, Although the S Health application is a great companion lung, or other serious disease, such as: to your exercise routine, it is always best to make sure •...
- Page 66 Wear the Gear Correctly 24‑Hour Activity Tracker Wear the Gear firmly around your lower arm just above Your Gear can monitor and record your activities during your wrist as shown below. Do not fasten the Gear too the day and encourage you to stay healthy. tightly.
- Page 67 • 3. Tap the screen to view a graph of your step count Healthy activity: Indicates whether you are records. walking or running. If you have made more than • 100 steps per minute for at least 10 consecutive Rotate the bezel to view records by day. minutes, the Gear encourages you to keep going.
- Page 68 • Exercise Tracker Auto pause: Automatically pause the workout when the Gear detects no movement. Record your exercise information and calories burned • Coaching msgs: Enable coaching messages to using S Health’s exercise feature. display during your exercise. When your Gear and smartphone are connected, this •...
- Page 69 Measure Your Heart Rate Note: Measured distance may differ from the actual distance due to uneven strides, walking in place, and 1. From the Apps screen, rotate the bezel to pacing around. S Health. 2. Rotate the bezel right and open the heart rate Heart Rate Tracker tracker screen.
- Page 70 Track Your Heart Rate Water Tracker The Gear can automatically measure and track your Record and track how many glasses of water you drink. heart rate. Your Gear measures your heart rate at 1. From the Apps screen, rotate the bezel to regular intervals.
- Page 71 Caffeine Tracker Together Record and track how many cups of caffeinated Compete with other S Health users. beverages you drink each day. Steps Leaderboard 1. From the Apps screen, rotate the bezel to Add the Steps leaderboard and set challenges through S Health.
- Page 72 • Settings Water target: Set a target water intake. • Caffeine limit: Set a limit for caffeine intake. Customize your S Health settings. • Help: View help topics for S Health. 1. From the Apps screen, rotate the bezel to S Health.
-
Page 73: S Voice
S Voice Use S Voice Speak to perform operations or searches on your device. 1. From the Apps screen, rotate the bezel to S Voice. Set a Wake‑Up Command – or – You can launch S Voice using your own wake-up ™... - Page 74 Tips for Better Voice Recognition • Speak clearly. • Speak in quiet places. The Gear may not recognize your commands or may perform unwanted commands depending on your surroundings or how you speak. Set the Language Customize the language used in the S Voice app. The selected language is applied to S Voice only (not to the language displayed on the Gear).
-
Page 75: Samsung Pay
Set up Samsung Pay on your Gear Pay using your Gear almost anywhere you can slide or tap your card. You must activate NFC and set Samsung Pay as your Register frequently used cards to Samsung Pay, a default payment method before using Samsung Pay on mobile payment service, to make payments quickly and your Gear. - Page 76 Make Payments Note: Use the Samsung Pay application for up to 5 transactions without the smartphone. This may vary Use your Gear to make payments using Samsung Pay. depending on the bank/institution issuing the account. Note: Samsung Pay and your Gear support magnetic...
-
Page 77: Schedule
Schedule View the events scheduled on the smartphone. 1. From the Apps screen, rotate the bezel to Schedule. 2. Rotate the bezel to view other months. 3. Tap a day on the monthly calendar. • The day’s events list is displayed. •... -
Page 78: Weather
Weather View weather information on the Gear for locations set on the smartphone when the devices are connected. When your Gear and smartphone are connected, this feature uses your smartphone’s location information. 1. From the Apps screen, rotate the bezel to Weather. -
Page 79: World Clock
World Clock Remove Cities The World clock lets you keep track of the current time in multiple cities around the globe. 1. From the Apps screen, rotate the bezel to World clock. Add Cities 2. Tap More options by the city you want to remove. 1. -
Page 80: Settings
Settings Configure your device’s connections and settings, add accounts, and customize Home screens, apps, and features. -
Page 81: How To Use Settings
How to Use Settings Access Settings You can personalize your device by configuring various setting options. To access Settings: ► From the Apps screen, rotate the bezel to Settings. Settings... -
Page 82: Connections
Connections Manage connections between your device and a variety of networks and other devices. -
Page 83: Bluetooth
BT headset: Search for Bluetooth headsets and connect them to the Gear. 1. From the Apps screen of the smartphone, tap Samsung Gear > Settings tab. Note: The headset can be only used for playing music on the Gear. 2. Tap Gear connection > Remote connection. -
Page 84: Mobile Networks
Mobile Networks Wi-Fi Control your device’s access to networks and mobile Activate the Wi-Fi feature to connect to a Wi-Fi data service. network. 1. From the Apps screen, rotate the bezel to 1. From the Apps screen, rotate the bezel to Settings. - Page 85 1. From the Apps screen, rotate the bezel to 1. From the Apps screen of the smartphone, tap Settings. Samsung Gear > Settings tab. 2. Tap Connections > Wi-Fi. 2. Tap Gear connection > Sync Wi-Fi profiles. 3. Tap Wi-Fi networks > Scan.
-
Page 86: Nfc
To register or get more information about the service, Note: Samsung Pay and your Gear support magnetic contact your service provider. secure transmission (MST) as well as near field 1. -
Page 87: Alerts
Alerts Data Usage Receive alerts when disconnected from Bluetooth. Set the Gear to monitor your mobile data usage. 1. From the Apps screen, rotate the bezel to 1. From the Apps screen, rotate the bezel to Settings. Settings. 2. Tap Connections > Alerts to enable or disable this 2. -
Page 88: Location
Location Connect to a Phone Some apps may require location services to be turned Connecting to your phone is the best way to get the on for full functionality. most out of your Gear. 1. From the Apps screen, rotate the bezel to This option is displayed only if you are in Standalone Settings. -
Page 89: Connect To A New Phone
Connect to a New Phone Connect your Gear to a new mobile device. The Gear can connect to another mobile device after performing a light reset to delete data. This option is displayed only if you are already connected to a mobile device. To connect to a new phone: 1. -
Page 90: Sounds And Vibration
Sounds and Vibration Configure the sounds and vibrations used to indicate notifications, screen touches, and other interactions. -
Page 91: Sound Mode
Sound Mode Vibrations Set the sound mode for the device. Set your vibration preferences for the device. 1. From the Apps screen, rotate the bezel to Vibrate with Sound Settings. The device can vibrate and play sounds for calls and 2. - Page 92 Vibration Intensity Ringtone Vibration Configure the vibration intensity. Vibrate for calls. 1. From the Apps screen, rotate the bezel to 1. From the Apps screen, rotate the bezel to Settings. Settings. 2. Tap Sounds and vibration > Vibration intensity, 2. Tap Sounds and vibration > Ringtone vibration and and select Strong or Light.
-
Page 93: Volume
Volume Notification Sound Adjust the volume level of your device. Customize the sound for new notifications. 1. From the Apps screen, rotate the bezel to 1. From the Apps screen, rotate the bezel to Settings. Settings. 2. Tap Sounds and vibration > Volume and adjust the 2. -
Page 94: Display
Display Configure your display’s brightness, screen timeout delay, and other display settings. -
Page 95: Style
Style Adjust Screen Brightness 1. From the Apps screen, rotate the bezel to Change the style settings. Settings. 1. From the Apps screen, rotate the bezel to 2. Tap Display and select an option: Settings. • Brightness: Manually adjust the brightness of 2. -
Page 96: Device Maintenance
Device Maintenance Get an overview of the status of your device’s battery, storage, memory, and device security. You can also automatically optimize your device’s system resources. -
Page 97: Gear Status
Samsung account: View the Samsung account 1. From the Apps screen of the smartphone, tap that is tied to your Gear. Samsung Gear > Settings tab > About Gear. • Device name: Change the Gear’s name. 2. Tap the icons at the top of the screen to view Power Saving Battery, Storage, and RAM information. - Page 98 To enable Power saving mode: ► From the Apps screen, rotate the bezel to Settings > Power saving, and then tap the checkmark. – or – Press the Power key, tap Power saving, and then tap the checkmark. To disable Power saving mode: ►...
-
Page 99: Lock Screen And Security
Lock Screen and Security Secure your device and protect your data with Lock Screen and Security settings. -
Page 100: Set A Screen Lock
™ • PIN: Set a PIN to use for unlocking the device shipping your device to Samsung or any other service when it removed from your wrist and the screen provider for service and before resetting the device is turned off. -
Page 101: Control Remotely
Control your Gear remotely while both your smartphone and Gear are connected to a network, or Bluetooth. 1. From the Apps screen of the smartphone, tap Samsung Gear > Settings tab > Find my gear. 2. Tap Control remotely and tap On/Off to enable. 3. Tap an option: •... -
Page 102: Accessibility
Accessibility Accessibility services are special features that make using the device easier for those with certain physical disabilities. For more information about Accessibility for Samsung products, please contact us at accessibility@sea.samsung.com. -
Page 103: Vision
• Vision Grayscale: Change all colors to gray. • Negative colors: Reverse the display of colors To set accessibility settings related to vision: from white text on a black background to black 1. From the Apps screen, rotate the bezel to text on a white background. -
Page 104: Text To Speech
Text to Speech Direct Access To set accessibility settings related to hearing: Triple-tap the screen with two fingers to open the screen reader. 1. From the Apps screen, rotate the bezel to Settings. 1. From the Apps screen, rotate the bezel to Settings. -
Page 105: Other Settings
Other Settings Configure features on your device that make it easier to use. -
Page 106: Device
Report diagnostic and usage info: Give screen when you raise your wrist. consent to provide diagnostic and usage data to Samsung to help improve the quality and • Touch sensitivity: Set the Gear to allow use of performance of its products and services. -
Page 107: Getting Help
Getting Help Additional resources for your device. -
Page 108: Videos
Videos samsung.com/spsn Simulators samsungsimulator.com/ Tips samsung.com/us/support/tips/galaxy/ Samsung Support samsung.com/us/support Verizon Glossary verizonwireless.com/support/glossary Getting Help Videos... - Page 109 Legal View legal information for your device.
-
Page 110: Legal Information
The End User License Agreement (EULA) for this device READ THIS INFORMATION BEFORE USING YOUR is found in the Samsung Gear application, which is MOBILE DEVICE. required for operation of your device. You may also... -
Page 111: Intellectual Property
Some software components of this product, including All Intellectual Property, as defined below, owned but not limited to ‘PowerTOP’ and ‘e2fsprogs’, by or which is otherwise the property of Samsung incorporate source code covered under GNU General or its respective suppliers relating to the Product,... - Page 112 Product, the purchaser takes construed to create an express or implied warranty the product “as is”, and Samsung makes no express of any kind whatsoever with respect to the Product. or implied warranty of any kind whatsoever with...
- Page 113 Samsung Knox is Samsung’s security platform and is by Enclosures [IP Code]; test conditions: 15‑35°C, a mark for a Samsung device tested for security with 86‑106 kPa, 5.0 feet, for 30 minutes). Despite this enterprise use in mind. Additional licensing fee may be classification, your device is not impervious to water required.
- Page 114 • • Any device which uses accessible compartments Do not expose the device to water at high pressure. or ports that can be opened, should have these • If the device is dropped or receives an impact, the sealed or closed tightly to prevent liquid from water and dust resistant features of the device entering the system.
- Page 115 Internet: samsung.com ©2017 Samsung Electronics America, Inc. Samsung, Samsung Galaxy, S Health, Samsung Gear, S Voice, and Samsung Pay, are all trademarks of Samsung Electronics Co., Ltd. Other marks are the property of their respective owners. Some multimedia (audio/video) files contain Digital Rights Management (DRM) technology to verify you have the right to use the files.
Need help?
Do you have a question about the Verizon Gear S3 frontier and is the answer not in the manual?
Questions and answers