Table of Contents
Advertisement
Publication No. ZZ 1448-4
December 2016
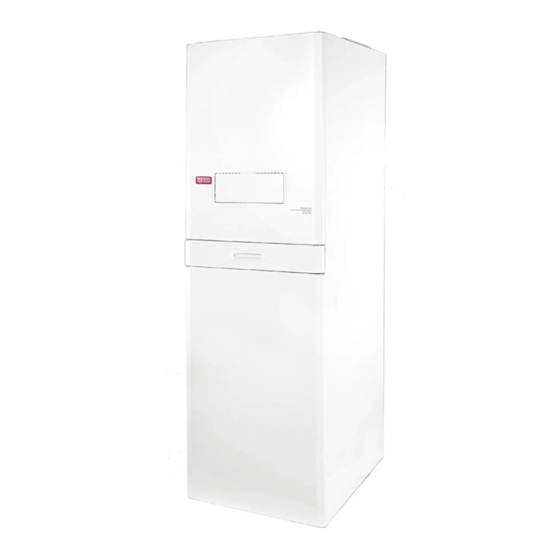
WARMCAIR C20DW
Condensing Air & Water Heater
High Efficiency Downflow
Condensing Air & Water Heater
INSTALLATION, COMMISSIONING
& SERVICING INSTRUCTIONS
WarmCair C20DW
-
G.C. No. 43-417-61
These instructions are to be left with the User
www.johnsonandstarley.co.uk
Advertisement
Table of Contents

Related Manuals for Johnson & Starley WARMCAIR C20DW


Summary of Contents for Johnson & Starley WARMCAIR C20DW
- Page 1 Publication No. ZZ 1448-4 December 2016 WARMCAIR C20DW Condensing Air & Water Heater High Efficiency Downflow Condensing Air & Water Heater INSTALLATION, COMMISSIONING & SERVICING INSTRUCTIONS WarmCair C20DW G.C. No. 43-417-61 These instructions are to be left with the User...
-
Page 2: Table Of Contents
CONTENTS The Benchmark Scheme Central Heating Water Temperatures Features 17 Warm Air Heating Commissioning With Thermista-stat Fitted General Description With No Thermista-stat Fitted Building Standards & Regulations 18 Handing Over Safety, Electrical & Gas Information 19 Servicing & Maintenance General Safety Information Service Schedule Power Flushing Initial Inspection... -
Page 3: Features
16.0kW and hot water output of 24.2 fully modulating down to 4.8kW. It is room sealed, with a stainless steel heat exchanger, using a vertical or horizontal Concentric Flue System. The WarmCair C20DW combinds air heater is ideally suited for new built dwellings and the replacement of existing non-condensing air heaters. For Indirect system applications only. -
Page 4: Building Standards & Regulations
BUILDING STANDARDS & REGULATIONS STATUTE LAW DEFINES THAT ALL GAS APPLIANCES MUST BE INSTALLED BY COMPETENT PERSONS, i.e. GAS SAFE REGISTERED INSTALLERS. GAS SAFE MEMBERSHIP ENQUIRIES TEL: 0800 408 5500 IN ACCORDANCE WITH THE GAS SAFETY (INSTALLATION AND USE) REGULATIONS (CURRENT EDITION). FAILURE TO COMPLY WITH THESE REGULATIONS MAY LEAD TO PROSECUTION. -
Page 5: Handling The Unit
ELECTRICAL INFORMATION 4.3.1 Ensure the mains supply voltage, frequency, number of phases and power rating comply with details on the rating label. 4.3.2 All wiring must be in accordance with the appropriate standards. The equipment must be supplied with a double pole isolator switch. -
Page 6: Technical Data
TECHNICAL DATA TABLE 1 C20DW Maximum weight lift 82.5 Gas supply mbar 2H - G20 - 20mbar Gas connection 15mm copper Gas Injector size 4.75mm Heating flow and return 22mm copper Flue terminal diameter 100mm (4”) Condense drain 6mm ID Electrical supply V ~ Hz 230V ~ 50Hz... -
Page 7: Heater Positioning
HEATER POSITIONING This heater is not suitable for external installation unless it is protected from the elements by a suitable enclosure. The enclosure must provide the clearance for installation, servicing and maintenance as well as the correct level of ventilation. The selected position should allow for a suitable flue system to be installed. When installed in a timber frame building guidance should be taken from the Gas Industry Publication IGE/UP-7 (Guide for Gas Installations in Timber Frame Housing). -
Page 8: Heating System
HEATING SYSTEM WARM DELIVERED AIR SYSTEM 9.1.1 All duct work, including riser ducts, should be fully insulated with 50mm (2”) fibre-glass or similar. If short extended duct runs are taken below floor level these should be similarly insulated and in addition wrapped with a sound vapour proof barrier. -
Page 9: Pipework Sizing
EXPANSION VESSEL COLD WATER STORAGE HOT WATER DRAIN COCK INDIRECT STORAGE CYLINDER NOTE: Johnson & Starley Ltd recommend the use of a sealed system kit. The pressure vessel and PVR must be fitted in the flow before any auxiliary diverter valves. FIGURE 4. -
Page 10: Flue Instructions
FLUE INSTRUCTIONS 10.1 The WarmCair C20DW Condensing Air Heater is certified as a warm air heater with corresponding flue systems according to EU Directive 2009/142/EC on gas-fired devices. These installation instructions are covered by this certification and are referred to in the design approval test certificate. - Page 11 D, E FIGURE 7. TERMINAL POSITIONS TABLE 3 TERMINAL POSITION MINIMUM DISTANCE Directly below an opening, air brick, opening window etc 300mm Above an opening, air brick, opening window, etc. 300mm Horizontally to an opening, air brick, opening window etc. 300mm Below gutters, soil pipes or drain pipes.
-
Page 12: Flue Requirements & General Information
10.7 FLUE REQUIREMENTS & GENERAL INFORMATION 10.7.1 Horizontal and vertical concentric flues (60/100mm diameter) with balanced terminals may be installed on all the WarmCair C10DW appliance. 10.7.2 If an extended horizontal flue is being used it must have a continuous fall back towards the appliance of 3°... -
Page 13: Vertical Flue Configuration Example
10.9 VERTICAL FLUE CONFIGURATION ITEM DESCRIPTION EXAMPLE NOTE: Vertical Appliance adaptor is fitted as Vertical 60/100mm Adaptor part of the air heater. Can be fitted to the left Vertical Terminal or the right. 1m Extensions for required length 10.10 OPTIONAL ROOF OUTLETS FLAT ROOF PITCHED ROOF Pitched... - Page 14 10.12 CONVENTIONAL 60/100mm FLUE ACCESSORY PARTS No TABLE 5. DESCRIPTION COLOUR APPLICATION PART No. 60/100 Standard Horizontal Flue Kit White Horizontal 1000-0020070 Turret White Horizontal 1000-0020020 800mm Horizontal Terminal White Horizontal 1000-0019830 Vertical Appliance Adaptor White Vertical 1000-0024940 90° Elbow White Horizontal &...
-
Page 15: Condensate Pump & Drain Tube
CONDENSATE PUMP & DRAIN TUBE 11.1 CONDENSATE PUMP 11.1.1 Supplied with 6mm x 10m condense tube. Condense adapter and 2 x clips SAFETY NOTE: If the pump fails, the safety float switch will shut off the heater operation. 11.1.2 DO NOT HANDLE PUMP IN WET CONDITIONS OR WITH WET HANDS 11.1.3 TECHNICAL DATA Tank capacity : 0.5L High level safety cut out... -
Page 16: Electrical
ELECTRICAL 12.1 The appliance is supplied with PVC sheathed, 3 core (Brown-Blue-Green/Yellow) 0.75mm CSA rated at 6A, connected to a terminal block and exiting through the casing at the top left hand front. The cable is suitable for a 230V 50Hz single phase supply. 12.2 The means of isolating the appliance MUST be via a double pole switch with a contact separation of at least 3mm in both poles, and fused at 3A. -
Page 17: Domestic Hot Water Heating Commissioning
DOMESTIC HOT WATER HEATING COMMISSIONING 15.1 CHECK GAS INSTALLATION 15.1.1 The whole of the gas installation, including the meter, should be inspected and tested for tightness and purged in accordance with the recommendations of BS. 6891. In IE refer to IS.813. 15.1.2 Purge air from the gas installation by the approved methods only. -
Page 18: Initial Lighting
INITIAL LIGHTING 16.1.1 Check that the system has been filled and the heat exchangers are not air-locked. NOTE: It is important the burner is not operated before the system is fully vented of air. IMPORTANT: The gas input to the burner is regulated by the gas valve according to the air flow produced by the fan. -
Page 19: Warm Air Heating Commissioning
WARM AIR HEATING COMMISSIONING 17.1 Ensure the heater is correctly filled with water and all air vented from the flow and return circuits. 17.2 Switch on electrical supply. 17.3 Setting maximum speed. Remove the PCB cover plate. Make a short across summer vent connections on the PCB interface and adjust the fan speed as required using a small screw driver on the warm air PCB to turn the relevant pot. -
Page 20: Servicing & Maintenance
SERVICING & MAINTENANCE 19.1 SERVICING SCHEDULE NOTE: It is a statutory requirement that ALL work is carried out by a “competent person” which in normal circumstances would be a GAS SAFE registered engineer. 19.1.1 For the very latest copy of literature for servicing & maintenance instructions, visit our website www.johnsonandstarley.co.uk - where you can download the information. -
Page 21: Flue Inspection & Checks
19.4 FLUE INSPECTION & CHECKS FLUE GAS FLUE GAS TEST POINTS Please Note: During routine servicing, and after any maintenance or change of part TEST POINTS of the combustion circuit, the following must be checked: • The integrity of the flue system and the flue seals, •... -
Page 22: Combustion Air Fan
19.8 COMBUSTION AIR FAN Refer to paragraph 19.5 & 19.6 19.8.1 Disconnect the electrical leads from the fan. 19.8.2 Remove the pressure differential tube. 19.8.3 Remove the red securing clip and slide fan backwards off the venturi. 19.8.4 Refit in reverse order. CLIP 19.9 BURNER ASSEMBLY... -
Page 23: Air To Water Heat Exchanger
19.13 AIR HEAT EXCHANGER MAGNETIC Refer to section 19.10 PANEL 19.13.1 Peel back the magnetic panel to gain access into the air heat exchanger. 19.13.2 Check the heat exchanger airways are free from obstructions. If necessary, clean with a vacuum cleaner from the air inspection panel, taking care to not damage the airways. -
Page 24: Parts Replacements
PARTS REPLACEMENT 20.1 IMPORTANT: Before commencing with any part replacement the appliance should be isolated from the electrical supply and the gas service cock on the appliance closed. 20.1.1 All parts that are removed should be replaced and refitted in reverse order, ensuring correct seals are made and wires are connected correctly. -
Page 25: Burner Assembly
20.5 BURNER ASSEMBLY Refer to paragraph 19.5 and 19.6 20.5.1 Remove the gas pipe securing clip from the venturi. 20.5.2 Unclip the ignition/detection lead. 20.5.3 Remove the 4 burner fixing nuts. 20.5.4 Carefully lift out the burner from the combustion chamber. 20.5.5 Replace the sealing gasket around the burner. -
Page 26: Air Circulation Fan
AUTOMATIC AIR VENT CONDENSE TRAP CIRCULATION (at the back) GAS COCK RADIATOR CAPPED FLOW PIPE DIVERTER HEAD PUMP DIVERTER VALVE DRAIN VALVE RETURN FLOW FOR RADIATORS FIGURE 38. PUMP/DIVERTER ASSEMBLY AIR TO WATER HEAT EXCHANGER WATER FLOW TEMPERATURE FIGURE 39. AIR WATER HEATER COMPONENTS SENSOR 20.11 AIR CIRCULATION FAN... -
Page 27: 20.15 Draining The Appliance
PART REPLACEMENTS BY DRAINING THE SYSTEM 20.15 DRAINING THE APPLIANCE 20.15.1 To drain the appliance, attach a length of hose to the drain point then open the drain valve. 20.15.2 Replace the necessary component. 20.15.3 After replacement close the drain valve and open all isolation valves and refill the system. -
Page 28: Fault Finding
FAULT FINDING FLOWCHARTS & BLOCKING CODES Should a fault occur, the boiler will shut down and these error codes will be displayed. HOT WATER FAULT FINDING - BLOCKING CODES MAF STAT CONNECTED NOT CALLING FOR HEAT (HEATER NOT FIRING) WHEN MAF STAT ON MAXIMUM Problem with switched live output going from High Voltage terminal 3 Is there 230 ~ 250VAC across High Voltage terminals 2 &... - Page 29 FAN NOT OPERATING WHEN PIPE IS ABOVE 60°C Is the MAF stat connected? Link out low voltage terminals 3 & 4. Make sure clock or room stat supplies mains voltage to high voltage terminals 1 & 2. No mains - no fan operation (except for summer vent) Make sure mains is present across High Voltage terminals 2 &...
- Page 30 HOT WATER FAULT FINDING - BLOCKING CODES Should a fault occur, the heater will shut down and these blocking codes will be displayed. IGNITION LOCKOUT If the heater is reset does the heater ignite for Is the gas pressure available at the inlet Check the gas supply a short time and then extinguish? (>18mbar)?
- Page 31 FAN FAULT Does the wiring from the fan to the PCB have secure connections at both Rectify wiring & connections ends and has not deteriorated? Does the wiring have continuity? Is there 230Vac at the Blue Brown connections to the 3 way connection on Replace the PCB.
- Page 32 ADC LOCKOUT Replace the PCB. RETURN THERMISTOR FAULT Remove the return thermistor from the CH return pipe and disconnect the Fit a new Thermistor. wires. Check the resistance using a suitable multi-meter connected across the thermistor’s terminal pins. Is the thermistor valve correct? Is the wiring securely connected to the low voltage 9 way connector X5 on Check and replace wiring as necessary.
- Page 33 BLOCKING CODES Should a fault occur, the boiler will shut down and these blocking codes will be displayed. EXHAUST SENSOR FAULT Is the heater & CH system filled with water and all isolation & radiator Fill and vent the system and open all isolation valves open? valves, check as supply, then reset heater Check flue thermistor.
- Page 34 FUNCTIONAL WIRING DIAGRAMS FIGURE 46. WARMCAIR C10DW COMBINED WIRING DIAGRAM www.johnsonandstarley.co.uk...
-
Page 35: Dimensions
DIMENSIONS FIGURE 47. WARMCAIR C20DW COMBINED DIMENSIONS Sales/Spares & Replacement Help Line 01604 762881... - Page 36 SPARES DIAGRAMS HOT WATER RETURN FROM HEAT SOURCE HOT WATER FLOW FROM HEAT SOURCE FIGURE 48. WARMCAIR C10DW COMBINED EXPLODED DIAGRAMS www.johnsonandstarley.co.uk...
-
Page 37: List Of Spares
LIST OF SPARES ITEM DESCRIPTION PART No. G. C. No. PCB Nexsys Boiler Control 1000-0527185 J24-704 1000-0526275 PCB Assembly (Aquair) J24-745 1000-0527035 PCB Interface J21-741 PWM High Efficiency Pump Head 1000-0531015 Includes 5 Pump Head Gasket 1000-1508935 J21-281 Burner Arm Assembly 1000-0711815 J21-311 Includes 7 - 11... -
Page 38: Air Filter
ITEM DESCRIPTION PART No. G. C. No. Injector (4.75) 1000-07111135 J21-234 Includes 22 ‘O’ Ring 1000-2501860 J21-235 Air Circulation Fan 1000-0525255 J24-686 Flue Gas Sensor 1000-0526525 J21-253 Air To Water Heat Exchanger AQ20-0138005 J24- Condensate Pump 1000-0023085 J24-746 1000-0024525 Condensate Trap J24-749 Return Water Temperature Sensor 1000-0526505... -
Page 39: List Of Ancillaries
LIST OF ANCILLARIES WARMCAIR C10DW ANCILLARY’S Description Product Code Cleanflow Air Filter CF20W Filter Replacement Pads (Pack of 6) A0212X0212 Return Air Kit RAK20W Base Duct Kit WBX20W Sales/Spares & Replacement Help Line 01604 762881... - Page 40 NOTES www.johnsonandstarley.co.uk...
-
Page 41: Code Of Practice
Code Of Practice For the installation, commissioning and servicing of domestic heating and hot water products Benchmark places responsibilities on Standards of Work both manufacturers and installers.* • Be competent and qualified to undertake the work required. The purpose is to ensure that •... - Page 42 CONDENSING WARM AIR HEATING AND WATER HEATING COMMISSIONING CHECKLIST This Commissioning Checklist is to be completed in full by the competent person who commissioned the wsnn air unit and associated equipment as a means of demonstrating compliance with the appropriate Building Regulations and then handed to the customer to keep for future reference Failure to Install and commission this equipment to the manufacturer's instructions may Invalidate the warranty but does not affect statutory rights.
-
Page 43: Service Record
SERVICE RECORD It is recommended that your heating system is serviced regularly and that the appropriate Service Interval Record is completed. Service Provider Before completing the appropriate Service Record below, please ensure you have carried out the service as described in the manufacturer’s instructions. SERVICE 01 SERVICE 02 Date:... - Page 44 Johnson & Starley Ltd Rhosili Road, Brackmills, Northampton NN4 7LZ sales@johnsonandstarley.co.uk marketing@johnsonandstarley.co.uk Reception/Customer Service 01604 762881 01604 767408 Anniversary 1922 - 2012...
Need help?
Do you have a question about the WARMCAIR C20DW and is the answer not in the manual?
Questions and answers
My c16 unit has been installed in the compartment used by my original boiler. Are the side vents still required. The unit is very noisy.
Side vents are not required for the Johnson & Starley WARMCAIR C20DW unit installed in a compartment, as the heater draws combustion air from outside the building and does not require compartment ventilation, provided minimum clearances are maintained. To address noise issues, ensure the appliance is completely level, as tilting can cause problems with condense draining and may lead to noise.
This answer is automatically generated