Table of Contents
Advertisement
Advertisement
Table of Contents

Related Manuals for Torrot MUVI 2017


Summary of Contents for Torrot MUVI 2017
- Page 1 muvi Owner's Manual Maintenance+Warranty...
- Page 3 Welcome to Torrot Thank you for acquiring our MUVI electric scooter! We are pleased to welcome you to the family of Torrot Electric product users. This manual contains information regarding the correct use and maintenance of your MUVI. For your security and comfort, we recommend you read these instructions carefully.
-
Page 5: Table Of Contents
Owner's Manual Table of contents INTRODUCTION TURN-ON SEQUENCE PRE-OPERATION CHECKS REMOVING THE BATTERIES CLOTHING INSERTING THE BATTERIES RIDING SAFELY CHARGING THE BATTERIES CHARACTERISTICS BATTERY PRECAUTIONS COMPONENTS MAINTENANCE CONTROLS BELT TENSION DASHBOARD TYRE PRESSURE EXTRA DISPLAYS AVAILABLE BRAKE FLUID DASHBOARD WARNING LIGHTS AND SYMBOLS BRAKE CALLIPERS RIDING MODES ACCESSING THE HEADLIGHT... -
Page 6: Introduction
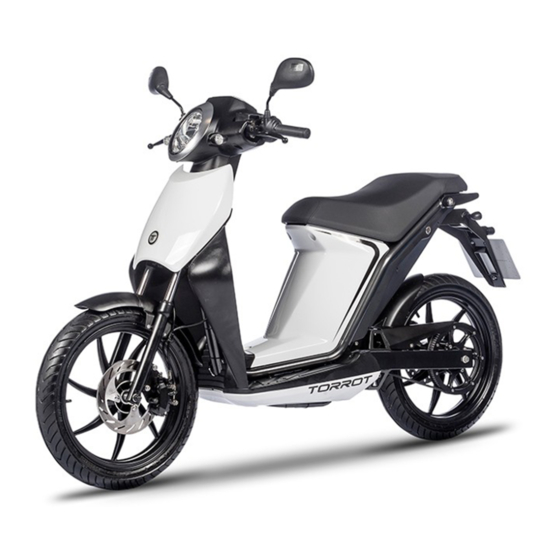
Owner's Manual INTRODUCTION The first lightweight electric scooter designed to move you from here to there in a breeze: it's easy to ride and very comfortable. It comes with a small space under the seat for a jet helmet, front and rear LED daytime running lights, disc brakes and everything else you need to get around town safely, enjoyably and efficiently. -
Page 7: Clothing
Owner's Manual PRE-OPERATION CHECKS Before riding, check that: • The charger is disconnected • The battery has sufficient charge • The lights and horn work properly, check the headlight, blinkers and brake light. • The brakes work properly • The tyres have the correct pressure •... -
Page 8: Characteristics
BRAKES HYDRAULIC COMBINED BRAKING SYSTEM 220mm FRONT - 190mm REAR TRANSMISSION HTD 1:5 TOOTHED BELT MOTOR TORROT BRUSHLESS 48V POWER / TORQUE (L3e-A1 = 3kw / L1e-B = 2.65kw) / 35Nm MAXIMUM SPEED L3e 60 km/h / L1e 45 km/h BATTERY REMOVABLE 2x48V 24.2Ah LiNiCoMn WITH A RANGE OF UP TO 110km *... -
Page 9: Components
Owner's Manual COMPONENTS ACCELERATOR BRAKES IGNITION SWITCH DASHBOARD BELT CENTRE STAND HEADLIGHT LOCK MOTOR BATTERY LUGGAGE HOOK MUVI... -
Page 10: Controls
Owner's Manual CONTROLS MUVI... - Page 11 Owner's Manual CONTROLS 1. HIGH AND LOW BEAM 5. DISCONNECTION BUTTON This button lets you switch between high and low Move the button to the right to put the motorbike into beam. You can flash the high beam by pressing the STOP mode.
-
Page 12: Dashboard
Owner's Manual DASHBOARD 22:45 KM/H RANGE 135.5 93450. 6 TRIP MUVI... -
Page 13: Extra Displays Available
Owner's Manual EXTRA DISPLAYS AVAILABLE You can change the display type via the MUVI application. 22:45 17:15 AVSPD KM/H KM/H Wh/km Wh/km 135.5 93450. 6 13.5 TRIP MUVI... - Page 14 Owner's Manual DASHBOARD WARNING LIGHTS AND SYMBOLS 1. BLUETOOTH INDICATOR 4. TRIP This indicator shows if there are any Bluetooth Shows the kilometres travelled since the last time devices connected to the motorbike. it was reset. 2. TEMPERATURE INDICATOR 5. RIDING MODE Indicates a problem, the temperature is either too Shows the mode in which the motorbike is being high or too low.
- Page 15 Owner's Manual DASHBOARD WARNING LIGHTS AND SYMBOLS 11. RANGE 15. OBD FAULT WARNING LIGHT Shows how many kilometres or miles (depending When this light turns on it means the OBD has on configuration) can be travelled before running detected a fault. Executing the diagnostics via out of battery.
-
Page 16: Riding Modes
Owner's Manual RIDING MODES 22:45 22:45 22:45 KM/H KM/H KM/H RANGE RANGE RANGE FULL 135.5 135.5 135.5 93450.6 93450.6 93450.6 TRIP TRIP TRIP FULL The motorbike starts in this mode by default. This mode This mode delivers maximum performance and power, is characterised by smooth power delivery, providing which will effect the range. -
Page 17: Ignition Switch
Owner's Manual IGNITION SWITCH 1. OFF In this position the motorbike is off, however, the steering is unlocked. 2. ON In this position the motorbike is on and ready to go, provided it is off its centre stand. 3. LOCK In this position the motorbike is off and the steering can be locked toward one side or the other. - Page 18 Read each message description to understand its meaning. TESTING The display will show the It will then test that all the Torrot logo upon starting the components are in working motorbike. order.
-
Page 19: Start Screens
Owner's Manual START SCREENS HIGH TEMPERATURE BATTERY ECO MODE ON motorbike's The temperature of one or batteries is below 20% of its more components capacity. high and ECO mode will be engaged. LOW TEMPERATURE INCOMPATIBLE ECO MODE ON BATTERIES The temperature of a component Two incompatible batteries have is too low. - Page 20 Owner's Manual START SCREENS BATTERY ERROR BATTERY NOT DETECTED SINGLE BATTERY ECO MODE ON MODE There is an error in one of the Only one battery has been batteries. ECO mode will be detected. ECO mode will be engaged. engaged. UNABLE TO RUN BATTERIES UNBALANCED ECO MODE ON...
-
Page 21: Set Button
Owner's Manual SET BUTTON The SET button performs three functions: • When it is possible, it switches the riding mode: The riding modes, as well as when it is possible to switch between them, have been explained on the previous page. -
Page 22: Bluetooth App
You're smartphone. an account then what are you waiting ever closer to enjoying the Torrot for? Press “Sign up for Torrot”. interconnected mobility experience. *The smartphone's Bluetooth must be the low energy version (BTLE) to be compatible. - Page 23 Owner's Manual BLUETOOTH APP This is the technical support screen If the OBD finds an error and it is where you can access the website, shown on the display as explained in send an email, send your motorcycle the symbols section. You can access logs to support if there is an error, view this screen to see the error and convey errors recorded by the OBD and scan...
- Page 24 Owner's Manual BLUETOOTH APP To access the status of the batteries You can access “Settings” from screen If you want to see a summary of what press “Batteries Stats”. Information number 3. This menu lets you set the you've done with the MUVI, access about the health of your batteries, units, synchronise the smartphone “Ride Statistics”...
- Page 25 Owner's Manual STORAGE COMPARTMENT The MUVI's storage compartment is designed to hold a helmet*. To open it, remove the key from the ignition and insert it into the lock on the left side of the motorbike. The motorbike batteries are also located inside this compartment. Further below there will be a detailed explanation on how to treat the batteries to avoid deterioration and extend their service life as much as possible.
-
Page 26: Using The Centre Stand
Owner's Manual USING THE CENTRE STAND To put the motorbike onto its centre stand when parking, set the ignition switch to OFF. Place your foot on the stand's arm and push downward. To facilitate this move, grasp the handle with your hand and pull upward. MUVI... - Page 27 Owner's Manual USAGE AND PRECAUTIONS The speed and maximum range can vary depending on the acquired model. • L3e-A1: 60km/h • L1e-B: 45km/h The range will also vary considerably depending on the driving style and conditions under which the MUVI is subjected to, including route gradient, driving aggressiveness, number of passengers, etc Hydraulic front and rear disc brakes provide easy braking, requiring very little force on the lever.
-
Page 28: Turn-On Sequence
Owner's Manual TURN-ON SEQUENCE Turning the key to the ON position turns on the motorbike, however, the motor is not yet operational. The display will show a few turn-on check screens and if there are no errors the speedometer will appear with the word STOP. To get to the ECO/FULL screen and activate the motor you will have to: 1. -
Page 29: Removing The Batteries
Owner's Manual REMOVING THE BATTERIES One of the aspects that sets this electric vehicle apart from the rest are its portable batteries that are easily removed, allowing them to be charged where desired. To remove them make sure the motorbike is stopped, open the storage compartment, loosen the Velcro strap and pull on the battery until it comes out. -
Page 30: Charging The Batteries
Owner's Manual CHARGING THE BATTERIES As the batteries are removable they can be charged either in or out of the motorbike. If the batteries are in the motorbike their charge level can be seen on the display, if not, the top cover has a charge level indicator. Press the button for a few seconds and the LEDs will light up showing the charge level. -
Page 31: Battery Precautions
If deterioration is detected in the electrical system's conductors, go beyond the limits indicated by the manufacturer. turn off the vehicle and take it to an authorised Torrot technical service centre. a. Avoid charging the battery in conditions of extreme heat or cold that go beyond the limits indicated by the manufacturer. -
Page 32: Maintenance
BELT TENSION The belt tension should be 80-85 Hz. This can be measured with a belt tension gauge. If you lack the required know-how, contact your trusted workshop, or the closest Torrot-authorised one, and have them adjust the belt. MUVI... -
Page 33: Tyre Pressure
Owner's Manual TYRE PRESSURE Riding with a tyre pressure different to that recommended can cause inappropriate tyre wear, less surface grip, and consequently, less control over the motorbike which can lead to an accident. Apart from avoiding all this, keeping the tyres at the correct pressure will also prolong their service life. -
Page 34: Brake Fluid
Owner's Manual BRAKE FLUID Regularly check the brake fluid level where indicated in the picture. Too low a level can cause deficient braking and lead to an accident. The brake fluid reservoir has a circular transparent window. The minimum level is situated slightly above the bottom of the window, and the maximum, at the top of the window. -
Page 35: Accessing The Headlight
Owner's Manual ACCESSING THE HEADLIGHT If you notice the headlight is emitting less light, or none at all, then it needs replacing. To access the light bulb, take off the rear handlebar cover by removing the screws shown in the picture. Once the screws are out, remove the plastic cover by detaching the tabs shown in the picture. -
Page 36: Changing The Light Bulb
Owner's Manual CHANGING THE LIGHT BULB You now have rear access to the headlight. Start by removing the black rubber protector on the rear of the headlight. Next, uncouple the headlight connector. You will see the bulb retention clip, one of its sides terminates in two ends. -
Page 37: Adjusting The Headlight
Owner's Manual ADJUSTING THE HEADLIGHT The headlight beam can go askew due to motorcycle use or a bulb change, making adjustment necessary. A headlight aim check must be performed on level ground with the tyres inflated and a person sitting on the motorbike. -
Page 38: Cleaning
Owner's Manual CLEANING To prolong the life of the fairings and other components it is important to keep the motorcycle clean. Dust and grime that accumulates on the motorbike's exterior can end up penetrating into its interior, affecting electronic components. Clean the motorbike with a damp cloth, soapy water or a spray especially for cleaning plastics. -
Page 39: Sticker Locations
Owner's Manual STICKER LOCATIONS Each of the MUVI's components has a sticker that indicates its model and serial number. Let's take a look at where these stickers are. Batteries Charge precaution VIN number Tyres Controller Motor MUVI... -
Page 40: Vin Number
Owner's Manual VIN NUMBER The VIN number, or serial number, is engraved on the metal tube that leads to the chassis' steering head. Just beside this is the Manufacturer's Data Plate, which is indelible. It indicates the manufacturer's name as well as the VIN number. -
Page 41: Warranty Terms And Conditions
WARRANTY TERMS AND CONDITIONS Torrot Electric Europa S.L. guarantees the owner LIMITED REPAIR that only the original parts of each new Torrot Electric Unless determined otherwise, any repair under the -Vehicles whose maintenance or repair has been carried vehicle, and their installation, will be free from defects... - Page 42 (controller, electronics...) Any claim under this warranty must be made via an Torrot Electric Europa S.L. requests that the user follow tampered with. authorised Torrot Electric dealer, directly online or via proper vehicle maintenance and use requirements so post to Torrot Electric Europa S.L. The original purchase as to properly uphold any warranty claim.
- Page 43 If any issues arise regarding your vehicle, write to us at info@torrot.com and include the chassis number, the problem that has been detected, your name and a contact number. Our technicians will contact you promptly, and, after a pre-evaluation over the telephone, the procedure to follow will be determined as quick as possible.
- Page 44 THEM FOR THE BEST AFTER SALES SERVICE ;-) OWNER'S MANUAL PRODUCED BY TORROT ELECTRIC EUROPA S.L. © V1 08/2016 TEESL / TORROT ELECTRIC EUROPA S.L. ALL RIGHTS RESERVED. TOTAL OR PARTIAL REPRODUCTION OF THIS MANUAL WITHOUT PREVIOUS WRITTEN PERMISSION FROM THE COPYRIGHT OWNER IS FORBIDDEN.
- Page 45 Owner's Manual TECHNICAL INSPECTIONS SERVICE DATE KILOMETRES SERVICE DESCRIPTION COMMENTS MUVI...
- Page 47 Serious fun. TORROT (0034) 972 850 797 info@torrot.com torrotelectric @torrotelectric...
Need help?
Do you have a question about the MUVI 2017 and is the answer not in the manual?
Questions and answers