Table of Contents
Advertisement
Advertisement
Table of Contents

Related Manuals for Singer SIWM7000


Summary of Contents for Singer SIWM7000
-
Page 1: User Manual
USER MANUAL Fully Automatic Washing Machine MODEL :SIWM7000... - Page 3 CAUTION: If this appliance is supplied with a cord extension set or and electrical portable outlet device, the cord extension set or electrical portable device must be positioned so that it is not subject to splashing or ingress or moisture. The appliance is not intended for use by young children or infirm persons without supervision.
-
Page 4: Table Of Contents
CONTENTS 1. SAFETY WARNING 2. PARTS IDENTIFICATION 3. ACCESSORIES 4. CONTROL PANEL 5. SPECIFICATIONS 6. INSTALLATION 7. DETERGENT CONTAINER 8. OPERATION 9. PROGRAMS 10. MAINTENANCE 11. TROUBLE SHOOTING 12. ELECTRICAL G DIAGRAM... -
Page 5: Safety Warning
SAFETY WARNING Never use the plug as Do not put the cord to unplug Do not let children play shown. from powerpoint. with the machine. Do not put hands into the Do not clean the body of the K e e p t h e w a s h i n g rotating tub. -
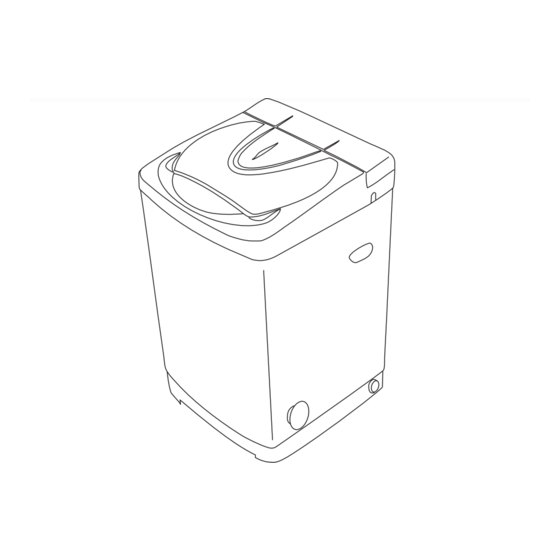
Page 6: Parts Identification
PARTS IDENTIFICATION Inlet hose (Please turn off the tab after using) Detergent box Fabric softener dispenser Inner tub Lint filter Power cord Control panel Pulsator Drain hose (Put into the drain or tub during operation) Base Level adjustment knob Noise and mice-proof plate Adjustable foot (It is inserted into the base to reduce noise and keep... -
Page 7: Control Panel
CONTROL PANEL Power button Water temperature selector Press this button to turn on/off the Press this button to select water temperature. washing machine. Do not turn on the washing machine again until 3 minutes Water level button later after it is turned off. The washing Press this button to select water level. -
Page 8: Installation
INSTALLATION Insert the noise-proof plate into the washing machine base 1. Take out the noise-proof plate. 2. The entrance is in the front of the base. 4. Lay down the washing 3. Insert the noise-proof plate machine, fasten the two into the base. - Page 9 INSTALLATION Connection of the drain hose Change the direction of the drain hose Unfasten the fixed screw of Lead out the drain hose from Fasten up the screw to fix the drain hose joint. the opening to the other side. the drain hose.
- Page 10 INSTALLATION Connection of the inlet hose Faucet: The faucet must be with G3/4" standard screw thread. If not , it is impossible to connect the inlet hose properly. NOTE: water supply faucets should be readily accessible to permit turning them off when washer is not being used. Installation and connection of the Inlet hose Note: The washing machine is to be connected to the water mains using new...
-
Page 11: Dismantling The Inlet Hose
INSTALLATION B: If you have both cold and hot water supplied, connect the inlet hose by cold to cold and hot to hot. 1. Connect the water inlet hose to the 2. Unscrew the lid of hot water connector in connector by turning the connecting water mixing valve, and then connect the nut. -
Page 12: Detergent Container
INSTALLATION Connection of the power cord Warning: The ground wire of the washing machine is set in the plug, don't try to modify it. The socket should have a reliable ground wire. If the socket has no earh socket, please call an Electrician to replace. Never try to connect the ground wire of the washing machine together with that of a gas pipe or water pipe, telephone cord or lightening rod. -
Page 13: Operation
OPERATION Preparation 3. Plug in the power cord. Connect the water inlet 4. Insert the end of the drain hose into the hook shelf, hose to the water tap. and hang the drain hose Turn on the water tap. over a drain outlet. 7. - Page 14 OPERATION Step two: Choose wash programs. Press the "PROGRAM" button to Choose the desired function and then the corresponding indicator blink. Note: Press the "FUNCTIONS" button continuously all options of water flow will circulate as figure. HEAVY UNDER- WASH WARE HEAVY UNDER WEAR SPEEDY...
-
Page 15: Programs
OPERATION Step five: Start the washing machine Press "START/PAUSE" button, the washing machine will buzz and run automatically. Please close the wash lid completely (otherwise, the machine will stop running when it reaches the spin program and gives an alarm.) Note: If you want to change the program when the washing machine is running, you must press the... -
Page 16: Maintenance
MAINTENANCE Clean the filter in the inlet valve Clean the filter in the inlet valve regularly in order to prevent it from clogging 1. Unplug the power cord first. 2. Take off the inlet hose and clean the filter with a brush. Clean the lint filter 3. -
Page 17: Trouble Shooting
TROUBLE SHOOTING Checklist Indicators and roubles UNDER- HEAVY HIGH WARE WASH SPEEDY BLANKET MIDDL E Call technician to check whether the connection of water WASH JEANS level sensor has become loose or is damaged. ONLY SPIN LITTLE GENTLE ONLY The machine gives alarm soon as it is turned on. -
Page 18: Electrical G Diagram
ELECTRICAL DIAGRAM Microcomputer Programmer water safety level switch sensor motor plug y/gr b-blue bl-black br-brown g-gray gr-green r-red w-white y-yellow p-purple o-orange C-capacitor L-inductance IV-inlet valve Ms-drain water motor assembly -14-... - Page 20 Distributed In Aus/NZ by : BLESSINGTON PTY LTD Unit 17,167 Prospect Hwy, Seven Hills NSW, 2147,Australia Phone: +61 2 8811 1900...
Need help?
Do you have a question about the SIWM7000 and is the answer not in the manual?
Questions and answers