Table of Contents
Advertisement
High-Res Digital Music Library
N1/2 Series
Hardware Manual
Please make sure to read this manual before using and follow the procedures. If you have any inquiries about
the product, contact the number on the warranty statement or the packing box. Do not discard this manual, the
warranty statement, or the packing box.
35021284-01
2016.12
Advertisement
Table of Contents

Subscribe to Our Youtube Channel
Related Manuals for Melco N1A/2

Summary of Contents for Melco N1A/2
- Page 1 High-Res Digital Music Library N1/2 Series Hardware Manual Please make sure to read this manual before using and follow the procedures. If you have any inquiries about the product, contact the number on the warranty statement or the packing box. Do not discard this manual, the warranty statement, or the packing box.
-
Page 2: Table Of Contents
Available Devices and Ports ............7 Preparing Player ................8 Default Settings and Product Specifications ....9 Default Settings ................9 Specifications of N1A/2 ..............9 Specifications of N1Z/2 ..............10 Regulatory Compliance Information ......11 For Customers in the United States ..........11 For Customers in Europe .............. 11... -
Page 3: Diagrams
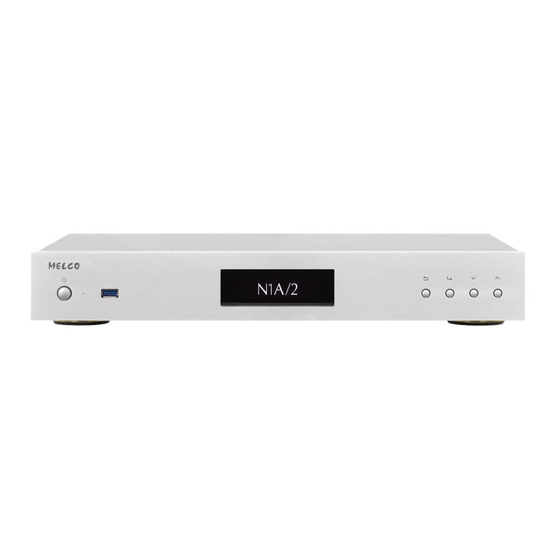
Diagrams N1A/2 1 2 10 12 13 14 N1Z/2 12 13 14 Power Button ( Press to turn the power on and off. Power LED While the N1 is powered on, the LED will light up in blue. It will extinguish when powering off. - Page 4 Note: The brightness of the power LED can be changed from Settings - Power LED Brightness. Display Displays the device's status and settings. In case of an error, displays the error message and code. Note: The brightness of the display panel can be changed from Settings - Brightness. If the display brightness is set to Dark Mode, the display panel will be turned off.
- Page 5 Expansion Drive or Format Backup Drive, then select Erase All Data to format all partitions. Please note that all data currently on the drive will be removed with this operation. ** When the Ethernet cable is connected to the network, the link LED will glow. The act LED shows network activity. On the display panel, go to Settings - Rear Side LED and set to "Off"...
-
Page 6: Turning The N1 On And Off
Turning the N1 On and Off Powering On Connect the power cable to the power connector on the N1 and outlet. The grounding cable should be connected before connecting to the outlet. Press the power button. The display panel will change as the sequence below. When the home screen is displayed, the boot process is finished. -
Page 7: Powering Off
Powering Off Press the power button. Confirm if the power LED is extinguished. Notes: • Make sure that the N1's power is turned off by following the procedure above before disconnecting the power cable. Disconnect the grounding cable after disconnecting it from the outlet. • Do not disconnect the power cable without properly powering the N1 off first. -
Page 8: Peripheral Connections
Peripheral Connections Available Devices and Ports To connect the N1 and other peripheral devices, refer to the diagram below. Internet Required for downloading music files from a streaming site, importing files from the CD, and checking for new firmware release. Computers and mobile devices Computers support saving or playing music files. -
Page 9: Preparing Player
Preparing Player USB-DAC Network Audio Player To use a USB-DAC as a player, connect the USB-DAC using the USB cable to the USB-DAC port. After turning the USB- DAC on, you may be able to play music files by changing the input to USB. You can use other ports than the USB- DAC port, but only one device will be detected if 2 or more USB-DAC devices are connected at the same time. -
Page 10: Default Settings And Product Specifications
N1-XXXX (X stands for the last four digits of MAC address) Check for Updates at Start-Up Specifications of N1A/2 Check melco-audio.com for information about the latest products and their specifications. Standards IEEE 802.3ab (1000BASE-T), IEEE 802.3u (100BASE-TX), IEEE 802.3 Compliance... -
Page 11: Specifications Of N1Z/2
Operating Temperature: 5–35°C; 41–95°F Environment Humidity: 20–80% (no condensation) Specifications of N1Z/2 Check melco-audio.com for information about the latest products and their specifications. Standards IEEE 802.3ab (1000BASE-T), IEEE 802.3u (100BASE-TX), IEEE 802.3 Compliance (10BASE-T), AUTO-MDIX Data Transfer Rates 10/100/1000 Mbps (auto sensing) -
Page 12: Regulatory Compliance Information
Regulatory Compliance Information For Customers in the United States FCC Statement This equipment has been tested and found to comply with the limits for a Class B digital device, pursuant to Part 15 of the FCC Rules. These limits are designed to provide reasonable protection against harmful interference in a residential installation. - Page 13 Utstyr som er koplet til beskyttelsesjord via nettplugg og/eller via annet jordtilkoplet utstyr – og er tilkoplet et kabel-TV nett, kan forårsake brannfare. For å unngå dette skal det ved tilkopling av utstyret til kabel-TV nettet installeres en galvanisk isolator mellom utstyret og kabel- TV nettet.
Need help?
Do you have a question about the N1A/2 and is the answer not in the manual?
Questions and answers