Table of Contents
Advertisement
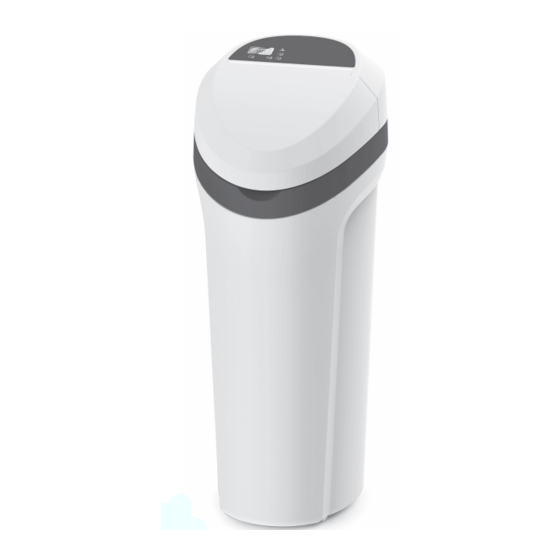
Model EPHY
How to install, operate
and maintain your
Whole Home
Water Treatment System
Do not return system to store
If you have any questions or concerns when
installing, operating or maintaining your water
treatment system, call our toll free number:
1-800-693-1138
www.ecopure.com
or visit
When you call, please be prepared to provide
the model and serial number of your product,
found on the rating decal, located on the rim
below the salt lid hinges.
System tested and certified by NSF International
against NSF/ANSI Standard 42 for the reduction
of chlorine taste and odor, and Standard 44
for hardness reduction, efficiency and the
reduction of barium and radium 226/228,
and certified to NSF/ANSI Standard 372.
System tested and certified by the
Water Quality Association against CSA B483.1.
Manufactured and warranted by
Ecodyne Water Systems
1890 Woodlane Drive
Woodbury, MN 55125
7361863 (Rev. C 6/14/17)
Advertisement
Table of Contents

Summary of Contents for Eco Pure EPHY
- Page 1 Model EPHY How to install, operate and maintain your Whole Home Water Treatment System Do not return system to store If you have any questions or concerns when installing, operating or maintaining your water treatment system, call our toll free number: 1-800-693-1138 www.ecopure.com...
-
Page 2: Table Of Contents
TABLE OF CONTENTS Page Specifications & Performance Claims ............2-3 Dimensions . -
Page 3: Specifications & Performance Claims
Specifications & Performance Claims SPECIFICATIONS Model EPHY Model Code EPHy 12,300 @ 2.9 lbs. (1.3 kg) Rated Softening Capacity (Grains @ Salt Dose) 23,800 @ 9.2 lbs. (4.2 kg) 27,200 @ 15.0 lbs. (6.8 kg) Rated Efficiency (Grains/Pound of Salt @ Minimum Salt Dose) 4,395 @ 2.9 lbs. -
Page 4: Dimensions
Dimensions 52.4 cm 8.6 cm 43.8 cm TOP VIEW IN - OUT 108.6 cm 94.0 cm FIG. 1 SIDE VIEW FRONT VIEW Safety Guides The water treatment system requires a minimum water flow of 3 gallons (11.4 L) per minute at the inlet. Maximum allowable inlet water pressure is 100 psi (7.0 kg/cm ). -
Page 5: Inspect Shipment
Inspect Shipment The parts required to assemble and install the water Remove and discard (or recycle) all packing materials. treatment system are included with the unit. To avoid loss of small parts, we suggest you keep the Thoroughly check the water treatment system for pos- small parts in the parts bag until you are ready to use sible shipping damage and parts loss. -
Page 6: Installation Requirements
Installation Requirements LOCATION REQUIREMENTS PLUMBING CODES Consider all of the following when selecting an installa- All plumbing must be completed in accordance with tion location for the water treatment system. national, state and local plumbing codes. Do not locate the water treatment system where AIR GAP REQUIREMENTS freezing temperatures occur. - Page 7 Installation Requirements VALVE DRAIN REQUIREMENTS 1/4” NPT Thread Barbs for 9.5 mm Using the flexible drain hose (included), measure and I.D. Tubing cut to the length needed. Flexible drain hose is not Hose Clamp allowed in all localities (check your plumbing codes). If local codes do not allow use of a flexible drain hose, a Drain Hose rigid valve drain run must be used.
-
Page 8: Installation Instructions
Installation Instructions TYPICAL INSTALLATION Hard Water Conditioned Water To Outside Pipe Faucets Clips 1” NPT Sweat Water Softener Adaptor (not Valve included) 1” NPT Controller Threaded Adaptor Outlet Plug-in O-ring Power Inlet Supply Overflow Valve Drain Drain Elbow Elbow Lubricated Salt Storage Valve Drain O-ring... - Page 9 Installation Instructions COMPLETE INLET AND OUTLET PLUMBING Top Cover Nozzle & Venturi Assembly Measure, cut, and loosely assemble pipe and fittings from the main water pipe to the inlet and outlet ports of Salt Lid Brine Tank the water treatment system valve. Be sure to keep fit- Overflow tings fully together, and pipes squared and straight.
- Page 10 Installation Instructions INSTALL VALVE DRAIN HOSE the valve gear and motor area, which rotates during regenerations. NOTE: See valve drain options on pages 6 & 7. 1. Plug the water softener’s power supply into an elec- 1. Measure, cut to needed length and connect the 9.5 trical outlet that is not controlled by a switch and is mm drain line (provided) to the water treatment sys- approved by local codes.
- Page 11 Installation Instructions TEST FOR LEAKS 7. After you hear the valve motor stop running (valve in “Brine” position), press, but do not hold, the To check for leaks, complete the following steps: RECHARGE button. The valve will advance to the “Backwash”...
-
Page 12: Programming The Water Treatment System
Level” on Page 13. DOWN button until the model code Light flashing, with “CLEAn” flashing in the (“EPHy” for Model EPHY) shows in the dis- display (See Fig. 17) - Four months have elapsed play. Then, press the SELECT button to set, on the system’s timer since start up or the last... - Page 13 Programming the Water Treatment System SET WATER HARDNESS NUMBER SET SALT LEVEL 1. Press the SELECT button once again to display a The water treatment system has a low salt indicator flashing “25” and the word “HARDNESS”. light to remind you to refill the storage tank with salt. NOTE: You must set salt level each time salt is added to the water softener.
-
Page 14: Customizing Features / Options
Customizing Features / Options RECHARGE NOW CLEAN FEATURE This feature is beneficial on water supplies containing At times of greater than normal water use, such as iron and/or high amounts of sediments (sand, silt, dirt, when you have guests, you could run out of treated etc.). - Page 15 Customizing Features / Options ADJUSTABLE FAST RINSE 3. Use the UP or DOWN buttons to set the length of the clean time in minutes. To change the length of the Fast Rinse: 4. When the desired clean time appears in the dis- 1.
-
Page 16: Routine Maintenance
Features / Options Routine Maintenance POWER OUTAGE MEMORY ADDING SALT If electrical power to the water treatment system is Lift the salt lid and check the salt storage level fre- lost, “memory'' built into the timer circuitry will keep all quently. - Page 17 Routine Maintenance CLEANING THE NOZZLE & VENTURI PROTECT THE WATER TREATMENT SYS- TEM FROM FREEZING A clean nozzle & venturi (See Figure 32) is a necessity for the water treatment system to work properly. This If the water treatment system is installed where it could small component creates the suction to move brine freeze (summer cottage, lake home, etc.), you must from the brine tank, into the resin tank.
- Page 18 Troubleshooting Guide PROBLEM CAUSE CORRECTION No soft water 1. No salt in the storage tank. Refill with salt and then use RECHARGE NOW feature. No soft water & dis- 1. Power supply unplugged at wall outlet, or Check for loss of power and correct. Reset electronic play is blank power cable disconnected from back of elec - controls and then use RECHARGE NOW feature.
-
Page 19: Troubleshooting
6. Press and hold the SELECT button until the model check operation. code (“EPHy” for Model EPHY) shows in the dis- play. This code identifies the water treatment sys- Remove the top cover to expose the valve and ob - tem model. - Page 20 Troubleshooting RESETTING TO FACTORY DEFAULTS 2. After observing fill, press the RECHARGE button to move the system’s valve into the brine position. A To reset the electronic controller to its factory default slow flow of water to the drain will begin. Verify for all settings (time, hardness, etc.): brine draw from the brine tank by shining a flash- light into the brinewell and observing a noticeable...
- Page 21 Notes...
- Page 22 Water Treatment System Exploded View Valve Assembly See Pages 24 & 25 for parts...
- Page 23 Water Treatment System Parts List Part No. Description Part No. Description Distributor O-Ring Kit 7330993 Salt Lid (order decal below) – 7112963 (includes Key Nos. 1-3) 7334230 Instruction Decal O-Ring, 73.0 x 82.6 mm á Repl. Electronic Control Board 7331834 O-Ring, 20.6 x 27.0 mm (PWA) á...
- Page 24 Valve Exploded View Wear Strip Seal Cross-section View...
- Page 25 Valve Parts List Part No. Description Part No. Description 7338111 Screw, #6-19 x 3.5 cm (2 req.) 7337571 O-Ring, 23.8 x 30.2 mm, pack of 4 Turbine & Support Assembly, 7281291 Motor – 7113040 including 2 O-Rings (See Key No. 7337474 Motor Mount 72) &...
-
Page 26: Warranty
EXTEND YOUR WARRANTY: Use EcoPure EPCL Water Softener Cleaner 7346596 orders.ecodyne.org ● The factory warranty for your whole home water treatment system is shown below. The one year full warranty peri- od on parts and labor can be extended to two years from the date of purchase if you use EcoPure EPCL Water Softener Cleaner on your system.
Need help?
Do you have a question about the EPHY and is the answer not in the manual?
Questions and answers