Shizuoka Seiki val6 daystar Owner's Manual
Infrared portable heater
Hide thumbs
Also See for val6 daystar:
- Owner's manual (32 pages) ,
- Maintenance manual (26 pages) ,
- Owner's manual (33 pages)
Table of Contents
Advertisement
Owner ' s Manual
Manuel d ' utilisation
Handleiding
Manual del usuario
• Read and thoroughly understand this Owner's Manual before using the heater
for safety operation.
• Please keep this Manual for the user's need and reference.
• Avant d'utiliser cet appareil de chauffage et pour des raisons de sécurité,
veuillez lire attentivement le contenu de ce manuel et en comprendre le sens.
• Conservez ce manuel de manière à pouvoir vous y reporter en cas de besoin.
• Lees deze handleiding zorgvuldig door en zorg dat u alles goed begrijpt zodat u
de verwarming veilig zult kunnen gebruiken.
• Bewaar deze handleiding zodat u er later nog eens iets in op kunt zoeken.
• Lea y entienda bien este Manual del usuario antes de emplear el calefactor para
que pueda funcionar con seguridad.
• Conserve este manual para que el usuario pueda consultarlo cuando sea necesario.
Advertisement
Table of Contents

Related Manuals for Shizuoka Seiki val6 daystar

Summary of Contents for Shizuoka Seiki val6 daystar
- Page 1 Owner ’ s Manual Manuel d ’ utilisation Handleiding Manual del usuario • Read and thoroughly understand this Owner’s Manual before using the heater for safety operation. • Please keep this Manual for the user’s need and reference. • Avant d’utiliser cet appareil de chauffage et pour des raisons de sécurité, veuillez lire attentivement le contenu de ce manuel et en comprendre le sens. • Conservez ce manuel de manière à pouvoir vous y reporter en cas de besoin. • Lees deze handleiding zorgvuldig door en zorg dat u alles goed begrijpt zodat u de verwarming veilig zult kunnen gebruiken. • Bewaar deze handleiding zodat u er later nog eens iets in op kunt zoeken. • Lea y entienda bien este Manual del usuario antes de emplear el calefactor para que pueda funcionar con seguridad.
-
Page 2: Table Of Contents
Contents 1. Safety Information ....... 3 4-1. Daily Inspection ......10 2. Names of Components ....... 6 4-2. Periodic Inspection ....11 3. How to use ........... 7 5. How to replace the nozzle & fuse ..11 3-1. Preparation for the operation ..7 6. -
Page 3: Safety Information
Thank you for having bought our Infrared Oil Heater “VAL6”. Safety Information ◆ This Manual explains every caution that should be strictly taken, for the proper and safety operation. Caution is divided into 3 categories of Danger, Warning, and Caution. Please read and under- stand well the detailed meanings of each category. Negligence of this indication “DANGER” and the improper operation can lead DANGER to death, serious injury and/or major fire. Negligence of this indication “WARNING” and the improper operation may WARNING likely result in death, serious injury, fire and/or possible explosion. - Page 4 ■ Special attention to be paid. For Safety Operation, Please Follow the Following * Following signs mean the very important points for the safety operation, so please don’t fail to read them well, before using. DANGER Use of Gasoline Never use gasoline, which surely causes a fire. Prohibited Also Following Never use the heater where thinner, gasoline, liquid propane gas, other highly flam-...
- Page 5 For Safety Operation, Please Follow the Following CAUTION When the heater is used in an altitude higher than 1000m (3000 ft) above the sea level, Do not use the Heater some adjustments will be required. Please contact your dealer about the adjustments. in high altitudes The heater, if not duly adjusted, may lead to wrong burning or fire. Stop using the Heater When wrong burning, smell or smoke, etc is found during the operation, please stop w h e n a n y t h i n g i r- immediately the operation and contact your dealer. If you continue using the heater in regular is found such a situation, a fire likely takes place.
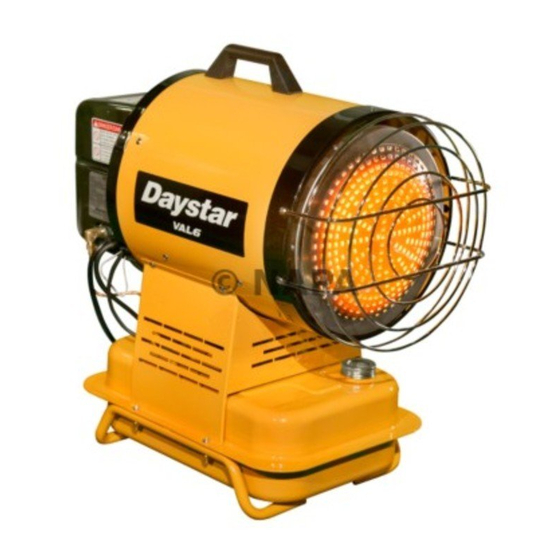
- Page 6 Names of Components ◆ Burner Section q Radiation disk !3 Filter Element w Casing !4 Burner Section e Handle !5 Insulating Board r Guard !6 Overheat Prevention System t Burner Cover !7 Fuse y Blower !8 Tip-over Switch u Fuel Tank !9 Flame Monitor i Fuel Gauge @0 Fan Motor...
-
Page 7: Preparation For The Operation
!6 Overheat Preven- Automatically extinguishes the flame should the heater overheat. Operating condition: The misfire lamp lights and if the heater is operating, the fan will cool tion System down the heater for about 5 minutes (hereafter referred to as post purge). Cuts off power to the heater should an electrical surge pass through the circuit caused by !7 Electrical System damage to the heater, etc. Protection (Fuse) Operating condition: The whole operation stops. Automatically extinguishes the flame when motion or an impact is detected during operation. !8 Tip-over Switch Operating condition: The misfire lamp lights and the post purge sequence will run for about 5 minutes if the heater is in operation. Automatically extinguishes the flame when ignition failure or abnormal combustion is de- tected.If the flame monitor detects any abnormalities prior to ignition, it will automatically !9 Flame Monitor extinguish the flame. -
Page 8: Operating Procedures
■ Connecting the Power Supply Power Plug Make sure that the operating switch is “OFF”, Connect then plug the power plug into AC power outlet. Make sure a grounded power pin or connec- AC Outlet tion is used. 3-2. Operating Procedures • When smell, smoke, wrong burning, etc. takes place, stop immediately operation to avoid a fire,and contact your dealer. • If the heater does not ignite with three consecutive tries, stop trying more than three (3) times, to avoid a fire, and contact your dealer. -
Page 9: Use Of The Heat Shielding Mat
■ Connecting the Control Device To connect the thermostat Take the cap off and hook up thermostat plug (No need to rewire) Thermostat Direct-coupling pin Don’t forget to put the cap back unless the thermostat is connected to heater. Without the cap, heater won’t operate at all with all circuit cut off. Therefore, there is the direct-coupling pin inside the cap and it must be used. -
Page 10: Inspection
4-1. Daily Inspection ■ Inspection of the tank inlet filter 1 Please remove the fuel cap and check if Tank Inlet Filter dirt/dusts stick to the tank inlet filter. Kerosene 2 If there are any dirt/dusts, remove the filter and wash it with fuel. 3 Please restore the tank inlet filter, and tight- en firmly the fuel cap. ■ Inspection of the filter and drainage of water from the fuel tank. Checking the filter element 1 Remove the suction pipe from the fuel Pull up pump and the fuel tank. 2 If the filter is dirty, replace it with a new one. -
Page 11: Periodic Inspection
■ Inspection and cleaning of the flame monitor Observations • When removing the flame monitor, hold it by its main assembly; do not pull out the cord. Remove the burner cover and pull out the flame monitor, and check whether or not its Pull out lens is dirty/foul. 2 If the lens is dirty/foul, please wipe the sur- face of the lens with a soft cloth, etc. until it Flame Monitor becomes clear. Flame Monitor 3 Restore the flame monitor, then please Lens surely fix with screws the burner cover. Cotton Swab Soft Cloth ■... - Page 12 ■ Replacing a nozzle 1 Unscrew two screws of the burner cover 5 Unscrew three nuts and pull out the burner and take the burner cover off. unit. 6 Replace with a new nozzle by using the 2 Unscrew the nut and remove the Suction provided nozzle spanner. Pipe from the fuel pump. 3 Unscrew the nut and remove the Return Nozzle Spanner Hose from the air vent valve.
-
Page 13: Troubleshooting
How to store the Heater • When you store the heater or hold it unused for a long time, please make sure that the CAUTION fuel tank is empty, for preventing a leakage of fuel and fire. When you store the heater, please disconnect the power plug from the AC outlet and store it in- doors where it is less humid. Observations • Do not store the fuel over summer months for use during next heater season. Using old fuel could damege the heater. Troubleshooting ■ When you face problems with your heater, please refer to this check- list before consulting with your dealer. -
Page 14: Specifications
Specifications V AL6 Daystar (PH1) V AL6 Daystar (PH1) Model Type Model Type 230 V 110 V 230 V 110 V 1.6 A 3.0 A Type Radiated / Direct-fired Electric fuse 60 dB (A) High intensity discharge Operating noise level Ignition system Kerosene (Diesel) Airflow 3.0 m /min Fuel 1.25 kg/h (1.5 L/h) • Tip-over switch Fuel consumption 15 kW (13000 kcal/h) • Flame monitor Heat output... -
Page 15: Safety Labels
Safety Labels ● Safety labels provide important information for safe use of the heater. So, please do not remove or soil them. ● If any of the labels is unreadable or removed, please ask your dealer for a new one and replace with the new one. 130W 105W... - Page 17 USER REGISTRATION Please enter the following temporary ID & Password and complete the user registration form on our website. By completing your registration, you will obtain your own ID & Password. This allows you to download the owner's manual and/or parts list from our website. Enregistrement de l'utilisateur Veuillez entrer l’identifiant et le mot de passe temporaires suivants et remplir le formulaire d’enregistrement de l’utilisateur sur notre site Web. En Faisant cela, vous pourrez obtenir un identifiant et un mot de passer personnalisé. Cela vous permettra de télécharger le mode d’emploi et/ou la liste des pièces détachées à partir du site Web. GEBRUIKERSREGISTRATIE Gebruikt u alstublieft de volgende combinatie van tijdelijk ID en wachtwoord om het formulier voor de gebruikersregistratie op onze website in te vullen. Door de registratie op deze manier uit te voeren, kunt...
Need help?
Do you have a question about the val6 daystar and is the answer not in the manual?
Questions and answers