Table of Contents
Advertisement
Advertisement
Table of Contents

Related Manuals for MSI VR One

Summary of Contents for MSI VR One
- Page 1 Preface...
-
Page 2: Table Of Contents
Ukraine restriction of hazardous substances ............1-7 Vietnam RoHS ......................1-7 Upgrade and Warranty ....................1-8 Acquisition of Replaceable Parts .................1-8 Safety Instructions ......................1-9 MSI Highlights .......................1-11 2. Introductions ...................2-1 Unpacking ........................2-2 Product Overview ......................2-3 Front Side View ......................2-3 Rear Side View ......................2-5 Specifications ......................... - Page 3 Connect a Monitor to the VR Backpack PC ............3-7 Configure Remote Desktop Connection on Your Windows 10 Pro System ..3-8 Connect Your VR Headset to the VR Backpack PC ..........3-12...
-
Page 4: Copyright Notice
Copyright Notice The material in this document is the intellectual property of Micro-Star International Co., Ltd. We take every care in the preparation of this document, but no guarantee is given as to the correctness of its contents. Our products are under continual improvement and we reserve the right to make changes without notice. -
Page 5: Fcc-B Radio Frequency Interference Statement
FCC-B Radio Frequency Interference Statement This equipment has been tested and found to comply with the limits for a Class B digital device, pursuant to part 15 of the FCC rules. These limits are designed to provide reasonable protection against harmful interference in a residential installation. -
Page 6: Battery Regulations
Chemical Substances Information In compliance with chemical substances regulations, such as the EU REACH Regulation (Regulation EC No. 1907/2006 of the European Parliament and the Council), MSI provides the information of chemical substances in products at: http://www.msi.com/html/popup/csr/evmtprtt_pcm.html... -
Page 7: Rohs Statement
1057, in terms of restrictions for the use of certain dangerous substances in electrical and electronic equipment. Vietnam RoHS As from December 1, 2012, all products manufactured by MSI comply with Circular 30/2011/TT-BCT temporarily regulating the permitted limits for a number of hazardous substances in electronic and electric products. -
Page 8: Upgrade And Warranty
5 years at most since the product has been discontinued, depending on the official regulations declared at the time. Please contact the manufacturer via http://www.msi.com/support/ for the detailed information about the acquisition of spare parts. -
Page 9: Safety Instructions
Safety Instructions • Read the safety instructions carefully and thoroughly. • All cautions and warnings on the equipment or user’s manual should be noted. Keep this equipment away from humidity and high temperature. Do not cover the ventilators of the equipment to prevent the equipment from overheating. - Page 10 • Users should contact the local authorized point of collection for recycling and disposing of their end-of-life products. • Visit the MSI website and locate a nearby distributor for further recycling information. • Users may also reach us at gpcontdev@msi.com for information regarding proper disposal, take-back, recycling, and disassembly of MSI products.
-
Page 11: Msi Highlights
MSI Highlights Explore more exclusive features of MSI notebooks for all series, please visit: http://www.msi.com and https://www.youtube.com/user/MSI How to use SteelSeries Engine 3 on MSI notebooks MSI collaborates with SteelSeries to develop an exclusive SteelSeries Engine 3 in gaming notebooks. SteelSeries Engine 3 is the Apps to combine frequently used functions for gamers in multiple devices management. - Page 12 1-12...
-
Page 13: Introductions
Introductions... -
Page 14: Unpacking
Congratulations on becoming an user of this equipment, the finely designed equipment. You will have a delightful and professional experience in using this exquisite equipment. We are proud to tell users that this equipment is thoroughly tested and certified by our reputation for unsurpassed dependability and customer satisfaction. -
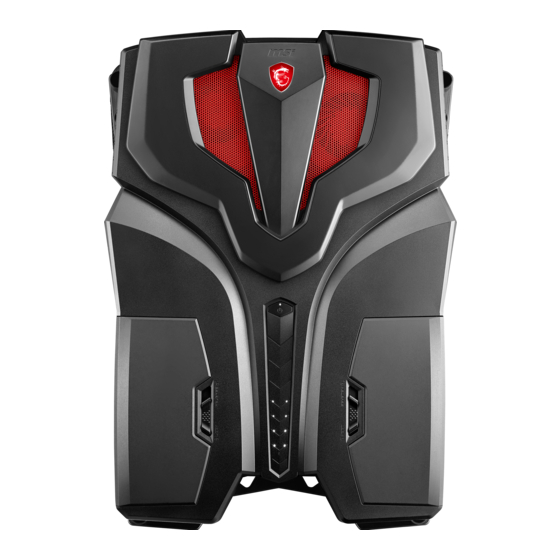
Page 15: Product Overview
Product Overview This section provides the description of basic aspects of the equipment. It will help you to know more about the appearance of this equipment before using it. Please be aware that the figures shown here are for reference only. Front Side View... - Page 16 1. Power Button / Power LED Power Button • Use this button to turn the equipment power ON and OFF. • Use this button to awake the equipment from the sleep state. • Note: The equipment can also be awakened by any Power mouse or keyboard activity.
-
Page 17: Rear Side View
Rear Side View... - Page 18 1. Audio Port Connectors Microphone Used for an external microphone. Headphone A connector for speakers or headphones. 2. Power Connector This connector is to supply power for your VR headset. 3. HDMI Connector HDMI (High-Definition Multimedia Interface) technology is the industry-leading interface and de-facto standard connecting high-definition (HD) and ultra high- definition (UHD) equipment.
-
Page 19: Specifications
The specifications listed here is reference only, and may change without notice. The actual products sold are different from areas. Visit MSI official website at www.msi.com, or contact the local retailers to learn the correct specifications of the product user purchased. - Page 20 I/O Port x 4 (USB 3.0) x 1, USB 3.1, Type-C interface, Thunderbolt 4K@60Hz output supported 5V/3A output charing optionally supported Mic-in Headphone-out x 1 (S/PDIF-Out supported) HDMI x 1, 4K@60Hz output supported Mini-DisplayPort x 1, 4K@60Hz output supported Communication Port Optionally supported by USB dongle Wireless LAN Supported...
-
Page 21: How To Get Started
How To Get Started... -
Page 22: Battery Usage
Battery Usage Users can hot-swap one battery without using an adaptor. However, it is necessary to have your VR backpack PC plugged to a power socket before removing both batteries. Install the Battery... -
Page 23: Remove The Battery
Remove the Battery Connect the VR Backpack PC to a Power Socket... -
Page 24: Battery Status
Battery Status The VR backpack PC comes with battery indicators, the number of lights illuminated next to the mount shows the battery life percentage. Light Percentage Note: The light flashes indicates low battery condition. 100% 100%... -
Page 25: How To Define Power Button
How to Define Power Button It is suggested that user to define power buttons before having all your VR gears ready. User can choose whether to shut down or sleep when pressing the power button. 1. Find [Control Panel], select [Power Options] and then click [Choose what the power button does]. -
Page 26: How To Wear Your Vr Backpack Pc
How to Wear Your VR Backpack PC... -
Page 27: How To Set Up The Vr Backpack Pc For The First Time
How to Set Up the VR Backpack PC for the First Time Connect a Monitor to the VR Backpack PC Have the VR backpack PC connected to a monitor through mini-DisplayPort and then have it connected to AC power. Power on the VR backpack PC. DO NOT connect your VR headset yet. - Page 28 Configure Remote Desktop Connection on Your Windows 10 Pro System The following configuration shows you how to enable remote desktop connections on your Windows 10 Pro computer. This feature is only available for Windows 10 Pro only. Users can also consider using Miracast or Wireless HDMI as alternative solutions. For other operating system, refer to "Project to a wireless display with Miracast"...
- Page 29 ▶ Allow remote connections 1. Open [System], go to [Remote settings], select [Allow remote connections to this computer] to enable remote desktop. 2. Connect the VR backpack PC to a wireless router, copy the IP address from Windows Network and Sharing Center. Connect remote client PC to the same wireless router.
- Page 30 ▶ Set up remote desktop connection 1. Activate Remote Desktop Connection on the client computer, and click [Show Options]. 2. On [Local Resources] tab, click [Settings] and check [Play on remote computer]. 3. Enter the IP address and user name of the VR backpack PC on [General] tab, click [Connect] to enter the password.
- Page 31 3-11...
- Page 32 Connect Your VR Headset to the VR Backpack PC Connect your VR headset to VR backpack PC and disconnect the monitor. Note: If you're a HTC VIVE user, replace the VIVE headset cables with the 3-in-1 cable for VIVE for immersive VR experience. Activate VR software from the remote client PC.
Need help?
Do you have a question about the VR One and is the answer not in the manual?
Questions and answers