Advertisement
Advertisement

Related Manuals for RHINO ARC EVO

Summary of Contents for RHINO ARC EVO
- Page 1 Arc Product Manual...
-
Page 3: Table Of Contents
Index Battery & Safety Warnings ..................What’s in the box ....................Mounting ......................... Leveling ........................Pairing ........................Setting up a move ....................Movement Types ....................Battery Life & Charging .................. -
Page 4: Battery & Safety Warnings
Battery & Safety Warnings Important: Rhino Arc is a pan-only device. It is not intended to use with an L-Bracket for tilt move because of the gearing for high speeds. Note: Rhino Arc must be used with Rhino Motion to function. It is not intended for stand-alone use. - Page 5 Do not short-circuit, disassemble, or modify the device or battery inside. Do not apply heat or apply solder to the internal battery or any attached external devices. Use only supplied USB cable and powered USB port or charger rated at 5vDC 1500mA. Lithium Polymer batteries are extremely hazardous and liable to cause serious injuries to persons or property.
-
Page 6: What's In The Box
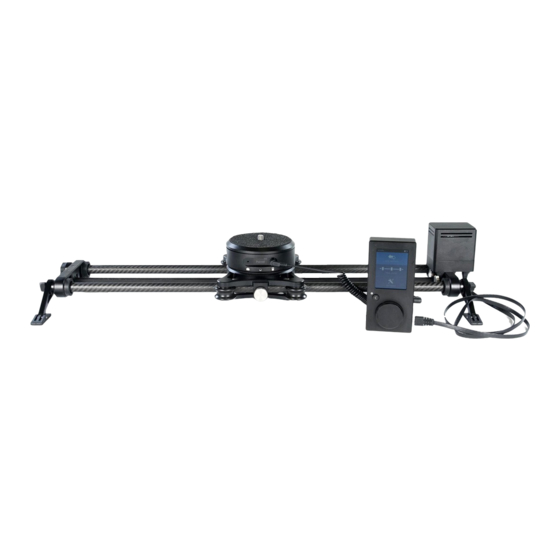
What’s in the box Rhino Arc Connection Cable - Use this to connect to Rhino Motion Rhino Arc Adjustment Wrench - Use this during your first setup to position Arc properly Rhino Arc - Motorized panning head Charger & USB Cable - Use this to charge Rhino... -
Page 7: Mounting
Mounting Rhino Arc is designed for use with 3/8” ball and fluid heads. It can support up to 10 lbs of weight if it is centered over the unit. Step 1. Set Rhino Arc on the Rhino Slider carriage and turn it clockwise until it’s tight. - Page 8 Step 2. Using the included allen wrench, loosen the two set screws identified with a white ring around them. Position Rhino Arc so that the screen is facing the brake on the carriage and lightly tighten the set screws. Note: This step is only necessary on initial setup.
-
Page 10: Leveling
Rhino Arc must be level before you start using it. Level your slider using your tripod. If you don’t have a ball head under Rhino Arc you’ll need to ensure that your slider is level. If you want to angle your slider you’ll need to add a ball head, fluid head, or leveling plate under Rhino Arc to keep it level. -
Page 12: Pairing
Step 1. Press and hold the power button for 3 seconds to power on. Step 2. Plug the included cable into the Rhino Motion Controller icon plug on Rhino Arc. Step 3. Plug the other end into the camera port on the Rhino Motion Controller. - Page 13 Step 4. Navigate to SETTINGS in the Rhino Motion Controller. Under “Arc”, set it to “ON”. The screen on Rhino Arc should now display “Paired”. If it doesn’t, make sure your cable is plugged in all the way and toggle the ON/OFF setting again.
-
Page 14: Setting Up A Move
Setting up a move Creating a panning & sliding move with Rhino Arc is extremely simple. When the unit is paired with your controller you’ll see a setup screen before each mode in Rhino Motion that allows you to position Rhino Arc. - Page 15 Step 3. Click “SET IN” and your slider will move to the other end of the slider. Step 4. Turn the wheel to point your camera in the direction you want it to end at.
- Page 16 Step 5. Click “SET OUT” and your Arc movement is set up.
-
Page 17: Movement Types
Interview Tips: The best way to film an interview with Rhino Arc is to use “Create a move”. If you’re shooting on a 24” slider a good starting move duration is around 15 seconds. For 42”... - Page 18 Rhino Motion to connect your camera to the port on Rhino Arc with the camera icon. This will allow the controller to still trigger your camera to take pictures during a time...
- Page 19 Sweeping Movement The third kind of move is known as a “Sweeping” shot. To set it up, point your camera about 30 degrees to the left at your “IN” position and about 30 degrees to the right at your “OUT” position (assuming you’re moving left to right).
-
Page 20: Battery Life & Charging
USB Wall charger: 3-4 hours USB Computer: 48 hours For safety reasons, charging will cease after ten hours. If you’re using Rhino Arc and charging simultaneously, unplug the cable after 10 hours and plug it back in to continue charging. - Page 21 If you’re shooting for long periods, you can use an external battery pack to power Rhino Arc. We recommend a battery pack with at least a 1.5A USB output (2A max). Simply plug it into the USB port on Rhino Arc to extend the duration of your shoot.
- Page 23 Facebook.com/Rhinocg @RhinoCG @RhinoCameraGear Youtube.com/RhinoCameraGear www.rhinocg.com...
- Page 24 Thank you for purchasing Rhino Arc. If you have any questions or comments, please email: support@rhinocg.com...
Need help?
Do you have a question about the ARC EVO and is the answer not in the manual?
Questions and answers
I have Rhino ARC 42inch slider and love it. My question is about creating a tracking move where the slide length is smaller than full tracking length of slider. How do I create a tracking shot with 24 inch (out of 36 inch full sliding distance} distance between In and Out positions and the Pan head tracking the object? It seems to me that only full length tracking shot is being permitted and not shorter ones.
To create a tracking shot with a 24-inch distance using the RHINO ARC EVO slider while ensuring the pan head tracks the object, follow these steps:
1. Set Up the Camera: Mount your camera on the Rhino Arc, ensuring it is securely attached.
2. Position the Camera: Point your camera at the subject in both the starting (“IN”) and ending (“OUT”) positions. This ensures the camera remains locked on the subject throughout the movement.
3. Set Up the Move: Use the “Create a Move” function in the Rhino Arc system.
4. Adjust Duration: For a 24-inch slider, set the move duration to around 15 seconds.
5. Smooth Transitions: Add a four-inch ramp to ensure smooth direction changes.
6. Enable Looping: Set Loop to “ON” if you want the camera movement to repeat automatically.
This setup is ideal for interviews or dynamic shots where maintaining focus on the subject is essential.
This answer is automatically generated