
Related Manuals for Selecto SP20-1


Summary of Contents for Selecto SP20-1
- Page 1 SUPERPLUS WATER FILTRATION SYSTEM For Model #: SP20-1 INSTRUCTIONS/ASSEMBLY USE AND CARE MANUAL (Important: Read this manual thoroughly before install)
-
Page 2: Table Of Contents
QR Code Instructions Troubleshooting & Repair Limited Warranty HELP AND SUPPORT Selecto, Inc. 3980 Lakefield Court Suwanee, GA 30024 USA WWW.SELECTOINC.COM Product Customer Support Hotline: Toll Free: 1-800-635-4017 Customer-Service@SelectoInc.com Monday to Friday 8:00 a.m. — 5:00 p.m. EST © Selecto, Inc. -
Page 3: General Notes
THANK YOU FOR PURCHASING OUR PRODUCT Everyone here at Selecto, Inc. would like to thank you for your support and continued use of our products. We believe everyone should have access to safe, clean water. Your purchase is a small step towards a clean future. -
Page 4: About Your Product
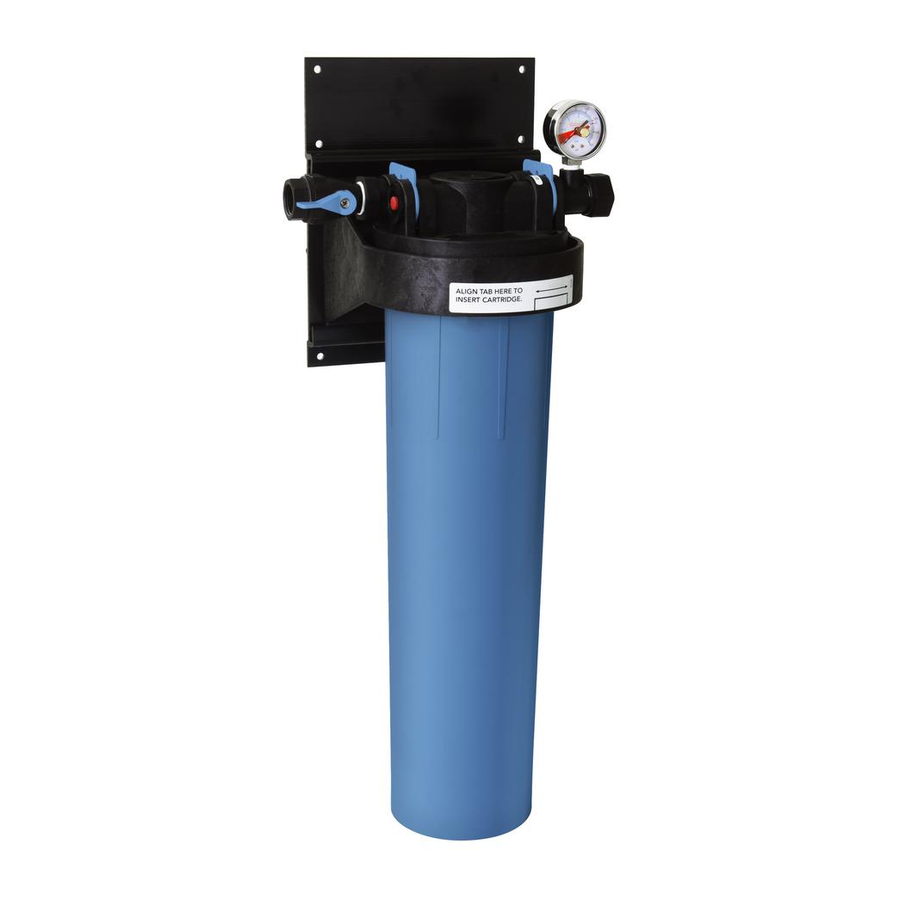
• Temperature range between 34° F and 100° F • Minimum pressure: 40 PSI • Maximum pressure: 120 PSI Dimensions: 22” × 9” × 14.5” Weight: With Water: 27 lbs. Without Water: 14 lbs. Replacement Filtration Cartridge: SP20-1RC © Selecto, Inc. -
Page 5: Installation Procedures For Hard Copper Pipe
2. Remove blue clip from inlet side 1. Center, level, and mount the filter head 3. Pull and separate inlet Shut-Off 4. Connect inlet fitting onto 3/4” 5. Reconnect plastic fitting back to valve fitting hard piping the filter head © Selecto, Inc. - Page 6 7. Hand press down the clip and 8. Repeat steps 2-7 for the outlet flush w/head surface side of piping 9. Install cartridge w/ align Filtered Water Tap Water Outlet Inlet 10. Now the installation is complete © Selecto, Inc.
- Page 7 2. Remove blue clip from inlet side 1. Center, level, and mount the filter head 3. Pull and separate inlet Shut-Off 4. Connect inlet fitting onto 3/4” 5. Reconnect plastic fitting back to valve fitting hard piping the filter head © Selecto, Inc.
- Page 8 9. Apply sealant on 3/4” CPVC pipe 10. Reconnect plastic fitting/clip back to the filter head Filtered Water Water Inlet Outlet 11. Installed Plastic pipe 12. Install 1st cartridge w/align 13. Now the installation is complete 4-tags © Selecto, Inc.
-
Page 9: Directions To Reverse Water Flow
Tap Inlet 300-715 300-714 Filtered Outlet Pressure Relief 300-720 300-738 (How to reverse the water flow direction) Plug Tap Inlet 300-715 300-714 Filtered Outlet 300-720 Pressure Relief 300-738 (Reversal of water flow path from right to left completed) © Selecto, Inc. -
Page 10: Cartridge Change-Out Instructions
The cartridge should be twisted clockwise in relation to the bottom of the cartridge. Hand tight is sufficient for a proper seal. 9. Turn on the inlet valve. Flush newly installed filter cartridges for 3 minutes (from sink faucet). © Selecto, Inc. -
Page 11: Qr Code Instructions
1. Scan the QR code on filter cartridge label with your smart phone. 2. Follow the instructions on the screen to either register for filter replacement reminders, or to order replacement filters. 3. You will receive reminders via email to change your filter cartridge. © Selecto, Inc. -
Page 12: Troubleshooting & Repair
Inspect the O-Ring on the top of the cartridge for damage. Replace with a new Lubricant O-Ring (supplied) and lubricate well with lubricant supplied. Replace the cartridge by following the procedures outlined in the Cartridge Change-Out Instructions on “Cartridge Change-Out” Page. © Selecto, Inc. -
Page 13: Limited Warranty
This Warranty does not apply to defects or damage due to abuse, neglect, misuse, accident, alteration, freezing, fire, other acts of God, or damage not caused by SELECTO. In no event will SELECTO be liable for incidental or consequential damages from a defective unit or improper installation. - Page 14 I.C.C. Regulations. SELECTO must be notified, in writing, including a copy of the carrier’s claim form, of any damage or loss claims with 15 days of receipt. Failure to notify SELECTO releases SELECTO from any liability.
Need help?
Do you have a question about the SP20-1 and is the answer not in the manual?
Questions and answers