Table of Contents
Advertisement
Advertisement
Table of Contents

Summary of Contents for IK ILOUD MICRO MONITOR
-
Page 1: User Manual
Studio reference monitor USER MANUAL... -
Page 2: Table Of Contents
Contents Table of Contents Contents English iLoud Micro Monitor Register your iLoud Micro Monitor iLoud Micro Monitor overview Installation and setup Control panel Audio inputs Speaker’s connection ports Bluetooth pairing Volume Power switch and DC input Acoustic setup Desktop filter... - Page 3 Contents 声学设置 桌面滤波器 高频滤波器 低频滤波器 驱动 低音单元 高音单元 低频倒相口 音箱放置 桌面定位 听音位置 房间声学设置 麦克风支架安装 故障排除 规格参数 保修政策 支持及更多信息...
-
Page 4: English
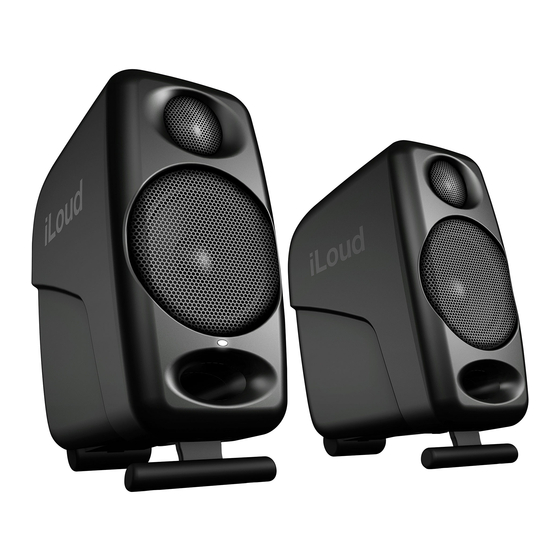
Micro Monitor is powered by four amps that deliver a combined 50 W RMS of power. Each offer extreme clarity and superior bass response via two 3/4” tweeters and two 3” woofers. -
Page 5: Iloud Micro Monitor Overview
English iLoud Micro Monitor overview Active speaker (left) -
Page 6: Installation And Setup
Please note that the loudspeakers will need a few days to achieve optimum sonic performance. 1. Make sure that the volume control of iLoud Micro Monitor is set to minimum. Make sure that the ON/OFF switch on the rear panel is set to OFF. - Page 7 English 3. Connect the included PSU to the DC socket on the left speaker. 4. Connect your sound source to the left speaker. You can use both the 1/8” jack input or the unbalanced RCA stereo inputs.
- Page 8 English 5. Switch ON the main ON/OFF switch on the rear panel of the left speaker. 6. It is also possible to stream audio wirelessly by pairing a Bluetooth device with iLoud Micro Monitor. ® iLoud Micro Monitor...
- Page 9 English 7. Play audio from your audio source and slowly raise the volume of the iLoud Micro Monitor to a comfortable listening level. 8. If needed, adjust the speakers response with the dedicated controls on the rear panel of the left speaker.
-
Page 10: Control Panel
English Control panel Audio inputs RCA unbalanced line input These RCA jacks allows for the connection of line sources (i.e., mixer/audio interface bal/unbal line out) both for the Left and Right channel. 1/8” AUX unbalanced input This unbalanced line input allows for the connection of stereo unbalanced audio sources (i.e., computer stereo output, music player stereo output, smartphone/tablet stereo output). -
Page 11: Bluetooth Pairing
® ® without the need to connect any audio cable. In order for your device to work with the iLoud Micro Monitor it must first be paired. To pairing your device: • Turn the back panel volume control counter-clockwise to the -INF position. -
Page 12: Acoustic Setup
English Acoustic setup These three switches on the back panel will help you to fit perfectly iLoud Micro Monitor in every acoustic environment. Desktop filter This switch sets a notch filter to compensate the typical acoustic effect of a console or a desktop. Such placement usually results in a peak in the lower midrange. -
Page 13: High Frequency Filter
This filter is used to adjust the proximity effect of side walls and ceiling. Use this filter whenever the acoustics of your room cause problems in the low frequency range. The frontal LED on the Left speaker will show important information about iLoud Micro Monitor’s status: Steady white: iLoud Micro Monitor is ON. -
Page 14: Bass Port
Please make sure that no obstacles are presents in the way from the monitors to your ears. You should be able to see the speakers completely. iLoud Micro Monitor has been designed for a vertical set up. The speakers must be positioned on a firm ground or a stand. -
Page 15: Listening Position
English Listening position When you use iLoud Micro Monitor for stereo applications, the optimum listening position should be located in the middle of an imaginary triangle. This means that your listening point (sweet point) will be located at the top of an equilateral triangle and the two loudspeakers should be placed at the other two points of this triangle. -
Page 16: Microphone Stand Mounting
English Microphone stand mounting Thanks to the thread adapter on the bottom of the speakers, iLoud Micro Monitor can be mounted on any standard 3/8” microphone stand. This allows you to place the speakers at the perfect height and, most important, helps to reduce the typical reflections of the desktop (or shell) and, consequently, improves the frequency response/linearity of the speaker. -
Page 17: Troubleshooting
English Troubleshooting I have connected my device to iLoud Micro Monitor, but no sound comes out. Make sure to set up the volume with the volume potentiometer on iLoud Micro Monitor and/or with your device’s volume control. Sound is distorted. -
Page 18: Graphics
English Graphics ILOUD MICRO MONITOR FREQUENCY RESPONSE (normalized at 0dB) Frequency (Hz) Measured at 1 meter distance, in anechoic chamber, on tweeter axis. All calibration switches set to “FLAT” . ILOUD MICRO MONITOR MAXIMUM SPL Frequency (Hz) Measured at 50 cm distance, with two speakers playing, for 10% THD. -
Page 19: Warranty
English Warranty Please visit: www.ikmultimedia.com/warranty for the complete warranty policy. Support and more info www.ikmultimedia.com/support www.iloudmm.com... -
Page 20: 中文
感谢您购买iLoud Micro Monitor。 盒子内包含 • iLoud Micro Monitor音箱 • 电源适配器 • 音箱连接线 • RCA线材 • 快速启动指南 • 注册卡 iLoud Micro Monitor是一个全功能超小型立体声监听系统。 这是一对便携式录音棚监听音箱,带有专业品质的双功放设计,其真实的线性频率响应提供诚实而精确的声音。 iLoud Micro Monitor由四个放大器输送一个组合50 W RMS的功率驱动。通过两个3/4”高音单元和两个3” 低音单元,每个音箱都提供清晰、卓越的低音响应。 这些功能因板载的56位DSP处理器而得以增强。它让你完全控制音箱的性能,带来非常精确和详细的声音,这 在考量的尺寸和价格内是难以实现的。 它能够调整以配合不同的播放情况,这得益于其扬声器的两个可定位的倾向角度和三个专用的EQ开关:低频、 高频和“自由场”/“桌面”补偿开关。这些开关让你优化它的声音,配合你的听音环境。 它还配备了一个全方位的音源选项,包括蓝牙流以及RCA和1/8”输入。 iLoud Micro Monitor可完美用于混音、母带处理、作曲、创作、苛刻的听音环境,以及各种情况下的使用,无 论是旅行途中,在家或在录影棚。 注册你的iLoud Micro Monitor 通过注册,您可以访问技术支持,激活您的保修并收到免费的JamPointsTM添加到您的账户。JamPointsTM... -
Page 21: 安装和设置
中文 安装和设置 我们建议使用高品质音频线以保证最佳的性能。一定要确保音箱稳定的放置在坚实的平面上。请注意,音箱需要 几天才能达到最佳的声音性能。 1. 确保iLoud Micro Monitor的音量控制设置为最低。确保后面板上的ON/OFF开关是OFF状态。 2. 使用配备的连接线材连接音箱。 ARROW UP... - Page 22 中文 3. 连接配备的电源适配器到左音箱的DC接口 4. 将音源连接到左音箱。可以使用3.5mm接口输入或非平衡RCA立体声输入。...
- Page 23 中文 5. 打开左音箱上背面的ON/OFF开关 6. 同样可以通过蓝牙无线连接到iLoud Micro Monitor播放音频 iLoud Micro Monitor...
- Page 24 中文 7. 从您的音源播放音频并缓慢转动iLoud Micro Monitor 的音量旋钮调整到舒适的音量大小。 8. 如果需要,可以通过左音箱背面的专用控制调节音箱的响应。 9. 如果需要调整音箱的角度,可以使用底部的支架。 注意:在连接音源和开启前,记住“后开机,先关机”的原则来给音箱供电。当启动系统时,先确保所有线材都 已经连接了,打开你的混音台/接口和其他设备,然后最后打开你的iLoud Micro Monitor。当关闭系统时,先 关闭iLoud Micro Monitor的电源然后再关闭你的混音台/接口和其他装备。...
-
Page 25: 控制面板
中文 控制面板 音频输入 RCA 非平衡线性输入 这组RCA接口让你可以连接任何线性音源(例如:混音台/音频接口平衡/非平衡线性输出)到左右声道。 3.5mm AUX 非平衡输入 这个非平衡线性输入让你可以连接立体声非平衡音源(例如:电脑立体声输出,播放器立体声输出,手机/平板 电脑立体声输出) 音箱连接端口 这个接口(在每个音箱后面)让你可以连接主音箱(左音箱)和副音箱(右音箱)。它是一个4-pin 接口:这样 可以在给音箱供电的情况下同时传输高频驱动和低频驱动。... -
Page 26: 蓝牙配对
中文 蓝牙配对 iLoud Micro Monitor 使用蓝牙来从设备无线传输高品质音频信号,在使用iLoud Micro Monitor 播放之前需 要先进行配对,来匹配连接您的设备: • 将背部面板的音量控制旋钮调节到 -INF的位置 • 打开您的iLoud Micro Monitor电源并开启需要连接蓝牙的设备:点击左音箱背部的PAIRING 按钮来将设备 变为可发现状态,设备前面板的指示灯将缓慢闪烁蓝灯。 • 在您的蓝牙设备设置中,允许其“扫描”可用设备。 • 在蓝牙可用设备列表中,选择“iLoud Micro Monitor”设备。 • 当iLoud Micro Monitor 的指示灯回到白色的固定状态表示配对已经完成,现在你可以使用iLoud Micro Monitor来播放音源:当有音源输入后LED指示灯变为蓝色。 • 当您的蓝牙音量开启后,播放一些音乐并缓慢的加大iLoud Micro Monitor的音量直到它达到您想要的效 果。 音量 这个指示开关让你可以调整输入音源的音量 电源开关的DC输入... -
Page 27: 声学设置
中文 声学设置 这三个位于背部面板的开关可以帮助您将iLoud Micro Monitor在不同的声学环境中调整到最佳状态。 桌面滤波器 此开关设置陷波滤波器以补偿控制台或桌面的典型声学效果,在较低的中频中改变了峰值的结果,Desktop 开 关激活了钟形陷波滤波器,在1kHz到10kHz以及-1dB低于400Hz的区间+3.5dB。... -
Page 28: 高频滤波器
中文 高频滤波器 这个开关通过使用搁架式EQ来控制高频等级,等级可以设置为0bB或-3dB(高于4kHz)。这个滤波器让您 在声学环境中可以调整监听音箱的高频,如果您觉得音色太过明亮可以尝试将开关调节到右边来给高音部降低 3dB。 低频滤波器 这个开关通过使用搁架式EQ来控制低频等级,等级可以设置为0db或-3dB(250Hz以下)。该滤波器用于调整 侧壁和天花板的邻近效应。当您的房间因为声学问题对音频造成影响时可以使用这个滤波器。 位于左音箱正面的LED用于显示iLoud Micro Monitor的重要状态信息:持续白色:iLoud Micro Monitor 电 源已开启 持续红色:限幅 蓝色闪烁:iLoud Micro Monitor 正在和蓝牙设备配对 持续蓝色:以连接的蓝牙设备正在输入音频信号到音箱 驱动 低音单元 低音单元采用了一个定制3”纸锥来提供平衡的中频和低频响应。 高音单元 通过使用特别开发的3/4”丝球搭配钕磁铁,高音单元在高频范围内可以带来及其自然的响应。... -
Page 29: 低频倒相口
中文 低频倒相口 位于前面板的这个洞口为倒相口,它的设计是用来释放低频信号并加强整体的低频响应。 音箱放置 请确保没有任何障碍物放置在音箱和您的耳朵之间,您应当确保可以完整的看到音箱。iLoud Micro Monitor 的设计采用了垂直的模式,音箱必须放置在坚固的平面或支架上。 请注意音箱附近的物品震动将会影响音色。 桌面定位 位于高音单元和低音单元的中点应当摆放在和耳朵大约一致的高度,如果您需要将音箱放置在特别矮或特别高的 位置,音箱的角度需要相应的调整。如果音箱的放置位置低于耳朵,您可以使用音箱底部的支架调整,同时也改 善了扬声器和桌面的声学耦合。... -
Page 30: 听音位置
中文 听音位置 当您使用iLoud Micro Monitor 搭配立体声软件使用,最佳的听音位置应该位于等边三角形上。这意味着您的 听音点(sweet point)将落在等边三角形的顶点上,2个音箱应该分别位于等边三角形的另外两个顶点。此 外,一个对称的位置同样重要:应用于两个音箱的间距以及和墙面、天花板、地板的间距。为了得到一个对称的 立体声图像,对称的反射同样重要:我们建议和墙面至少保持20 cm(8英寸)的距离,来避免低频堆积。 房间声学设置 房间的声学在监听系统的表现中起到关键的作用,建议您至少对您的环境做最基本的声学处理。搭配正确的监听 音箱位置摆放,可以提高听音的线性和精确度。... -
Page 31: 麦克风支架安装
中文 麦克风支架安装 因为有了音箱底部的麦克风支架接口,iLoud Micro Monitor 可以连接到任何标准3/8”麦克风支架上。这让你 可以将音箱摆放在完美的高度,更重要的是,减少了桌面(或外壳)的反射,提升音箱的频率响应/线性。 故障排除 我已经连接了我的设备到iLoud Micro Monitor,但是没有声音。 确保您调整过iLoud Micro Monitor的音量控制按钮或调整设备的音量控制。 声音失真 当可辨认的失真发生时,请调低音箱的音量或调低音源的音量。... -
Page 32: 规格参数
中文 规格参数 类型:2路供电,双功放,录音棚监听音箱 频率响应(-3dB):55Hz - 20kHz 频率响应(-10dB):45 Hz - 22 kHz 交叉频率:3kHz 高音单元:3/4”丝膜球顶和钕磁体 低音单元:3” 纸锥 最大SPL @ 50cm(使用双音箱播放,从100Hz到10kHz平均正弦波):107dB 功放数量:4 功放类型:D类 总输出功率(双音箱):70W(峰值)- 50W RMS 低音单元输出功率(单音箱):18W RMS 高音单元输出功率(单音箱):7W RMS 声学设置:high shelf (0dB or -3dB from 4kHz up); low shelf (0dB or -3dB from 250Hz down); desktop (+3.5dB between 1kHz and 10kHz and -1dB below 400Hz) 高性能低音倒相口... - Page 33 émetteur. iLoud® Micro Monitor is a trademark or registered trademark property of IK Multimedia Production Srl. All other product names and images, trademarks and artists names are the property of their respective owners, which are in no way associated or affiliated with IK Multimedia.
Need help?
Do you have a question about the ILOUD MICRO MONITOR and is the answer not in the manual?
Questions and answers