Table of Contents

Summary of Contents for Bestok M330
- Page 1 12MP Infrared Digital Trail Camera User Manual Thank you for purchasing the trail camera, for making best use of all the functions of this camera, please read this manual carefully before you use the camera and keep it as handy reference.
-
Page 2: Table Of Contents
Contents Cautions............................- 2 - Package Contents..........................- 3 - Product Introduction........................- 3 - 1.1 The Introduction of Product..................... - 3 - 1.2 Main Features:........................- 3 - 1.3 Illustration.........................- 4 - Setting UP And Connecting......................- 6 - 2.1 Power supply........................- 6 - 2.2 Inserting SD Card...................... -
Page 3: Cautions
Cautions Be sure the camera’s power is switched off before inserting or removing SD card or batteries. It is recommended to use new high-performance alkaline AA batteries or rechargeable batteries, for prevent the liquid rot the battery depot. Please make sure that the battery polarity matches that on the battery ... -
Page 4: Package Contents
Package Contents The following components are included in delivery: Digital Camera X1 USB Cable X1 Warranty Card X1 User Manual X1 Tree fastening strap X1 Product Introduction 1.1 The Introduction of Product This trail Camera can be used as autonomic surveillance device for guarding and recording unexpected intrusion to homes, warehouse, schools, offices, forest etc. -
Page 5: Illustration
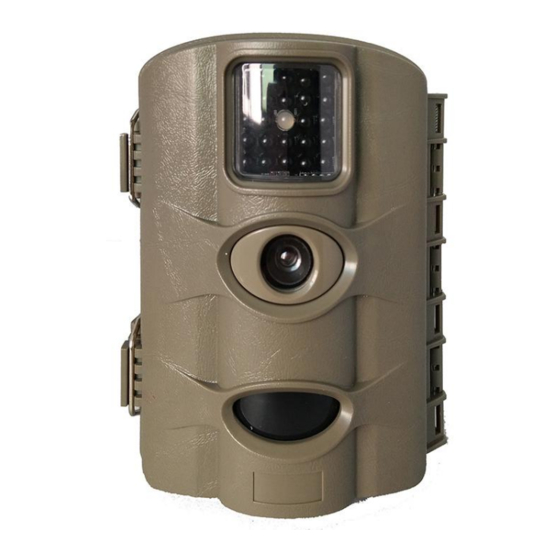
1.3 Illustration 1.3.1 Front View 1.3.2 Internal Structure - 4 -... - Page 6 1.3.3 Side View 1.3.4 Bottom View - 5 -...
-
Page 7: Setting Up And Connecting
Setting UP And Connecting If you are not familiar with the operation of this camera, the following instructions will help you get a quick overview. Before doing any operation, please make sure you have loaded batteries and plugged the SD card correctly. 2.1 Power supply ... -
Page 8: Functions Setting
The device supports SD/SDHC memory cards with a capacity of up to 32 GB. To avoid malfunctions, keep the memory card away from moisture and avoid strong vibration, dust, heat sources and direct sunlight. Insert the memory card as indicated by the icon on the slot. ... -
Page 9: Mode
the camera setting) will be taken and saved to the SD card. Also,press to Play / Pause the video. 5) Press the buttons to select the desired menu entry which you can then activate with the OK button. If you change settings, you must always confirm your changes with "OK". -
Page 10: Interval
3.7 Interval Use the buttons to select the minimum time period that the camera should wait before reacting to subsequent activation of the main sensor after the initial recording. During the selected interval,the camera will not record any images or videos. This prevents the memory card from being filled up with too many recordings of the same event. -
Page 11: Time Lapse
Confirm your selection with the OK button. Afterwards, press the MENU button to close this sub-menu. 3.10 Time lapse With this function the camera automatically takes pictures at adjustable intervals. This is useful if you want to observe the blooming of plants or the like, for example. -
Page 12: Date Stamp
3.13 Date stamp Here you can choose whether to save your photos with a time stamp. (Date,Time,Temperature,Moon Phase). 3.14 Password protection Select "On" if you want to use a password to protect the camera from unwanted access. In the following screen menu, you can set a 4-digit combination: Press the buttons to select the first digit between 0–9. -
Page 13: Default Settings
in another device, you should first format the memory card. Select "Yes" with the OK button and confirm the following prompt with the OK button. The formatting process starts.While the card is being formatted, the message "Please wait" appears. CAUTION ►... - Page 14 playback.The following appears on the display: A: Shows that the selected recording is a video. If this does not appear, the selected recording is a photo. B: Battery charge level display C: Shows the current recording number as well as the total number of recordings.
-
Page 15: Delete Selection
If you do not select an option within three minutes, the menu will close automatically. ♦ Press the / buttons to select the desired menu entry which you can then activate with the OK button. Use the MENU button to navigate one menu level backwards. -
Page 16: Technical Parameters Setting
Technical Parameters Setting Category Parameters Image Sensor 12 Mega Pixels Color CMOS Maximum Pixel 4000 x 3000 Lens Angle 60° Camera Lens,Auto IR-Cut IR LED Up to 65ft/20m LCD Screen 48x35mm(2.36") Operation Keypad 6 Keypad Storage Support SD card (8MB ~32GB) Image Size 12MP=4000 x 3000;... -
Page 17: Trouble Shooting
Work Humidity 5% ~ 95% Certificate FCC & CE & ROHS Trouble Shooting 10.1 Firmware Upgrade We periodically release firmware update with new feature or performance enhancements.Please contact the seller or authorized dealer to get the updated firmware. 10.2 Update Steps Copy the file "FWDLJA.bin"... -
Page 18: Warranty
of the sun). There are no You have installed the Change the installation recordings on camera such that no location of the camera. the memory wildlife can enter the card after detection range of the period of motion sensors. planned wildlife observation.
Need help?
Do you have a question about the M330 and is the answer not in the manual?
Questions and answers
No fue posible resetearla para quitar la clave antigua
To reset the Bestok M330 camera and remove the old password, follow these steps:
1. Press and hold the RIGHT BUTTON.
2. While holding the button, move the operating mode selector switch to the TEST position.
3. Keep holding the button until the boot screen appears.
4. After about 5 seconds, the camera will switch on and can be used without a password.
Note: This procedure will permanently delete any previously made settings.
This answer is automatically generated
No me acuerdo de la clave como la reseteo
To reset the password for the Bestok M330 camera, follow these steps:
1. Keep the RIGHT BUTTON pressed.
2. Move the operating mode selector switch to the TEST position.
3. Continue holding the RIGHT BUTTON until the boot screen appears.
4. After about 5 seconds, the camera will switch on and can be used without a password.
Note: This process will reset the camera to factory default settings and permanently delete any previously made settings.
This answer is automatically generated