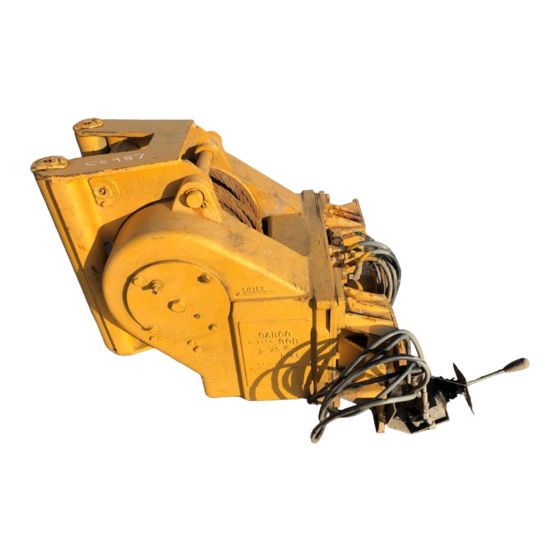
Table of Contents
Advertisement
Quick Links
CARCO
NOTE: This manual covers mounting and control group installation, and parts specific to this
winch on the specified tractor. For all other winch parts, refer to Winch Parts Manual,
Publication LIT2116.
Adapter Group . . . . . . . . . . . . . . . . . . . . . . . . . . . . . . . . . . . . . . . . . . . . .3
Mounting Group . . . . . . . . . . . . . . . . . . . . . . . . . . . . . . . . . . . . . . . . . .4-6
Control Group . . . . . . . . . . . . . . . . . . . . . . . . . . . . . . . . . . . . . . . . . . .8-10
30B-PS
C
Basic
Bevel
0-OVERWIND
Winch
Gear Ratio
Model
C-1.64:1
D-2.11:1
E-2.79:1
PRINTED IN U.S.A.
COPYRIGHT 2008 PACCAR WINCH DIVISION.
ALL RIGHTS RESERVED.
INSTALLATION AND
PARTS MANUAL
MODEL 30B
JI CASE 650K/750K/850K
TABLE OF CONTENTS
MODEL NUMBER DESCRIPTION
0
0
0-HAUL-IN
1-PAY-OUT
PACR
P.O. BOX 547 BROKEN ARROW, OK U.S.A. 74013
PHONE (918) 251-8511 FAX (918) 259-1575
www.paccarwinch.com
FOR
0
0-WITHOUT TOWING HITCH
1-WITH TOWING HITCH
WINCH DIVISION
0
0-FOUR SHAFT WINCH
0-NO FAIRLEAD
(31.047 base ratio)
1-THREE SHAFT WINCH
(17.249 base ratio)
0
3 - 3 ROLLER
4 - 4 ROLLER
LIT2171 REV 3
10/2008
Advertisement
Table of Contents

Summary of Contents for Carco 30B
- Page 1 CARCO INSTALLATION AND PARTS MANUAL MODEL 30B JI CASE 650K/750K/850K NOTE: This manual covers mounting and control group installation, and parts specific to this winch on the specified tractor. For all other winch parts, refer to Winch Parts Manual, Publication LIT2116.
- Page 2 THIS PAGE INTENTIONALLY LEFT BLANK...
- Page 3 ADAPTER GROUP DET. A OIL LEVEL DETAIL A ITEM NO. PART NO. DESCRIPTION QTY. 26133 PTO PILOT 72251 BEARING 26165 SEAL 26128 SLEEVE 13838 O-RING 26169 GASKET, PTO PILOT 104174 CAPSCREW, HEX HD (1/2 - 13 X 1 1/4, G8) 11026 LOCKWASHER (1/2) 25491...
- Page 4 MOUNTING GROUP OPTIONAL FAIRLEAD OPTIONAL DRAWBAR KIT MODIFIED TRACTOR PTO COVER (DIFFERENT FOR EACH TRACTOR) TRACTOR PTO ACCESS HOLE TYPICAL WINCH DRIVESHAFT LOCATION (DIFFERENT FOR EACH TRACTOR) TRACTOR PTO OUTPUT SHAFT SEE INSTRUCTIONS, ITEM 12 WINCH INPUT YOKE WINCH INPUT YOKE (HYDRAULIC PUMP DO NOT OVER-TIGHTEN THROUGH-SHAFT)
- Page 5 (43 kg). Use proper safety precautions when handling to prevent injury. A CARCO 30B winch weighs approximately 1,000 8. Test fit the winch mounting brackets (items 1 & 2) to lbs. (454 kg) without oil, cable, tractor adapters and the winch.
- Page 6 MOUNTING GROUP 17. Guide the winch into position on the winch mounting 22. Using a saw, cut the PTO access opening cover in brackets. half vertically to allow for installation around the drive- shaft. Install the PTO access cover to the tractor rear 18.
- Page 7 THIS PAGE INTENTIONALLY LEFT BLANK...
- Page 8 CONTROL GROUP QTY. REQ'D ITEM NO. PART NO. DESCRIPTION 63469 63470 26214 VALVE ASSEMBLY 105006 PLATE 104383 BRACKET DECAL 104381 DECAL 104253 CAPSCREW, 5/16 UNC X 2 3/4, GRB, Z 100858 WASHER, 5/16 NOM, HARD, Z 104254 NUT, HEX, 5/16 UNC, GR8, Z 103749 CAPSCREW, 3/8 UNC X 7/8, GRB, Z 101440...
- Page 9 CONTROL GROUP CONTROL GROUP 4. Remove the top plastic cover from the RH tractor con- sole. INSTALLATION INSTRUCTIONS 5. For EROPS machines only, remove the ashtray, steel 1. Observe general service methods and safety precau- ashtray opening surround, and cigar lighter assembly tions given in Case / New Holland tractor service from the plastic console cover.
- Page 10 CONTROL GROUP 8. Remove the winch controller handle from the assem- 16. Install the boot and boot retainer plate (items 26 & 27) bly. to the gate plate using self-tapping screws (item 25) as shown in View B. 9. Test fit the plastic console cover to the RH console. 17.
Need help?
Do you have a question about the 30B and is the answer not in the manual?
Questions and answers