Table of Contents
Advertisement
Advertisement
Table of Contents

Summary of Contents for AOKON SJ7000
-
Page 1: User Manual
SJ7000 USER MANUAL... - Page 2 Thank you for purchasing our SJ7000 WIFI video camera, please read this instruction for the sake of playing its performance maximally and lengthening this product’s service life. Some diagram may be slightly different from the digital video you sued in reality to...
-
Page 3: Table Of Contents
/ Table of Contents / Table of Contents Product Features Troubleshooting The Basics Customer Support Getting Started Trademarks Camera Displays Mode Switching Camera Setup Menus Navigating Settings Menus Settings Menus Description Record Video Mode Photo Mode Playback Mode Connecting to the App Transferring Files to a Computer SD Messages Accessories... -
Page 4: Product Features
/ Product Features / Product Features English/French/Spanish/German Image Sensor 12Mega Pixels CMOS-Sensor /Italian/Chinese Simple Language /Chinese Tradition WIFI 2.4G Wireless WIFI /Russian/Japanese/Korean 2.0’’LCD Screen Connection USB 2.0/HDMI 12MP(4032*3024)/10MP(3648*2736) Image /8MP(3264*2448)5MP(2592*1944) Battery Life 80 minutes(1080P) Resolution /3MP(2048*1536)/2MHD(1920*1080) /VGA(640*480)/1.3MP(1280*960) Battery 3.7V 900mAh Video 1920*1080 30fps/1280*720 60fps/ Resolution... -
Page 5: The Basics
/ The Basics / The Basics 1. Camera WIFI Status Light (orange) 2. Shutter/Select Button [ 3. Power/Switch/Mode Button [ 4. Camera Lens 5. Micro HDMI Port (cable not included) 6. Mini-USB Port (supports composite A/V cable/ 3.5mm stereo mic adapter, not included) 7. - Page 6 / Getting Started / Getting Started CHARGING THE BATTERY 2. Insert a microSD card (sold separately). The card must have 1. Remove the camera from its housing. a minimum rating of Class 6 or UHS-I, and a capacity maximum 32GB.
-
Page 7: Getting Started
/ Getting Started / Getting Started 3. Open the bottom door, insert the battery and then close 4. Charge the battery by connecting the camera to a computer the bottom door. or other USB charging adapter using the included USB cable. The camera status light turns on during charging and turns off when charging is complete. - Page 8 / Getting Started / Getting Started CAMERA DEFAULT SETTINGS POWERING ON + OFF The Aokon SJ7000 camera powers up with the following To Power On: default settings: Press the Power/Mode button [ ] for two seconds. The camera status lights (Blue) flash and the sound indicator emits. When the camera status screen displays information, your camera is on.
- Page 9 / Getting Started INSERTING + REMOVING MICROSD CARDS To remove the microSD Card: The Aokon SJ7000 camera is compatible with microSD Place your fingernail against the edge of the memory card and lightly memory cards with a capacity maximum 32GB (sold press it further into the camera.
-
Page 10: Camera Displays
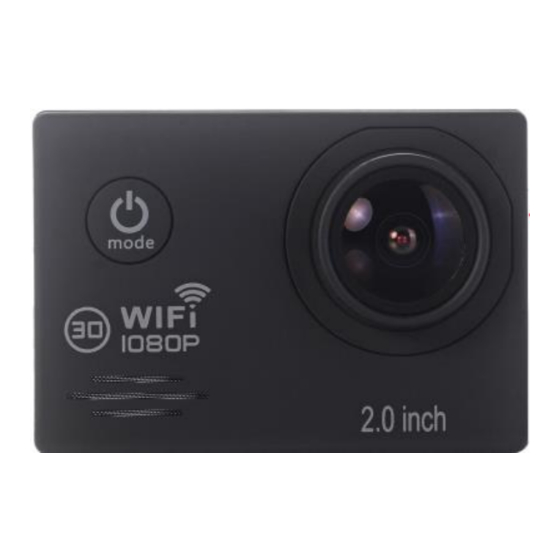
/ Camera Displays / Camera Displays ① Available Recording Time (depend on your SD-CARD) Your SJ7000 camera features a 2.0-inch screen on the back of the camera. ② Resolution/fps (frames per second) CAMERA SCREEN The 2.0-inch screen on the back of the camera lets you ③... -
Page 11: Mode Switching
/ Mode Switching / Camera Setup Menus The camera will enter into Video Recording Mode, when it’s power on. You can press the Power/Mode button [ ] to switch mode. -
Page 12: Navigating Settings Menus
Each camera mode has its own settings menu. With your options within a setting. To select an option, leave the option SJ7000, you can navigate the settings menus using the highlighted when you move to another screen. buttons on the camera. -
Page 13: Settings Menus Description
/ Settings Menus Description Video Resolution Video Resolution Best Use Great for all shots. High resolution and The SJ7000 includes the video resolutions listed below. frame rate yield stunning results. Recommended for body-or gear-mounted 1080P shots. Full-screen 16:9 for stunning Video... - Page 14 / Settings Menus Description / Settings Menus Description TV out OSD Mode The OSD (on-screen display) setting determines whether the You can play back videos and photos on your TV/HDTV. camera system icons and file information on video and on the Playing back videos and photos on your TV/HDTV requires a viewing screen appear during operate camera.
- Page 15 / Settings Menus Description / Settings Menus Description Capture Mode HDR: High Dynamic Range, with this setting, you can turn on Like Self Timer Photo Mode, you can take photo at specific and off HDR technology. intervals. Option: Off/On Default option: Off Option: Single/3S Timer/5S Timer/10S Timer/20S Timer Screen icon: Default option: Single...
- Page 16 / Settings Menus Description Image Size Audio With this setting, you can set your camera’s audio setting. The SJ7000 captures photos at 12MP, 10MP, 8MP, 5MP, If open, it will record audio when recording. 3MP, 2MHD, VGA, 1.3MP. Option: off/on...
- Page 17 / Settings Menus Description / Settings Menus Description Color ISO Limit adjusts the camera’s sensitivity in low-light Color allows you to adjust the color profile of your video environments, and creates a balance between brightness and footage or photos. resulting image noise. Image noise refers to the degree of Color Setting Resulting Color Profile graininess in the image.
- Page 18 / Settings Menus Description / Settings Menus Description Exposure Language Exposure affects the brightness of your video or photo. This setting changes the language that appears on the Adjusting this setting can improve image quality when camera dis-plays. shooting in environments with contrasting lighting conditions. Option: Off/On Default option: Off -2.0...
- Page 19 / Settings Menus Description / Settings Menus Description Date/Time TV Mode This setting lets you manually set the date and time. If the The TV Mode setting governs frame rates for recording and battery is removed from the camera for an extended period of playback when viewing video on a TV/HDTV.
- Page 20 / Settings Menus Description / Settings Menus Description Frequency WIFISSID This setting lets you set the camera’s WIFI SSID. This setting lets you set the camera’s system frequency. Option: 50 HZ/60 HZ Default option: 50 HZ Car Mode It can be used as a driving recorder. If you open this mode, Rotate your camera will automatic power on and recording when charging.
-
Page 21: Record Video Mode
④Current audio setting:on ⑤Battery electric quantity ZOOM IN VIDEO RECORDING MODE: ⑥Current date and time This SJ7000 camera offers 4X digital zoom. You can long press the “Up/Down” button to zoom when it is ⑦Other setting icon display area recording or stop recording. -
Page 22: Photo Mode
(depend on your Shutter/Select button [ ] to take a photo. SD-CARD) ④Other setting icon ZOOM IN PHOTO MODE: display area This SJ7000 camera offers 4X digital zoom. You can short press the “Up/Down” button to zoom when in Photo Mode. -
Page 23: Playback Mode
④Videos date and time resolution. PLAYING BACK VIDEOS AND PHOTOS ON YOUR SJ7000 CAMERA You can play back your videos and photos directly on your 1. Press the Shutter/Select button [ ] in this mode, it will camera. - Page 24 /Playback Mode / Playback Mode PLAYING BACK VIDEOS AND PHOTOS ON A COMPUTER PLAYING BACK PHOTOS To Play Back Content on Your Computer: Photos in Playback Mode default screen as show below. 1. Connect the camera to your computer using the included USB cable.
-
Page 25: Connecting To The App
5. After "FinalCam" software operates on a mobile phone or a TO CONNECT YOUR SJ7000 TO THE APP: panel computer, images recorded by the camera will be real 1. Install" FinalCam" software ( scan the two-dimension code time displayed on a mobile phone or a panel computer. -
Page 26: Transferring Files To A Computer
/ Transferring Files to a Computer / SD Messages MICROSD CARD MESSAGES To play back your video and photos on a computer, you must first transfer these files to a computer. TO TRANSFER FILES TO A COMPUTER: No card present. The camera requires a NO SD microSD, microSDHC card (sold separately) to capture videos and photos. -
Page 27: Accessories
MAXIMIZING BATTERY LIFE If the battery reaches 0% while recording, the camera saves the file and powers off. To maximize battery life, close the SJ7000 App. To maximize battery life when shooting longer-duration activities, open the Screensavers setting. Extreme cold temperatures can decrease battery life. - Page 28 / Battery / Battery BATTERY DISPOSAL BATTERY STORAGE AND HANDLING The camera contains sensitive components, including the battery. Avoid Most rechargeable lithium-ion batteries are classified as non-hazardous waste and are safe for disposal in the normal municipal waste stream. exposing your camera and battery to very cold or very hot temperatures. Many localities have laws in place requiring battery recycling.
-
Page 29: Camera Housing
/ Camera Housing / Camera Housing SWAPPING BACKDOORS Your SJ7000 camera comes with two types of backdoors: You can switch the backdoor of your SJ7000 camera to suit Standard Backdoor, and Skeleton Backdoor. your activity and shooting conditions. To Change the Backdoor: The Standard Backdoor makes the housing 1. -
Page 30: Using The Mounts
PREVENTING WATER DAMAGE TO YOUR CAMERA ATTACHING YOUR CAMERA TO MOUNTS To attach your SJ7000 camera to a mount, you need a Quick The rubber seal that lines the camera housing forms a Release Buckle and/or thumb screw, depending on the mount waterproof barrier that protects your SJ7000 in wet and you are using. - Page 31 / Using the Mounts / Using the Mounts MOUNTING GUIDELINES For more solutions of the camera accessories, see pictures below. Follow these guidelines when attaching adhesive mounts: Attach the adhesive mounts at least 24 hours prior to use. Adhesive mounts must be mounted only on smooth surfaces. Porous or textured surfaces do not enable a proper bond.
- Page 32 / Using the Mounts / Using the Mounts...
-
Page 33: Troubleshooting
/ Troubleshooting / Troubleshooting MY CAMERA WON'T ZOOM IN RECORD MODE MY CAMERA WON'T POWER ON This camera can zoom in both video mode and photo mode. Make sure your camera is charged. To charge your camera, use the You can short press "up/down" button to zoom when in photo mode, and included USB cable and a computer. -
Page 34: Customer Support
If any question, please contact to the AOKON Support. / Trademarks AOKON, AOKON SJ7000, are trademarks or registered trademarks of AOKON, Inc. in the US and internationally. Other names and marks are the property of their respective owners. - Page 35 Enjoy Your Life Capture Your Most Meaningful Life Experience Share and Celebrate Your Wonderful Life...
Need help?
Do you have a question about the SJ7000 and is the answer not in the manual?
Questions and answers