Table of Contents
Advertisement
Technical Documentation
06.10 JMo/Roe
Version 2.0
KA.HENRI-EN
National Rejectors, Inc. GmbH • Zum Fruchthof 6 • D-21614 Buxtehude
Phone: +49 (0) 41 61-729-0 • Fax: +49 (0) 41 61-729-115 • E-mail: info@nri24.com • Internet: www.nri24.com
for proceeding internal HENRI functions
Service tool
HENRI
Short reference guide
Advertisement
Table of Contents

Summary of Contents for NRI HENRI
- Page 1 Technical Documentation Service tool HENRI Short reference guide for proceeding internal HENRI functions 06.10 JMo/Roe Version 2.0 KA.HENRI-EN National Rejectors, Inc. GmbH • Zum Fruchthof 6 • D-21614 Buxtehude Phone: +49 (0) 41 61-729-0 • Fax: +49 (0) 41 61-729-115 • E-mail: info@nri24.com • Internet: www.nri24.com...
-
Page 3: Table Of Contents
Navigating in the menus Main menu currenza c² General main menu HENRI Switching between the main menus From the general HENRI main menu to the c main menu From the c main menu to the general HENRI main menu Display help texts... - Page 4 Calling up current firmware version Updating firmware Downloading the new firmware and FW updating PC application from the internet Installing HenriFlash Installing new firmware in HENRI tool/Uploading new c firmware in HENRI tool G-46/E-66/A-66 Configuration The basics Key functions in the G-46/E-66/A-66 mode...
-
Page 5: About This Short Reference Guide
• basic settings and service work on the HENRI service tool. • the basic operation of the HENRI service tool in the G-46 and E-66/ A-66 configuration mode. This short reference guide does not describe the entire func- tional range of the service tool, but rather the internal HENRI functions. -
Page 6: Additional Technical Documentationen
This shorT reference guide Additional technical documentationen Apart from the short reference guide you already have there is further documentation for the service tool and the NRI coin changers. All product descriptions are available in a compressed PDF format at www.nri24.com (→ Download). -
Page 7: About Henri
Diagnostics options by means of status and error messages being displayed • Display of all audit data (optional) in service cases • Useful service functions Scope of delivery In addition to the HENRI service tool you are supplied with a USB cable. National Rejectors, Inc. GmbH, Buxtehude... -
Page 8: Accessories
SRG – Internal HENRI functions bouT Accessories The following accessories can be ordered for the HENRI service tool: • WinSPT basic kit (MDB) – with EURO plug (ordering code 24688) – with USA plug (ordering code 24854) • WinSPT accessory kit –... -
Page 9: Safety Instructions
Proper use The HENRI service tool is used for operation, diagnostics, configuration and general service work on the NRI coin changers currenza c , G-46. -
Page 10: Protecting Yourself And Equipment
The coin validator, changer and HENRI PCBs are fitted with components which may be damaged beyond repair by electro- static discharge. Please observe the handling instructions for components exposed to the risk of electrostatic discharge. -
Page 11: Design
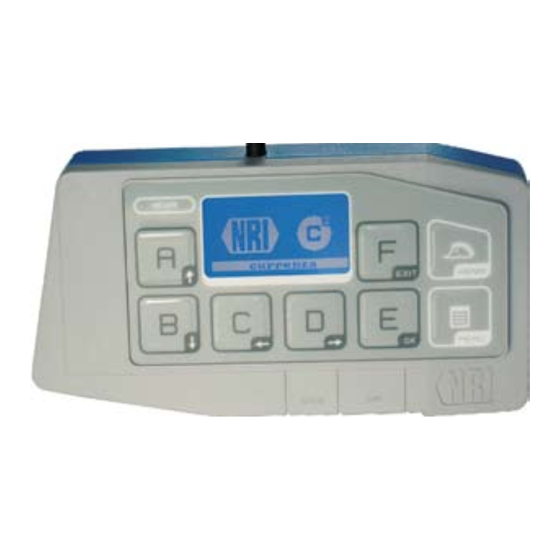
To operate and service the coin changer connected, the service tool is equipped with a display [1/6], six multifunction keys [1/5] and two menu keys [1/1, 2]. It can be connected to an NRI payment system (e.g. coin changer) using the connecting cable installed with RJ-45 plug [1/7]. For, e.g., firmware updates the service tool can be connected to a PC using... -
Page 12: Functions Of The Operating Keys
The menu is only available if HENRI is connected to a currenza c². If not, the key has no function. This short reference guide only describes the general operation and proceeding of internal HENRI functions (cp. -
Page 13: Navigating In The Menus
HENRI distinguishes between functions that are proceeded in the coin changer currenza c² and functions that are proceeded either in other NRI payment systems or in the HENRI itself. Accordingly there are two inde- pendent menus. This short reference guide only describes the general operation and proceeding of internal HENRI functions (cp. -
Page 14: Switching Between The Main Menus
If you try to switch over direct to the other menu, the connec- tion between changer and service tool will be interrupted. In this case pull the HENRI plug out of the c² socket and wait for ap- prox. 30 sec. until a new connection has been set up. -
Page 15: Connection
Connecting HENRI on site In order to connect HENRI to a coin changer, plug the RJ-45 connector (western plug) of the connecting cable into the socket on the top right of the coin changer (see Fig. -
Page 16: Connecting Henri In The Workshop
Connect the power pack to the power supply using the power cable. The display of the WinSPT tester shows "SPT (C)NRI vx.x_". Plug the HENRI connector into the socket on the top right of the coin changer (see Fig. 2). -
Page 17: Start Screens When Connecting A
HENRI identifies the payment system connected automatically. Thus the start screen is device-dependent..currenza c If HENRI is connected to a currenza c², HENRI displays two start screens: and switches then over to the c² mode automatically in order to display the selected status message, if there is no error, e.g.:... -
Page 18: Basic Settings
SRG – Internal HENRI functions asic seTTings Basic settings This chapter describes how to adjust basic settings, which HENRI saves as presettings for all further applications: • Menu language • System time • Display contrast • Baud rate Setting menu language HENRI supports the following languages: •... -
Page 19: Setting Date And Time
SRG – Internal HENRI functions asic seTTings Setting date and time To set time and date for HENRI: If HENRI has already been connected to a PC, e.g., for a firmware update, HENRI has already saved the PC system time. In this case time setting is not necessary. Press HENRI key. You enter the main menu:... -
Page 20: Altering Display Contrast
SRG – Internal HENRI functions asic seTTings Altering display contrast The default setting of the display contrast is "46". To alter the contrast: Press HENRI key. You enter the main menu: Press C key to open the s menu: eTTings... -
Page 21: Setting Baud Rate
SRG – Internal HENRI functions asic seTTings Setting baud rate By default the baud rate is set to 57600. In case the baud rate must be adapted manually, e.g., for a coin changer firmware update: Press HENRI key. You enter the main menu:... -
Page 22: Service Work
Testing keys, system time, memory To test the operational capability of the service tool: Connect HENRI to a voltage source (see Chap. 5 "Connection"). In case HENRI is connected to a PC, it switches over to the main menu automatically, if not Press HENRI key. -
Page 23: Testing Keys, System Time, Memory And Henri/C
To additionally test the HENRI interfaces as well as the currenza c vend- ing machine interface: Connect HENRI to a voltage source (see Chap. 5 "Connection"). In case HENRI is connected to a PC, it switches over to the main menu automatically, if not Press HENRI key. - Page 24 SRG – Internal HENRI functions ervice work Press B key to start HENRI and interface function test: • Keys after having pressed the relevant key A to F, HENRI, mENu • System time • EPROM • Flash memory • SIM card slot •...
-
Page 25: Firmware Update
ExIT key to return to the main menu. Updating firmware For updating the FW you will require the PC application HenriFlash which you can download along with the current FW from the NRI website (www.nri24.com) using your customer password. National Rejectors, Inc. GmbH, Buxtehude... -
Page 26: Downloading The New Firmware And Fw Updating Pc Application From The Internet
Installing HenriFlash To install the program onto the hard disc of your PC: If necessary, unpack zipped file. In addition to HenriFlash this directory also contains the HENRI firmware "xxx.hen" The directory may also contain files with the extension .cxb/.mot./dsp. These files represent the current FW for the currenza c coin changer (cp. - Page 27 After having selected all firmware files required, HenriFlash is ready for a firmware update or simple upload. First, connect the USB cable provided to a PC USB port. Then: A If the HENRI firmware is to be updated, (InstAllAtIOn) mENu button on the HENRI tool while con- •...
- Page 28 SRG – Internal HENRI functions ervice work Click on the uPDATE button on the HenriFlash screen to start the firmware installation/upload. HenriFlash displays the data transfer status in the right-hand o uTpuT field. Please refer to the c service manual to install new c firmware.
-
Page 29: 46/E-66/A-66 Configuration
HENRI-key by mistake? The basics The old G-46/E-66/A-66 setting module G-55.0460 has been displaced by the new service tool HENRI. As the HENRI tool, in the first instance, has been developed to operate and maintain the c coin changers, HENRI provides an extra G-46/E-66/A-66 mode offering the same menu structure and navigation as the old setting module. -
Page 30: Accessing Dis Menu
Accessing Dis menu Depending on whether you want to start configuring the coin changer di- rectly or you made basic settings using the HENRI main menu beforehand the way to the Dis menu can differ: Connect HENRI to the coin changer (cp. Chap. 5 "Connection"). -
Page 31: How To Return To The G-46/E-66/A-66 Mode, If I Had Pressed The Henri Key By Mistake
How to return to the G-46/E-66/A-66 mode, if I had pressed the HENRI key by mistake? If you pressed the HENRI-key by mistake, you enter either the A main menu or the menu. hanger modes To return to the G-46/E-66/A-66 mode, just press (the... -
Page 32: Technical Data
SRG – Internal HENRI functions echnical daTa Technical data This chapter provides • all relevant device data • information about the CE certification Device data Supply voltage Via USB or RJ-45 interface Temperature range 10°C to 50°C Rel. humidity Up to 90% Interfaces... -
Page 33: Ce Certification
SRG – Internal HENRI functions echnical daTa CE certification The CE certificate (CE = Communautés Européennes) confirms that our products comply with specified basic requirements of the applicable direc- tive. The CE certificate is not a quality assurance certificate in terms of the quality expected by the manufacturer but only in terms of the quality demanded legally.
Need help?
Do you have a question about the HENRI and is the answer not in the manual?
Questions and answers