
Related Manuals for Dell Latitude 5285 2-in-1


Summary of Contents for Dell Latitude 5285 2-in-1
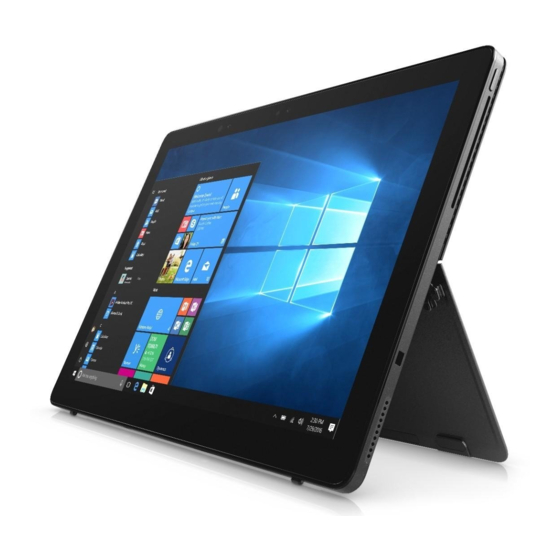
- Page 1 Latitude 5285 2-in-1 Owner's Manual Regulatory Model: T17G Regulatory Type: T17G001...
- Page 2 A WARNING indicates a potential for property damage, personal injury, or death. © 2017 Dell Inc. or its subsidiaries. All rights reserved. Dell, EMC, and other trademarks are trademarks of Dell Inc. or its subsidiaries. Other trademarks may be trademarks of their respective owners.
-
Page 3: Table Of Contents
Contents 1 Technical specifications..........................5 Processor specifications..............................5 System specifications................................ 5 Memory specifications..............................5 Video specifications................................6 Audio specifications................................6 Port and connector specifications........................... 6 Communication specifications............................7 Camera specifications................................7 Display specifications................................. 7 AC adapter specifications..............................8 Battery specifications................................ 8 Physical specifications...............................9 Environmental specifications............................ - Page 4 5 Troubleshooting............................34 Enhanced Pre-boot System Assessment (ePSA)......................34 Features:..................................34 Running the ePSA Diagnostic Utility ........................34 Tablet LED..................................34 Diagnostic LED................................34 Real Time Clock (RTC) reset............................35 Identifying the AC adapter shipped with your tablet....................36 6 Contacting Dell............................37 Contents...
-
Page 5: Technical Specifications
Technical specifications NOTE: Offerings may vary by region. The following specifications are only those required by law to ship with your computer. For more information about the configuration of your computer, go to Help and Support in your Windows operating system and select the option to view information about your computer. -
Page 6: Video Specifications
Feature Specification Type Integrated on system board UMA controller Intel Integrated HD Graphics 620 External display Optional Dell Adapter - USB Type-C to HDMI/VGA/ Ethernet/USB 3.0 support NOTE: Supports VGA, DisplayPort, HDMI through the docking station. Audio specifications Feature Specification... -
Page 7: Communication Specifications
• Dell Wireless Qualcomm Snapdragon X7 LTE-A • Dell Wireless Qualcomm Snapdragon X7 HSPA+ • Dell Wireless Telit Intel Ln-930 AP LTE CAT4 WiGig (Optional) Intel Tri-Band Wireless-AC 18265 WiGig + Wi-Fi + BT4.2 Wireless Card Camera specifications Feature Specification Type •... -
Page 8: Ac Adapter Specifications
Feature Specification Diagonal 312.42 mm (12.0 inches) Maximum resolution 1920x1280 Refresh rate 60 Hz Maximum viewing +/-80° angles—horizontal Maximum viewing +/-80° angles—vertical Pixel pitch 0.135 mm AC adapter specifications Feature Specification Type 45 W USB Type-C and 65 W USB Type-C Input voltage 100 V AC to 240 V AC Input current—... -
Page 9: Physical Specifications
Feature Specification Width 82.6 mm (3.25 inches) Height 5.5 mm (0.21 inch) Weight 135.0 g (0.29 lb) (126 GB m2 SATA) Voltage 11.4 VDC 42 WHr: Length 177.6 mm (6.99 inches) Width 82.6 mm (3.25 inches) Height 5.5 mm (0.21 inch) Weight 170 g (0.37 lb) Voltage... - Page 10 Relative humidity Specifications —maximum Operating 10% to 90% (non-condensing) Storage 10% to 95% (non-condensing) Altitude— Specifications maximum Operating 0 m to 3048 m (0 to 10,000 ft) Non-operating 0 m to 10,668 m (0 ft to 35,000 ft) Airborne G2 or lower as defined by ISA S71.04–1985 contaminant level Technical specifications...
-
Page 11: Using Your Tablet
Using your tablet This section covers how to power on and turn off your tablet including how to install the micro SD and uSIM cards. Topics: • Deploying the kickstand • Before Working Inside Your Tablet • After working inside your tablet •... -
Page 12: Before Working Inside Your Tablet
Damage due to servicing that is not authorized by Dell is not covered by your warranty. Read and follow the safety instructions that came with the product. - Page 13 NOTE: After you press and hold the Power button, by default, the “Slide to shut down your PC” screen Venue 11 Pro 7130 . For Venue 11 pro 7130 vPro and Venue 11 Pro 7139 , by default, the tablet displays only in enters sleep mode.
-
Page 14: After Working Inside Your Tablet
After working inside your tablet CAUTION: Leaving stray or loose screws inside your tablet may severely damage your tablet. Replace all screws and ensure that no stray screws remain inside your tablet. Connect any external devices, peripherals, and cables you removed before working on your tablet. Replace any media card, SIM card, and any other parts that you removed before working on your tablet. -
Page 15: Technology And Components
Technology and components This chapter details the technology and components available in the systems. Topics: • Power adapter • Processors • Chipset • Memory features • Display options • Camera features • Hard drive options Power adapter This system is shipped with 45 W or 65 W Type-C power adapters. WARNING: When you disconnect the power adapter cable from the tablet, grasp the connector, not the cable itself, and then pull firmly but gently to avoid damaging the cable. -
Page 16: Verifying Processor Usage In Task Manager
Figure 1. Verifying processor usage in task manager Right click on the desktop. Select Start Task Manager. The Windows Task Manager window is displayed. Click the Performance tab in the Windows Task Manager window. Verifying processor usage in resource monitor Right click the desktop. -
Page 17: Chipset
Click the Performance tab in the Windows Task Manager window. The processor performance details are displayed. Click Open Resource Monitor. Chipset The chipset is integrated on the processor. Identifying chipset in device manager on Windows 10 NOTE: The Chipset information displayed is a generic image and may be different from what is displayed. -
Page 18: Memory Features
Verifying system memory in setup Turn on or restart your tablet. Perform one of the following actions after the Dell logo is displayed: • With keyboard — Tap F2 until the Entering BIOS setup message appears. To enter the Boot selection menu, tap F12. -
Page 19: Testing Memory Using Epsa
Testing memory using ePSA Turn on or restart your tablet. Perform one of the following actions after the Dell logo is displayed: • With keyboard — Press F12. • Tablet only — Press Volume Up button before pressing the Power button to turn on the tablet. Once the power sequence is initiated you can release the Volume Up button and ePSA will launch. -
Page 20: Camera Features
Starting the camera To start the camera, open an application that uses the camera. For instance, if you tap the Dell webcam central software or the Skype software that is shipped with the 2-in-1, the camera turns on. Similarly, if you are chatting on the internet and the application requests to access the webcam, the webcam turns on. -
Page 21: Hard Drive Options
Identifying the hard drive in the BIOS Turn on or restart your laptop. When the Dell logo appears, perform one of the following actions to enter the BIOS setup program: • With keyboard — Tap F2 until the Entering BIOS setup message appears. To enter the Boot selection menu, tap F12. -
Page 22: System Setup
Entering BIOS without keyboard Press the power button to turn on your tablet. Press and hold the Volume Up button when the Dell logo appears on the screen. When the F12 boot selection menu appears, select BIOS Setup using the Volume Up button. -
Page 23: System Configuration Screen Options
If USB port is disabled, the OS cannot see any device attached to this port. The options are: • Enable USB Boot Support—enabled by default • Enable External USB Port—enabled by default • Always Allow dell docks—enabled by default System setup... - Page 24 Option Description NOTE: USB keyboard and mouse always work in the BIOS setup irrespective of these settings. USB PowerShare This field configures the USB PowerShare feature behavior. This option allows you to charge external devices using the stored system battery power through the USB PowerShare port. This option is disabled by default Audio This field enables or disables the integrated audio controller.
-
Page 25: Video Screen Options
Option Description • Enable Back Camera—enabled by default • Secure Digital (SD) card—enabled by default • Secure Digital (SD) card boot • Secure Digital (SD) card read-only-mode Video screen options Option Description Display Allows you to set the display brightness depending up on the power source—On Battery and On AC. The display Brightness(LCD brightness is independent for battery and AC adapter. -
Page 26: Secure Boot Screen Options
Option Description Password Change Allows you to enable the disable permission to the System and Hard Drive passwords when the admin password is set. Default setting: Allow Non-Admin Password Changes is selected. Non-Admin Setup Allows you to determine whether changes to the setup options are allowed when an Administrator Password is set. Changes If disabled the setup options are locked by the admin password. -
Page 27: Intel Software Guard Extensions Screen Options
Option Description Default setting: Enabled Expert Key Allows you to manage all secure boot keys. Manage All Factory Keys (PK, KEK, DB, DBX) Management NOTE: For Secure Boot to be enabled, the system needs to be in UEFI boot mode and the Enable Legacy Option ROMs option needs to be turned off. -
Page 28: Power Management Screen Options
Standby, the system setup removes power from all the USB ports to conserve battery power. • Wake on Dell USB-C dock Default setting: The option is enabled by default. Wireless Radio Allows you to enable or disable the feature that automatically switches from wired or wireless networks without Control depending on the physical connection. -
Page 29: Post Behavior Screen Options
Standard—Fully charges your battery at a standard rate—enabled by default Configuration • ExpressCharge—The battery charges over a shorter time using Dell’s fast charging technology. If Custom Charge is selected, you can also configure Custom Charge Start and Custom Charge Stop. NOTE: All charging mode may not be available for all the batteries. -
Page 30: Virtualization Support Screen Options
Option Description Extended BIOS Allows you to create an additional preboot delay. The options are: POST Time • 0 seconds—enabled by default • 5 seconds • 10 seconds Full Screen Logo This option will display full screen logo if your image match screen resolution •... -
Page 31: Maintenance Screen Options
It is recommended to update your BIOS (System Setup), on replacing the system board or if an update is available. For systems, ensure that your tablet battery is fully charged and connected to a power outlet Restart the tablet. Go to Dell.com/support. Enter the Service Tag or Express Service Code and click Submit. NOTE:... -
Page 32: System And Setup Password
On the Drivers and Downloads screen, under the Operating System drop-down list, select BIOS. Identify the latest BIOS file and click Download File. You can also analyze which drivers need an update. To do this for your product, click Analyze System for Updates and follow the instructions on the screen. -
Page 33: Deleting Or Changing An Existing System And/Or Setup Password
Deleting or changing an existing system and/or setup password Ensure that the Password Status is Unlocked (in the System Setup) before attempting to delete or change the existing System and/or Setup password. You cannot delete or change an existing System or Setup password, if the Password Status is Locked. To enter the System Setup, press F2 immediately after a power-on or reboot. -
Page 34: Troubleshooting
The following steps can be used to run the ePSA diagnostic utility in DOS mode without using an external keyboard. Power on the system. Before the Dell Logo is displayed, immediately press the Volume Up button to get the Boot Menu Scroll down the Diagnostics and then press the Volume Down button to select The tablet will begin running the ePSA utility. -
Page 35: Real Time Clock (Rtc) Reset
Real Time Clock (RTC) reset The Real Time Clock (RTC) reset function allows you or the service technician to recover the recently launched model Dell Latitude and Precision systems from select No POST/No Boot/No Power situations. You can initiate the RTC reset on the system from a power off state only if it is connected to AC power. -
Page 36: Identifying The Ac Adapter Shipped With Your Tablet
AC adapters are shipped based on customer requirements or based on regions. To identify the AC adapter shipped with your tablet, you can verify it from the service tag. Go to Dell. com/support Type the service tag of your tablet. -
Page 37: Contacting Dell
Dell product catalog. Dell provides several online and telephone-based support and service options. Availability varies by country and product, and some services may not be available in your area. To contact Dell for sales, technical support, or customer service issues: Go to Dell.com/support.
Need help?
Do you have a question about the Latitude 5285 2-in-1 and is the answer not in the manual?
Questions and answers