Table of Contents
Advertisement
Available languages
Available languages
Advertisement
Chapters
Table of Contents

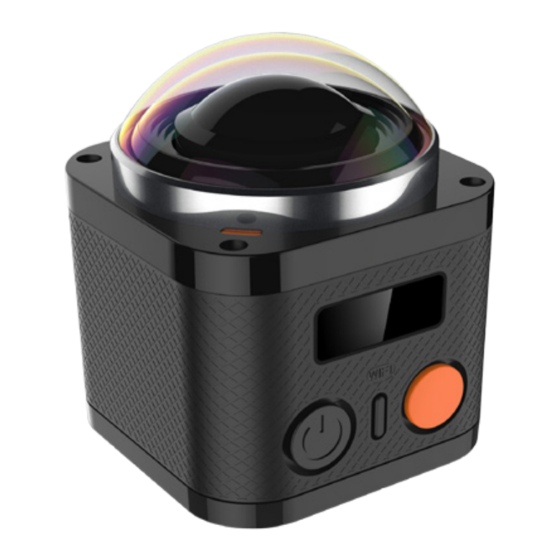
Summary of Contents for QIMMIQ DV360 4K
- Page 1 DV360 4K MODE D’EMPLOI GUÍA DE USUARIO USER GUIDE...
-
Page 4: Table Of Contents
MODE D’EMPLOI DESCRIPTION (PAGE 3) DESCRIPTION DE L’AFFICHAGE UTILISER VOTRE APPAREIL RÉGLAGES DE CAMÉRA TÉLÉCOMMANDE CONFIGURATION DU WI-FI UTILISER L’APPLICATION FONCTIONNALITÉS CLÉS CONTENU DU CARTON CONSIGNES DE SÉCURITÉ INSTRUCTIONS POUR LA MISE AU REBUT GARANTIE ET SERVICE APRÈS-VENTE... -
Page 5: Description (Page 3)
DESCRIPTION (PAGE 3) Lentille Protège-carte étanche DEL de chargement Interrupteur de l'obturateur Affichage Port pour carte micro SD Bouton ALIMENTATION Port micro-USB Bouton WI-FI Bouton RÉINITIALISATION Bouton PRISE DE VUE Port HDMI DESCRIPTION DE L’AFFICHAGE... -
Page 6: Utiliser Votre Appareil
Mode Vidéo/Photo Qualité Vidéo/Photo Date Niveau de batterie Nombre de photos/Temps de vidéo total disponible État de la carte mémoire UTILISER VOTRE APPAREIL Insérer la carte mémoire Votre appareil ne dispose pas de mémoire interne. Pour commencer, insérez une carte mémoire micro SD : Appuyez sur le bouton de commande situé sur le cache d’interface ;... - Page 7 Allumer/Éteindre l’appareil Allumer Appuyez sur le bouton « ALIMENTATION » et maintenez-le enfoncé pendant 2 secondes, l’appareil va s’allumer. Éteindre Appuyez sur le bouton « ALIMENTATION » et maintenez-le enfoncé pendant 2 secondes, l’appareil va s’éteindre. Charger la batterie Avant la première utilisation de l’appareil, chargez complètement la batterie : Branchez l’appareil DV360 à...
-
Page 8: Réglages De Caméra
Faire une vidéo / Prendre un cliché Faire une vidéo Le mode Vidéo est défini par défaut. Appuyez sur le bouton « PRISE DE VUE » pour commencer à filmer. Appuyez de nouveau sur le bouton pour arrêter l’enregistrement. Prendre un cliché Appuyez sur le bouton ALIMENTATION pour basculer en mode Cliché. - Page 9 Arrêt : la vidéo sera séparée dans des fichiers différents toutes les 12 min si 4K est sélectionné, toutes les 25 min si 1 080 p/ 720 p / VGA est sélectionné. Par exemple, si vous sélectionnez « 5 min », après un enregistrement de 20 min, la vidéo dans 4 clips vidéo de 5 min chacun.
- Page 10 Mode En mode Rafale, l’appareil prend automatiquement Rafale plusieurs clichés en même temps. Vous pouvez désactiver le mode Rafale ou choisir de prendre 3, 5 ou 10 clichés. Mode Cap- Cette fonctionnalité vous permet de définir les inter- ture valles auxquels sont pris les clichés. Vous pouvez définir les intervalles de temps sur Arrêt, 3 s, 5 s, 10 s, 30 s, 1 min.
- Page 11 Balance des Vous pouvez ajuster la balance des blancs lorsque blancs les conditions de luminosité sont différentes : Auto, Lumière du jour, Nuageux, Fluorescent ou Aqua- tique. Le mode par défaut est Auto. Il s’agit de mesurer la sensibilité du capteur de l’appareil numérique à...
-
Page 12: Télécommande
Effacer Effacer le dernier fichier Formater Formater la carte mémoire : effacer les données sauvegardées sur la carte SD. Configuration Réinitialiser tous les paramètres de l'appareil aux par défaut paramètres d'usine par défaut. Version Vous pouvez contrôler la version logicielle de l'appareil ici TÉLÉCOMMANDE A. -
Page 13: Configuration Du Wi-Fi
que l’appareil est allumé. Indicateur droit : clignote en vert pendant l’enregistrement d’une vidéo : clignote au moment de la prise de chaque cliché. NOTE : Veuillez apparier votre appareil et la télécommande avant d’utiliser la fonction de commande à distance. Apparier votre appareil et la télécommande Assurez-vous que votre appareil et votre télécommande ont suffisamment de mémoire. -
Page 14: Utiliser L'application
pourrez voir « WIFI T_360 » dans la liste. Cliquez pour connecter l’appareil. Saisissez le mot de passe « 12345678 » pour connecter l’appa- reil à votre appareil sans fil. Ouvrez l’application « DV360 ». UTILISER L’APPLICATION Présentation de l’interface utilisateur... - Page 15 Ajouter/Supprimer la connexion entre l'appareil et l'appareil intelligent Voir les clichés pris Voir les vidéos enregistrées Cliquer pour entrer dans le mode d'affichage en temps réel Sélection du mode de capture/vidéo : réalité virtuelle, sphère à 180°, sphère à 360°, « fisheye », plat à 180°, plat à 360°, 4 côtés, cylindrique, 2 bandes à...
- Page 16 Transférer des fichiers sur un PC Vous pouvez transférer des vidéos et clichés que vous avez pris sur un PC. Branchez votre appareil et votre PC via le câble USB fourni. L’appareil va s’allumer automatiquement et afficher deux options, « Stockage de masse » et « Appareil PC ». Sélectionnez « Stoc- kage de masse ».
- Page 17 La TV peut être utilisée pour voir les vidéos enregistrées, sauve- gardée sur la carte mémoire. Appuyez sur le bouton « ALIMENTATION » et maintenez-le enfon- cé pendant 2 secondes pour éteindre l’appareil. Convertir une vidéo à l’aide du PC Vous devez télécharger le programme Panorama360Demo pour convertir les vidéos de votre appareil à...
- Page 18 Étape 3 : cliquez sur « Ouvrir » pour choisir la vidéo que vous souhai- tez transférer, puis le transfert débute. Une fois le transfert terminé, vous pouvez charger le fichier sur You- Tube. Comment charger un fichier sur YouTube ? Ouvrez l’application DV360 une fois votre appareil connecté...
-
Page 19: Fonctionnalités Clés
FONCTIONNALITÉS CLÉS Résolution vidéo : 4K à 24 fps, 2K à 30 fps, 1 080 p à 60 fps, 1 080 p à 30 fps, 720 p à 120 fps, 720 à 60 fps. Résolution de l’image : 12,4MP Lentille : Champ de vision 360 degré (horizontal), 220 degré (vertical) Fonction Wi-Fi avancée, jusqu’à... - Page 20 corrosifs ou de l’alcool. • N’entreposez pas et n’utilisez pas votre appareil dans des endroits très chauds. • N’exposez pas l’objectif à des sources lumineuses extrêmes (par ex. lumière du jour, etc.) pendant de longues périodes. • Évitez d’utiliser ou d’entreposer votre appareil dans des endroits d’où...
- Page 21 pas d’images ou de vidéos provenant d’autres appareils. Elles ne seraient pas reconnues. • La modification de données directement sur la carte mémoire n’est pas recommandée. Copiez les données sur le disque dur de votre ordinateur avant de procéder à des modifications. •...
-
Page 22: Instructions Pour La Mise Au Rebut
INSTRUCTIONS POUR LA MISE AU REBUT Recyclage adéquat des batteries (Applicable aux pays de l’Union européenne et autres pays européens dans lesquels des systèmes de collecte sélective sont mis en place.) Ce symbole sur la batterie et le manuel du produit indique que la batterie de ce produit ne doit pas être éliminée en fin de vie avec les déchets ménagers ordinaires. -
Page 23: Garantie Et Service Après-Vente
Le produit a été mis sur le marché pour la première fois en septembre 2016. Google Play™ est une marque déposée de Google, Inc. App Store™ est une marque déposée d’Apple, Inc. Wi-Fi™ est une marque déposée de Wi-Fi Alliance. QIMMIQ™ est une marque déposée de JLCA Holding. - Page 24 GUÍA DEL USUARIO DESCRIPCIÓN (PAG. 3) DESCRIPCIÓN DE LA PANTALLA USO DE LA CÁMARA AJUSTES DE LA CÁMARA CONTROL REMOTO CONFIGURACIÓN DE LA CONEXIÓN WI-FI USO DE LA APLICACIÓN CARACTERÍSTICAS PRINCIPALES CONTENIDO DE LA CAJA INSTRUCCIONES DE SEGURIDAD...
-
Page 25: Descripción (Pag. 3)
DESCRIPCIÓN (PAG. 3) Objetivo Cubierta estanca para tarjetas LED de carga Interruptor en la cubierta Pantalla Ranura para tarjeta micro SD Botón POWER Ranura micro USB Botón WI-FI Botón RESET Botón SHOOT Ranura HDMI DESCRIPCIÓN DE LA PANTALLA... -
Page 26: Uso De La Cámara
Modo de vídeo/fotografías Calidad de vídeo/fotografías Fecha Nivel de batería Tiempo de vídeo/cantidad de fotografías total disponible Estado de la tarjeta de memoria USO DE LA CÁMARA Inserción de la tarjeta de memoria Esta cámara no tiene memoria interna. Antes de nada, inserte una tarjeta de memoria micro SD: Pulse el botón de control en la cubierta para tarjetas: se abrirá... - Page 27 Encendido/apagado de la cámara Encendido Mantenga presionado el botón “POWER” durante 2 segundos: la cámara se encenderá. Apagado Mantenga presionado el botón “POWER” durante 2 segundos: la cámara se apagará. Carga de la batería Antes de usar la cámara por primera vez, cargue completamente la batería: Conecte la cámara DV360 a un ordenador (u otra fuente de alimentación USB) con el cable USB (suministrado).
-
Page 28: Ajustes De La Cámara
para detener la grabación. Toma de fotografías Pulse el botón “POWER” para pasar al modo de fotografías. Pulse el botón “SHOOT” para tomar una fotografía. AJUSTES DE LA CÁMARA Pulse el botón “POWER” para ver el icono Pulse el botón SHOOT para acceder al menú Ajustes. En él se encuentran los submenús Vídeo y Fotografía, así... - Page 29 Lapso de Esta función permite establecer los intervalos a los tiempo que se capturará un fotograma. Están disponibles los siguientes intervalos: Desactivado, 1 s, 5 s, 10 s, 30 s, 1 min. STAMP HDR realiza varias fotografías con distintas imágenes (HDR) de exposición, para después combinarlas mediante software para formar una única imagen.
- Page 30 Modo de Esta función permite establecer los intervalos a los captura que se capturará un fotograma. Están disponibles los siguientes intervalos: Desactivado, 3 s, 5 s, 10 s, 30 s, 1 min. STAMP HDR realiza varias fotografías con distintas imágenes (HDR) de exposición, para después combinarlas mediante software para formar una única imagen.
- Page 31 Aquí se mide la sensibilidad a la luz del sensor de la cámara digital. Las opciones disponibles son AUTO, 100, 200, 400, 800, 1.600. Valor de Permite establecer el valor de exposición a la luz: exposición +2,0,+1,7,+1,0, +0,7, +0,0, -0,7, -1,0, -1,7, -2,0. Nitidez Establece la nitidez de la imagen: Alta, Normal o Baja Fecha / Hora...
-
Page 32: Control Remoto
CONTROL REMOTO A. Botón de fotografía Pulse el botón una vez para tomar una fotografía. B. Botón de vídeo Pulse el botón una vez para empezar a grabar vídeo y vuelva a pulsarlo para parar. C. Botón de apagado Mantenga el botón presionado durante 4 segundos para apagar la cámara. -
Page 33: Configuración De La Conexión Wi-Fi
control remoto y el botón POWER de la cámara al mismo tiempo. Cuando el indicador intermedio se ilumine en color azul, el proce- so de configuración habrá terminado. NOTA: Solo es necesario emparejar el control remoto una vez. A partir de ese momento, la cámara se reconocerá automáticamente. La función Wi-Fi y el control remoto no pueden utilizarse al mismo tiempo. -
Page 34: Uso De La Aplicación
USO DE LA APLICACIÓN Introducción a la interfaz de usuario... - Page 35 Agrega/elimina la conexión entre la cámara y el dispositivo inalámbrico. Muestra la fotografía tomada. Permite ver los vídeos grabados. Haga clic para acceder al modo de visualización en tiempo real. Selección del modo de captura de escenas de vídeo: VR, 180 esférico, 360 esférico, ojo de pez, 180 plano, 360 plano, 4 lados, cilíndrico, 2 bandas de 180 Interruptor de modo de vídeo/fotografías...
- Page 36 YouTube Formatear: Elimina los datos de la tarjeta de memoria de la cámara. Número de dispositivo: El número de la cámara conectada. Versión de la aplicación: Número de versión actual Transferencia de archivos a un PC Es posible transferir los vídeos y fotografías capturados a un PC. Conecte la cámara al PC con el cable USB suministrado.
- Page 37 Conecte la cámara al televisor con un cable micro HDMI. Encienda la cámara. El televisor puede utilizarse para ver los vídeos grabados y alma- cenados en la tarjeta de memoria. Mantenga presionado el botón “POWER” durante 2 segundos para apagar la cámara. Conversión de vídeo con el PC Para poder convertir vídeos de la cámara en modo 360 y cargarlos en YouTube, por ejemplo, necesitará...
- Page 38 Paso 3: Haga clic en “Abrir” para elegir el vídeo que desee transferir. La transferencia comenzará. Cuando haya terminado, podrá cargar el vídeo en YouTube. ¿Cómo cargar vídeos en YouTube ? Abra la aplicación DV360 tras conectarse correctamente a la cámara.
-
Page 39: Características Principales
CARACTERÍSTICAS PRINCIPALES Resolución de vídeo: 4K a 24 fps, 2K a 30 fps, 1.080 p a 60 fps, 1.080 p a 30 fps, 720 p a 120 fps, 720 p a 60 fps. Resolución de imagen: 12,4 MP OBJETIVO: FOV 360 grados (horizontal), 220 grados (vertical) Función Wi-Fi avanzada, alcance hasta 15 metros Compatible con control remoto inalámbrico de 2,4 GHz Compatible con aplicación personalizada para dispositivos Android y iOS... - Page 40 corrosivas. • No guarde ni utilice la cámara en lugares con temperaturas muy elevadas. • No exponga el objetivo a fuentes de luz fuertes (luz solar, etc.) durante largos periodos de tiempo. • Procure no utilizar ni guardar la cámara en lugares con campos magnéticos fuertes.
- Page 41 • No se recomienda editar datos directamente en la tarjeta de memoria. Copie los datos en el disco de su ordenador antes de editarlos. • Apague el producto antes de extraer la tarjeta de memoria para evitar daños. • No desconecte la alimentación ni apague el producto durante los procesos de actualización de firmware.
- Page 42 INSTRUCCIONES DE ELIMINACIÓN Reciclaje correcto de las baterías (Aplicable en la UE y otros países europeos con sistemas de devolución de baterías independientes). Esta marca en la batería y la documentación del producto indica que la batería de este producto no debe desecharse con otros residuos domésticos al final de su vida útil.
- Page 43 Este producto fue comercializado por primera vez en septiembre de 2016. Google Play™ es una marca comercial de Google, Inc. App Store™ es una marca comercial de Apple, Inc. Wi-Fi™ es una marca comercial de Wi-Fi Alliance. QIMMIQ™ es una marca comercial de JLCA Holding.
- Page 44 USER GUIDE DESCRIPTION (PAGE 3) DISPLAY DESCRIPTION USING YOUR CAMERA CAMERA SETTINGS REMOTE CONTROL WI-FI SET-UP USING THE APPLICATION RESET THE CAMERA KEY FEATURES BOX CONTENT SAFETY INSTRUCTION DISPOSAL INSTRUCTIONS WARRANTY AND AFTER-SALES SERVICE...
-
Page 45: Description (Page 3)
DESCRIPTION (PAGE 3) Lens Waterproof card cover Charging LED Cover switch Display Micro-SD card slot POWER button Micro-USB slot WI-FI button RESET button SHOOT button HDMI slot DISPLAY DESCRIPTION... -
Page 46: Using Your Camera
Video/Picture mode Video/Picture quality Date Battery level Total video time/picture quantity available Memory card status USING YOUR CAMERA Insert memory card You camera doesn’t have internal memory. First insert a micro SD memory card: Press the button control on the interface cap, it will pop open automatically, then insert a memory card with correct direction. - Page 47 Power On / Off the camera Turn on Press and hold the “POWER” button for 2 seconds, the camera will turn on. Turn off Press and hold the “POWER” button for 2 seconds, the camera will turn off. Charge the battery Before using the camera for the first time, fully charge the battery firs: Connect DV360 camera to a computer (or other USB power source) using the USB cable (provided).
-
Page 48: Camera Settings
Take a picture Press POWER button to switch to Picture mode. Press SHOOT button to take a picture. CAMERA SETTINGS Press “POWER” button to see icon. Press SHOOT button to enter Settings menu. You have Video and Picture settings sub menus and General settings sub menu. -
Page 49: Picture Settings
Time Lapse This feature allows you to set the intervals at which a frame is captured. You can set the time intervals as Off, 1 sec, 5 sec, 10 sec, 30 sec, 1 min. STAMP HDR is to use more photos with different exposure (HDR) images, and then use software to combine them into one image. -
Page 50: General Settings
STAMP HDR is to use more photos with different exposure (HDR) images, and then use software to combine them into one image. Its advantage is that eventually you can get a part no matter in the shadows or highlights have detail pictures. You can set up as ON or OFF. General Settings Beep Turn the key tone on/off... -
Page 51: Remote Control
Frequency Select correct light frequency to avoid strobing: 50Hz or 60Hz. Language Choose your language: English, French or Spanish Delete Delete the last file Format Format memory card: Erase the data saved on SD card. Default Reset all camera settings to factory default. Version You can check your camera software version here REMOTE CONTROL... -
Page 52: Wi-Fi Set-Up
Middle indicator: light with blue when connected to the camera, light with red when charging and light with purple when charging and camera is on. Right indicator: Blink with green during video recording; flicker once for each picture, when picture captured. NOTE: Please pair your camera and remote control before using the remote. -
Page 53: Using The Application
device. Open the Application “DV360”. USING THE APPLICATION User Interface Introduction... -
Page 54: Application Settings
Add/Delete camera and smart device connection View the photo you shot View the videos you recorded Click to enter real time viewing mode Video/capture scene mode selection : VR, 180° sphere, 360° sphere, fisheye, 180° flat, 360° flat, 4 sides, Cylindric, 2 bands 180°... - Page 55 Transfer files to PC You can transfer captured videos and pictures to PC. Connect your camera and PC via a provided USB cable. The camera will turn on automatically, and shows two options, “Mass Storage” & “PC Camera”. Choose “Mass Storage”. Select the files you want to transfer to your computer.
- Page 56 Convert video using the PC You will need to download a Panorama360Demo program in order to convert videos from your camera in 360° mode and upload them to Youtube, for example. Download the program from the website: www.sopeg.com Step 1: Open Panorama360Demo. Step 2: Click SET, set according to the following interface.
-
Page 57: Reset The Camera
How to upload to Youtube ? Open DV360 application after connecting with camera success- fully. Enter into Video folder. Press and hold the video you would like to upload, click “down- load” After downloaded successfully, connect with the network, enter into video folder. -
Page 58: Box Content
Support customized App for Android & iOS device Waterproof: 10 meters (without waterproof case) 0.83” TFT LCD screen 3.7V/1200mAh built-in Lithium-ion battery BOX CONTENT 1 x Camera, 1 x 3M adhesive for curved mount, 1 x Remote control, 1 x 3M adhesive for Flat mount, 1 x Portable case, 1 x Lock bolt, 2 x Quick release mount, 1 x USB Cable, 1 x Curved mount;... - Page 59 • If the battery overheats during charging, turn off the camera, remove the battery and wait until it cools. • If a battery leaks inside the product, please contact the technical service. If contact battery fluid with the skin, rinse thoroughly and consult your doctor.
-
Page 60: Disposal Instructions
a dry cloth, thoroughly wash with soap and rinse with clear water If liquid crystal enters your eyes, immediately rinse your eyes with plain water for at least 15 minutes, then consult your doctor. If the liquid crystal is ingested carelessly, immediately rinse your mouth with clean water and consult your doctor as soon as possible. -
Page 61: Warranty And After-Sales Service
The product was put on the market for the first time in September 2016. Google Play™ is a trademark of Google, Inc. App Store™ is a trademark of Apple, Inc. Wi-Fi™ is a trademark of Wi-Fi Alliance. QIMMIQ™ is a trademark of JLCA Holding.
Need help?
Do you have a question about the DV360 4K and is the answer not in the manual?
Questions and answers