Table of Contents
Advertisement
Quick Links
INTRODUCTION
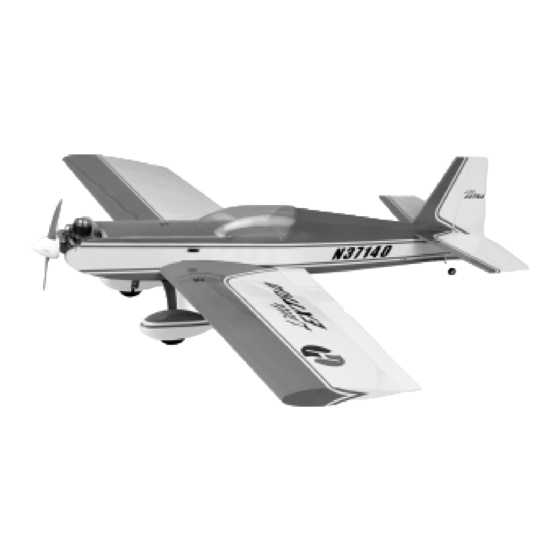
Congratulations on the purchase of the HERR ENGINEERING
Little Extra ARF kit! The Little Extra is one of the first true high
performance 1/2A fun-fly R/C type models to be available in an
Almost Ready to Fly format. Like larger fun-fly type sport models,
the Little Extra is loaded with a lot of features and truly
exhilarating performance potential. The airframe is very light,
beautifully built and engineered to last a long time. The covering
has been professionally applied and the trim scheme is just about
perfect for this type of model. The assembly process is very quick
and further enhanced by the completeness of the kit.
Properly powered and flown, the Little Extra is a very capable
fun-fly type model!
The airplane itself has been specifically
designed around the powerful little Norvel .074 BigMig R/C
engine. The kit includes a custom-cut motor mount assembly
specifically for this engine and even includes a custom aluminum
spinner insert for the spinner, designed to fit the .074 prop shaft.
In the air you will find it hard to believe that such a small model can
fly so "big". The Little Extra is fully capable of just about any R/C
maneuver you care to throw at it - point rolls, snaps, knife-edge,
inverted flight, lomcevaks, etc.
powered models could be so fun! Herr Engineering, that's who.
To take full advantage of the Little Extra's potential flight envelope,
we urge you to carefully review this Assembly Manual, paying
particular attention to the radio and battery equipment
suggestions.
These suggestions are based upon a lot of
experience with this design and should be heeded. The success
of this model is based upon its light ready-to-fly weight, so you
want to be sure your airborne equipment is as light as possible.
Finally, the Little Extra ARF design is not intended as a beginner's
R/C model. The design assumes that you are a proficient R/C
pilot, capable of flying relatively high-performance model aircraft.
RADIO EQUIPMENT
As mentioned previously, it is very important to select the correct
airborne radio equipment for your Little Extra ARF model. This
Assembly Manual will show the use of the following equipment.
This equipment is what we have used and can highly recommend
for the Little Extra ARF:
• 5 Micro Servos
(Hitec
™
• 1 Micro Receiver
(see suggested receivers below)
• 1 270-300 mAh Airborne Battery Pack
• 1 Hitec
™
Miniature Switch Harness
• 1 Hitec
™
6" Y-Harness
• 1 Hitec
™
6" Servo Extension
(*With these part numbers you must specify the connector type for your radio system)
Who knew flying small gas
HS-55 Servos used, (Hitec
™
(Hitec
™
P/N 57405*)
(Hitec
™
P/N 54403*)
(Hitec
P/N 57351*)
™
(Hitec
™
P/N 57344*)
We used and recommend the Hitec
this model. Of course you can use different brands of servos but
make sure they are the same size, weight, and output as the
HS-55 units.
IMPORTANT SERVO NOTE: The Hitec
in this kit all had off-the-shelf servo lead lengths of 10-1/2". This
meant that we did not have to add servo extensions to these
servos to reach the center of the wing. If you are using servos with
shorter leads, you will likely have to add servo lead extensions.
For receivers, we have used the Hitec
6 and the FMA M5 units. All three of these receivers are dual
conversion types. These receivers are light, have excellent range
and, because they are dual conversion types, they are perfect for
use at any typical R/C flying field. We do not recommend using
single conversion receivers for this model.
We used a Hitec
Little Extra models. In actual use, we found that after being fully
charged, we could fly for an honest 40 minutes or so before
needing to be recharged. The Y-harness is used to join the two
aileron servos and the 6" servo extension is required to connect
the ailerons to the receiver. We used the small Hitec
switch assembly in the interest of weight and size.
Finally, the transmitter you use for this model is important. For our
Little Extra ARF models, we used both the Hitec
Airtronics
®
systems offer multi-model memory and a host of easy-to-use
computer features that make radio set-up and flying a whole
easier and much more fun. If you do not use these transmitters or
similar units, the set-up and flying of your model is going to be
more difficult.
P/N 31055*)
ENGINE SELECTION:
As previously mentioned, the Little Extra ARF was specifically
designed to fly very nicely using the Norvel
engine. The use of this recommended engine provides really
1
™
™
™
270 mAh NiCad airborne battery pack for our
RD-6000 transmitters.
Both of these affordable
HS-55 Feather Servos for
™
HS-55 servos we used
#555, the Hitec
Electron
™
™
On/Off
™
Flash 4 and the
™
.074 BigMig R/C
Advertisement
Table of Contents

Summary of Contents for Herr little extra
- Page 1 Congratulations on the purchase of the HERR ENGINEERING HS-55 units. Little Extra ARF kit! The Little Extra is one of the first true high IMPORTANT SERVO NOTE: The Hitec ™...
- Page 2 Scissors Heat Iron and Trim Seal Tool COVERING MATERIAL: Masking Tape Paper Towels Your Little Extra ARF has been professionally covered using SIG AEROKOTE-LITE ™ iron-on covering film. This is a low temperature covering film that is both very tough and light, weighing only 5.9 grams per square foot.
- Page 3 WINGS: The wing in your Little Extra ARF kit is fully assembled and ready to use. Note that the aileron hinges are in place, but are NOT yet glued in place.
- Page 4 pre-drilled holes and against the bottom of the aileron. Repeat this hardwood mounting blocks and press it in place next to the servo, procedure to attach the opposite aileron control horn. beneath its mounting lug and use CA accelerator to set the glue. exposed "spike"...
- Page 5 movement if the connector hangs up anywhere within the wing. Next, move the transmitter stick to confirm that the servos are moving in the correct direction to produce right and left movement to the ailerons. If they are not moving in the correct directions, use the servo reversing feature on your transmitter to reverse their movement - this may require that you will again have to reposition the output arms to 90...
- Page 6 Turn the wing over and use another piece of tape along the hinge Remove the tape holding the ailerons in neutral. You can now test line to temporarily "lock" the aileron in this neutral position. the operation of the ailerons with your radio system. The ailerons Repeat this process with the opposite aileron.
- Page 7 Remove the stabilizer from the fuselage and mix a small amount of 5-minute epoxy. Apply a thin layer of glue to the top and bottom of the stabilizer slot - very little is actually needed. Slide the stabilizer/elevator assembly carefully back in place into the fuselage.
-
Page 8: Fuel Tank Assembly
in position to the opposite side, against the elevators. As before, body and check to see if the bent end of the tubing is close to the apply 3 or 4 drops of thin CA glue to each exposed hinge edge. top of the tank. - Page 9 However, some modelers may wish to use paint in the engine compartment and the mounting plate to make their Little Extra ARF models look a bit more "custom". We also like this look and decided to use gray fuel-proof paint. If you also want to achieve this look, now is the time to do it.
-
Page 10: Radio Installation
For now, leave the muffler, needle valve, propeller and spinner off transmitter throttle stick in the "full throttle" position (with Norvel ™ of the engine. These parts will be re-installed after the throttle .074 engine, the full throttle position has the output arm moving to servo and throttle pushrod are in place and functioning with the the rear of the fuselage). - Page 11 30" to 36" long and therefore leave a lot of their length this is done, needle nose pliers should be used to re-straighten the hanging off the rear of a small model, such as the Little Extra. wire on each side of the "V".
- Page 12 MODELER'S TIP (continued): We made our "bobbin" from a piece of 3/32" x 3/4" x 1-1/4" balsawood. From the receiver, measure the antenna out to 4-1/2" - no closer. This is the point to start neatly wrapping the antenna wire around the bobbin. Do not cross the wrapped antenna wire, simply lay it neatly next to each strand.
- Page 13 2) Now is the time to give some thought to the propeller that you will use on your engine. We have used a variety of propellers on our own Little Extra ARF models and have learned that different brands all seem to have different prop shaft hole diameters.
-
Page 14: Center Of Balance
™ .074 engine has an exhaust outlet that can be Little Extra and get a feel for how effective these movements are, you can increase or decrease the movements as desired. positioned to any desired angle. We positioned ours to aim the... -
Page 15: Academy Of Model Aeronautics
- these can be changed later to suit your particular preferences. You will also find that the Little Extra spins very nicely and will exit LIMIT OF LIABILITY the spin almost instantaneously after releasing the controls. We have managed some very respectable "flat spins"... - Page 16 HERR LITTLE EXTRA LOG BOOK Date of first flight: Comments:...
Need help?
Do you have a question about the little extra and is the answer not in the manual?
Questions and answers