Table of Contents
Advertisement
Advertisement
Table of Contents

Summary of Contents for Raven RAVEN RVZ03
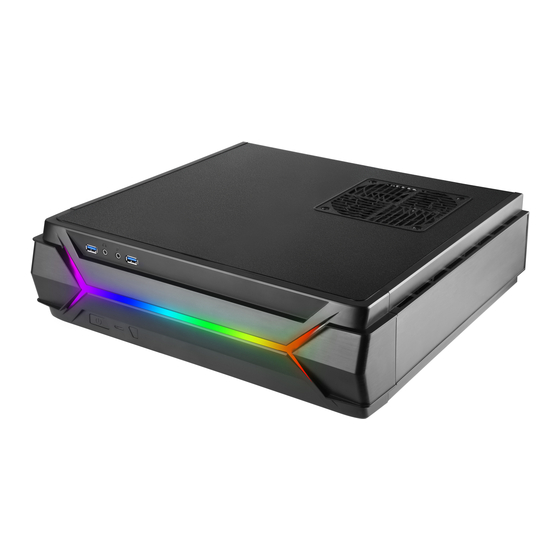
- Page 1 R edefine SFF computing with flair Redefine SFF computing with flair...
- Page 3 RVZ03 Redefine SFF computing with flair Installation and system optimization guide: The following manual and guides were carefully prepared by the SilverStone engineering team to help you maximize the potential of your SilverStone product. Please keep this manual for future reference when upgrading or performing maintenance on your system.
-
Page 4: Specifications
Redefine expectations Specifications Model No. SST-RVZ03B Material Reinforced plastic outer shell, steel body Motherboard Mini-DTX, Mini-ITX Drive Bay External Internal 2.5" x 4* Cooling System 1 x 120mm fan, 1500rpm, 18dBA Bottom 1 x 120mm fan, 1500rpm, 18dBA Expansion Slot 1 x 120mm fan slot Front I/O Port USB 3.0 x 2, Audio x 1, MIC x 1... - Page 5 Disassemble Chart 2.5" HDD X 2 2.5" HDD X 1 FAN FILTER X 1 HDD CAGE 2.5" HDD X 1 TOP COVER FAN FILTER X 2 12015 FAN X 1 12015 FAN X 1 USB 3.0 + SPK + MIC MINI-ITX (OPTION) POWER BUTTON POWER LED...
- Page 6 Disassemble Chart FRONT BACK SIDE LEFT SIDE RIGHT LEFT RIGHT...
- Page 7 lnstallation Guide Before you begin, please make sure that you 1. Have all components collected. 2. Check that all components do not have compatibility problems with each other or with the case. 3. If possible, assemble the components outside the case first to make sure they are working. 4.
- Page 8 lnstallation Guide Отвинтите винт кронштейна блока Unscrew the screws from PSU bracket питания и извлеките его then remove it PS U 케 이 스 의 나 사 를 풀 어 케 이 스 를 Lösen Sie zum Abnehmen die Schraube 분리합니다...
- Page 9 lnstallation Guide Если вы собираетесь использовать If you want to use SilverStone NT06-PRO SilverStone NT06-PRO или аналогичную or other similar CPU cooler, please систему охлаждения процессора, relocate the top panel 120mm fan to the переставьте 120-мм вентилятор с верхней bottom vent near the graphics card area панели...
- Page 10 lnstallation Guide Если вы собираетесь использовать We recommend at this point connecting SilverStone NT06-PRO или аналогичную all the necessary cables including the систему охлаждения процессора, SATA cables to the motherboard переставьте 120-мм вентилятор с верхней панели на нижнюю панель с вентиляционными отверстиями...
- Page 11 lnstallation Guide Установите кронштейн блока питания в Place the PSU bracket on top of the верхней части корпуса и подключите chassis then connect the power cord to кабель питания к блоку питания the PSU PSU 브래킷을 섀시 상단에 위치시킨 후 Bringen Sie die Netzteilhalterung im 전원...
- Page 12 lnstallation Guide Снимите крышку слота расширения и Remove expansion slot cover and install установите графическую карту на graphics card into the graphics card кронштейн крепления графической support bracket карты 확장 슬롯 커버를 벗기고 그래픽 카드를 Entfernen Sie die Abdeckung des 그래픽...
- Page 13 lnstallation Guide Install 2.5" HDD/SSD onto the graphics card support bracket Установите 2,5-дюймовый жесткий или твердотельный диск через слот на крепежный кронштейн графической карты Installieren Sie eine 2,5-Zoll-Festplatte/SSD an der Grafikkartenhalterung 2.5" HDD/SSD 방식 를 그래픽 카드 지지 브래킷에 설치합니다 Installez le lecteur de DD/SSD de 2,5"...
- Page 14 lnstallation Guide Подключите кабель от световой ленты RGB к материнской плате с поддержкой Connect cable from the RGB light strip to RGB enabled motherboard. RGB. Если ваша материнская плата не имеет разъёма RGB 4pin (+12В, G, R, B), If your motherboard does not have an RGB 4pin socket (+12V, G, R, B), пожалуйста, установите...
- Page 15 lnstallation Guide Установите крепежный кронштейн Install graphics card support bracket графической карты в корпус и при into the chassis and connect the power необходимости подключите кабель cord to the graphics card if needed питания к графической карты 그래픽 카드 지지 브래킷을 섀시에 설치하고 Installieren Sie die Grafikkartenhalterung 필요한...
- Page 16 P r ä f e r e n z en vie r Gummi füße z ur 고무 스탠드 4개을 부착하거나 수직 용도의 horizontalen Nutzung auf oder installieren 고무 패드를 설치하십시오. 설치를 돕기 위해 die Gummipolster zur vertikalen Nutzung. 각 방향으로 해당 RAVEN 로고가 표시되어 Ein entsprechendes RAVEN-Logo ist für 있습니다 die jeweilige Installationsausrichtung mitgeliefert Selon les exigences ou les préférences,...
- Page 17 Connector definition (1) Front Panel Connectors Guide Power switch and reset switch installation guide Please refer to the motherboard manuals for the motherboard’s “Front Panel Connector” or “System Panel Connector” pin definition Power switch and reset switch have no polarity, so they can be connected in any orientation Bitte suchen Sie in der Motherboard-Dokumentation nach der Pinbelegung der Anschlüsse des Frontbedienfeldes („Front Panel Conne oder „...
- Page 18 Connector definition LED indicators installation guide Please refer to the motherboard manuals for the motherboard’s “Front Panel Connector ” or “System Panel Connector” pin definition.; the white/blackwires are negative while other colors are positive wires Bitte suchen Sie in der Motherboard-Dokumentation nach der Pinbelegung der Anschlüsse des Frontbedienfeldes („Front Panel Connectors“ oder „ System Panel Connectors“).
- Page 19 Connector definition (2) RGB LED connector guide RVZ03 includes SilverStone’s custom RGB control box, the LSB01, so you can control front panel RGB light strip’s color and lighting mode by software or hareware Software control: A. If you want to control via motherboard’s RGB software, just make sure your motherboard has built-in RGB 4pin signal output (+12V, G, R, B) socket, then connect to it using the included RGB 4pin cable directly from RGB light strip from the front of the case without using the LSB01 B.
- Page 20 La RVZ03 incluye la caja de control RGB personalizada de SilverStone, la LSB01, para que pueda controlar el color y el modo de iluminación de la cinta de luz RGB del panel frontal mediante software o hardware Control por software: A.
- Page 21 RVZ03에는 SilverStone의 사용자 지정 RGB 컨트롤 박스인 LSB01이 포함되어 있으므로 소프트웨어 또는 하드웨어를 사용하여 전면 패널의 RGB 라이트 스트립 색상과 조명 모드를 제어할 수 있습니다 소프트웨어 제어: A. 마더보드의 RGB 소프트웨어를 통해 제어하려면 마더보드에 내장 RGB 4핀 신호 출력(+12V, G, R, B) 소켓이 있는지 확인한 다음 이를 동봉된 RGB 4v핀...
- Page 22 RVZ03內附銀欣特製RGB控制盒-LSB01,可選擇藉由軟體或硬體控制,將前面板的RGB LED色彩及模式進行變更軟體控制: A.若想藉由主機板內附軟體進行燈光控制,僅需確認您的主機板是否內建RGB 4pin (+12V, G, R, B)訊號輸出針腳插座,不需透過控制盒LSB01,直接將機殼內 的RGB 4pin訊號線連接至主機板即可 B.若您有額外的RGB燈條/裝置如SilverStone LS02或FG121,也可同時直接透過內附控制盒LSB01或連接Y型延長線進行串接,以同步由主機板軟體來控制燈光, 安裝步驟如下 1.將控制盒LSB01上的開關切換至「MB」 2.將RGB 4pin線材連接至主機板與LSB01 3.將機殼內的前面板RGB 4pin線連接至LSB01 4.利用LSB01的背面磁鐵直接吸附於機殼內部欲安裝的位置 5.若有必要,可使用內附的Y型延長線連接燈條 6.連接其他品牌,非SilverStone RGB燈條或裝置時,務必確認接頭與針腳定義及方向相同硬體控制: 將取代前面板的Reset重開機按鍵功能,藉由隨附的RGB控制盒-LSB01進行硬體控制燈號 1.將控制盒LSB01上的開關切換至「IC」 2.將機殼Reset線材連接至LSB01的杜邦2pin插座,並接上隨附的2轉大4pin供電線 3.將機殼內的前面板RGB 4pin線連接至控制盒 4.若您有額外的RGB燈條/裝置如SilverStone LS02或FG121,可直接連接LSB01或使用內附的Y型延長線 5.連接其他品牌,非SilverStone RGB燈條/裝置時,務必確認接頭與針腳定義及方向相同 6.利用控制盒的背面磁鐵直接吸附於機殼內部欲安裝的位置 7.連接電源供應器的大4pin接頭至LSB01的2轉大4pin供電線 8.通電後即可利用機殼Reset按鍵切換顏色模式 9.內建硬體控制IC模式下,長按4秒Reset按鍵可馬上關閉RGB燈光,輕按一下即恢復關閉前的選項 RVZ03内附银欣特制RGB控制盒-LSB01,可选择藉由软件或硬件控制,将前面板的RGB LED色彩及模式进行变更软件控制: A.若想藉由主板内附软件进行灯光控制,仅需确认您的主板是否内建RGB 4pin (+12V, G, R, B)讯号输出针脚插座,不需透过控制盒LSB01,直接将机箱内的RGB 4pin讯号线连接至主板即可...
- Page 23 Connector definition (3) Front I/O connector guide Below are the front I/O connectors pin definition, please also check your motherboard manual to cross reference with motherboard’s front I/O pin headers. SilverStone’s I/O connectors are in block type to simplify installation Nachstehend finden Sie die Pinbelegung der vorderen E/A-Anschlüsse;...
- Page 24 Component size limitations The RVZ03 can accommodate all standard size components and even some that are out of spec, please refer to the following guidelines for component selection and future upgrade considerations (1) CPU cooler height limitation A.Height limitation: The RVZ03 has 83mm height limitation for CPU cooler B.Upper boundary: the cooler can protrude 11mm over the motherboard’s top edge C.Front boundary: The clearance toward the front of the chassis is 4.2mm A.Höhenbeschränkung: Das RVZ03 unterstützt beim CPU-Kühler eine Maximalhöhe von 83 mm...
- Page 25 Component size limitations (2) PSU limitation RVZ03’s maximum depth for a standard PS/2 (ATX) power supply is 150mm, but installation of a 150mm deep power supply will require sacrificing a 2.5" drive space and no room for cable connection after installation. So if using a 150mm deep modular power supply, make sure to connect all cables prior to installing it into the case.
- Page 26 Component size limitations (3) Graphics card/expansion card length limitation A. Length limitation RVZ03 can support 13" (330mm) consumer level graphics cards. Please contact us if you find a card that does not fit RVZ03 nimmt bis zu 330 mm lange Grafikkarten auf. Bitte wenden Sie sich an uns, falls Sie keine passende Karte finden können RVZ03 peut supporter la plupart des cartes graphiques du marché...
- Page 27 (i)La largeur standard pour les cartes graphiques est 4,38" (111mm) (ii)Avec le support de carte graphique, la largeur maximale permise pour les cartes graphiques est 5,16" (131mm) (iii)Sans le support de carte graphique, la largeur maximale permise pour les cartes graphiques est 5,88" (149mm) (i)La anchura estándar para las tarjetas gráficas es de 4,38"...
- Page 28 Component size limitations C. Thickness limitation 3.23 34.8 (i)Calculated from the bottom of the graphics card PCB to the top, the total thickness limitation is 68mm (ii)With the standard 34.8mm-thick dual slot graphics card installed, the maximum thickness of the fans is 32mm (iii)The thickness of the components on the back of the graphics card is limited to 3mm in the area supported by the graphics card holder;...
- Page 29 Optimal Thermal Performance Layout If you use graphics card with omni-direction or open air cooler, we recommend having two case fans on the bottom vents Wenn Sie eine Grafikkarte mit omnidirektionalem und Open-Air-Kühler verwenden, empfehlen wir zwei Gehäuselüfter an den unteren Belüftungsöffnungen Si vous utilisez une carte graphique multi-directionnelle ou un refroidisseur à...
- Page 30 Vertical/horizontal placement A. Because most vents are situated on the bottom, placing the RVZ03 vertically will result in better temperature than in horizontal position B. When using the case horizontally, please be sure of adhering rubber stands to the bottom A.
- Page 31 Le SilverStone TD03-SLIM est compatible avec le RVZ03 en option si un refroidisseur liquide tout en un (AIO) est nécessaire La SilverStone TD03-SLIM es compatible con la RVZ03 como opción si es necesario un refrigerador líquido todo en uno (AIO) TD03-SLIM di SilverStone è...
- Page 32 Il y a un certain espace entre le panneau avant et le côté de la carte graphique réservé pour le cheminement des câbles Existe algo de espacio entre el panel frontal y la parte lateral de la tarjeta gráfica reservado para el enrutado de cables C’è...
- Page 33 La conception à pression d'air positive du RVZ03 est une configuration efficace permettant de réduire l'accumulation de la poussière dans le boîtier. De petites particules d'air ou de peluche vont s'accumuler avec le temps sur les filtres d'aspiration, et non sur les composants à l'intérieur du boîtier. Pour conserver les excellentes performances de refroidissement du RVZ03 au fil des ans, nous vous recommandons de nettoyer l'ensemble des filtres des ventilateurs, tous les trois ou six mois (selon votre environnement).
- Page 34 Fan removal guide Сняв верхнюю крышку, можно демонтировать T h e f a n o n t h e t o p c o v e r c a n b e установленный на ней вентилятор dismounted after removing the top cover 상단...
- Page 35 Protect Your Computer Kensington Security Slot Note: Cable security lock is not included with RVZ03 A lock and cable can be purchased on the market for use with the Kensington security slot located on rear of RVZ03 to prevent removal of the entire computer or top cover Caution: Please check for compatibility before purchasing the lock and cable for use with RVZ03’s Kensington security slot Im Fachhandel erhalten Sie passende Schlösser und Kabel zum Anschluss an den Kensington-Sicherheitsschlitz;...
- Page 36 Q&A Q: Does RVZ03 fit in the Sugo Pack? A: Yes it does, with room to spare! Q: Can the NT06-PRO be used without fan in RVZ03? A: We do not recommend it Q: Everything is properly installed, why does it not start up? A: If your PSU has an AC switch, make sure the switch is at the “ON”...
-
Page 37: Warranty Information
Warranty Information This product has a limited 1 year warranty in North America and Australia. For information on warranty periods in other regions, please contact your reseller or SilverStone authorized distributor. Warranty terms & conditions 1. Product component defects or damages resulted from defective production is covered under warranty. Defects or damages with the following conditions will be fixed or replaced under SilverStone Technology’s jurisdiction. - Page 38 有毒有害物质/元素及其化学含量表 计算器机箱 铅 汞 镉 六价铬 多溴联苯 多溴二苯醚 部件名称 (Pb) (Hg) (Cd) (Cr(VI)) (PBB) (PBDE) 机壳 ○ ○ ○ ○ ○ ○ (金属) 机壳 ○ ○ ○ ○ ○ ○ (塑胶) 风扇 ○ ○ ○ ○ ○ ○ ○ ○ ○...
- Page 40 G11230791...