Table of Contents
Advertisement
Advertisement
Table of Contents

Related Manuals for SICK WLL180T

Summary of Contents for SICK WLL180T
- Page 1 WLL180T Sensor Confi guration for Individual Applications...
- Page 2 Universal or individual – application solutions. Fast and reliable programming, menu driven and at the push of a button: sensor properties and parameters are individually programmed directly on the sensor. Teach-in or manual adjustment? You decide! 1-point Teach-in Teach-in – quick and easy for standard applications.
-
Page 3: Table Of Contents
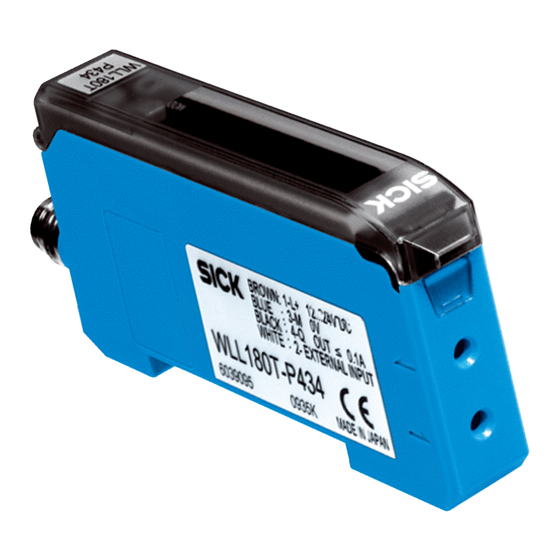
Selection of the menu levels Teach-in – 1-point Teach-in P. 6 2-point Teach-in P. 7 Auto Teach-in P. 8 Zone Teach-in P. 9 Teach-in of transparent objects P. 10 End End teach mode Application specific configuration – Switching mode P. 11 Response time P. - Page 4 WLL180T – Easy handling, structured functions and optimum functionality. The photoelectric sensor for fi ber-optic cables WLL180T with the SICK fi ber-optic cables of the LL3 series is especially suited to detecting very small objects, objects in front of refl ective backgrounds, and transparent and moving objects.
- Page 5 From monitoring to power control. 2 X 4 - D I G I T N U M E R I C D I S P L AY Monitoring simplifies many things, and technical highlights provide many options, always enabling easy commissioning and permanently reliable operation.
- Page 6 WLL180T Photoelectric sensors for fiber-optic cables For standard applications: Teach-in and the commissioning is complete. The manual or automatic adjustment with Teach-in is always the first step. The 5 different Teach-in modes can be quickly and easily selected. Alternatively, the switching threshold can be adjusted manually utilizing the display.
- Page 7 WLL180T Photoelectric sensors for fiber-optic cables Application specific configuration: Utilising the entire functionality. If further adjustments need to be made beyond the normal threshold adjustment, the entire functionality can be selected via a comfortable menu. Configuration Level I Level II...
-
Page 8: 1-Point Teach-In
WLL180T Photoelectric sensors for fiber-optic cables 1-point Teach-in Easy setting of the switching threshold. 1. Press Teach-in key for 2 s Secondary condition: Diffuse type = object absent Through-beam = object present Adjust diffuse type to the background without object 2. -
Page 9: 2-Point Teach-In
WLL180T Photoelectric sensors for fiber-optic cables 2-point Teach-in Exact adjustment of the switching threshold to object and ambient 1. Press Teach-in key for 2 s conditions, in any order. 1st step: Teach-in with object 2. Operating mode Teach-in Teach-in active 3. -
Page 10: Auto Teach-In
WLL180T Photoelectric sensors for fiber-optic cables Auto Teach-in Automatic adjustment without stopping the production process. 1. Press Teach-in key for 2 s 1st step: start Teach procedure 2. Operating mode Teach-in Teach-in active 3. In the basic menu, select –... -
Page 11: Zone Teach-In
WLL180T Photoelectric sensors for fiber-optic cables Zone Teach-in The switching point of the object is learned, and detected, within a 1. Press Teach-in key for 2 s window. This window can be manually extended for the lower (far) and higher (near) switching threshold, respectively. -
Page 12: Teach-In Of Transparent Objects
WLL180T Photoelectric sensors for fiber-optic cables Teach-in of transparent objects Mode is optimised for the detection of transparent objects. 1. Press Teach-in key for 2 s Diffuse type: Teach-in without object. Use reflector. Reflector 2. Operating mode Teach-in Teach-in active 3. -
Page 13: Switching Mode
WLL180T Photoelectric sensors for fiber-optic cables Switching mode Switching mode (L- -d), 1. Press Mode key for 2 s L on: light-switching (factory setting), d on: dark-switching. 2. Operating mode Configuring Configuring active 3. In the basic menu, select –... -
Page 14: Response Time
WLL180T Photoelectric sensors for fiber-optic cables Response time 1. Press Mode key for 2 s 8. Select ending the adjustment – (End) 2. Operating mode Configuring Configuring active 9. Finish selection with Mode key 3. In the basic menu, select –... -
Page 15: Time Delay Setting
WLL180T Photoelectric sensors for fiber-optic cables Time delay setting 1. Press Mode key for 2 s 8. Finish selection 2. Operating mode Configuring 9. For activated time stage, Configuring active setting the time value 3. Press Mode key 4. In the basic menu, select –... -
Page 16: Expert Menu/Detailed Settings
WLL180T Photoelectric sensors for fiber-optic cables Expert menu/detailed settings 1. Press Mode key for 2 s Configuring 2. Operating mode Configuring active 3. In the basic menu, select – required mode by pressing the arrow keys 4. Detail adjustment is shown on the display 5. -
Page 17: Reset
WLL180T Photoelectric sensors for fiber-optic cables Reset All operating modes are reset to the factory setting 1. Press Mode key for 2 s “as-delivered ex works”. Factory settings: Switching mode: ON light-switching 2. Operating mode Configuring Configuring active Response time: Standard = 250 μs... -
Page 18: Set Display Value To Zero
WLL180T Photoelectric sensors for fiber-optic cables Set display value to zero 11. Close Expert mode with 1. Press Mode key for 2 s – arrow key 2. Operating mode Configuring Configuring active 3. In the basic menu, select – Expert mode by pressing the arrow keys 12. -
Page 19: Display Settings
WLL180T Photoelectric sensors for fiber-optic cables Display settings 1. Press Mode key for 2 s 11. Finish selection with Mode key 2. Operating mode Configuring 12. Close Expert mode with arrow – Configuring active 3. Press Mode key 4. In the basic menu, select –... -
Page 20: Energy-Saving Mode
WLL180T Photoelectric sensors for fiber-optic cables Energy-saving mode 1. Press Mode key for 2 s 11. Close Expert mode with – arrow key 2. Operating mode Configuring Configuring active 3. In the basic menu, select – Expert mode by pressing the arrow keys 4. -
Page 21: Reverse Display
WLL180T Photoelectric sensors for fiber-optic cables Reverse display 1. Press Mode key for 2 s 11. Close Expert mode with – arrow key 2. Operating mode Configuring Configuring active 3. In the basic menu, select – Expert mode by pressing the arrow keys 4. -
Page 22: Hysteresis Setting
WLL180T Photoelectric sensors for fiber-optic cables Hysteresis setting 12. Close Expert mode with arrow 1. Press Mode key for 2 s – 2. Operating mode Configuring Configuring active 3. Press Mode key 4. In the basic menu, select 13. Finish selection with Mode key –... -
Page 23: External Input Configuration
WLL180T Photoelectric sensors for fiber-optic cables External input configuration 1. Press Mode key for 2 s 11. Finish selection with Mode key 2. Operating mode Configuring 12. Close Expert mode with arrow – Configuring active 3. Press Mode key 4. In the basic menu, select –... -
Page 24: Copy Mode
WLL180T Photoelectric sensors for fiber-optic cables Copy mode (Bus operation only) 1. Press Mode key for 2 s 10. Close Expert mode with arrow – 2. Operating mode Configuring Configuring active 3. Press Mode key 4. In the basic menu, select 11. -
Page 25: Master Teach-In
WLL180T Photoelectric sensors for fiber-optic cables Master Teach-in (Bus operation only) 1. Press Mode key for 2 s 11. Finish selection with Mode key 2. Operating mode Configuring 12. Select ending the adjustment – Configuring active (End) 3. Press Mode key 4. -
Page 26: Asc Setting
WLL180T Photoelectric sensors for fiber-optic cables ASC setting 1. Press Mode key for 2 s 11. Finish selection with Mode key 2. Operating mode Configuring 12. Close Expert mode with arrow – Configuring active 3. Press Mode key 4. In the basic menu, select –... -
Page 27: Power Setting Of The Sender Led
WLL180T Photoelectric sensors for fiber-optic cables 3.10 Power setting of the sender LED 1. Press Mode key for 2 s 11. Finish selection with Mode key 2. Operating mode Configuring 12. Close Expert mode with arrow – Configuring active 3. Press Mode key 4. -
Page 28: Keylock
WLL180T Photoelectric sensors for fiber-optic cables 3.11 Keylock 11. Close Expert mode with 1. Press Mode key for 2 s – arrow key 2. Operating mode Configuring Configuring active 3. In the basic menu, select – Expert mode by pressing the arrow keys 12. - Page 29 WLL180T Photoelectric sensors for fiber-optic cables Notes 2 0 1 0 - 0 8 - 0 2 S I C K S u b j e c t t o c h a n g e w i t h o u t n o t i c e...
- Page 30 E-Mail support@sick.jp E-Mail info@sickusa.com Nederlands Phone +31 (0)30 229 25 44 E-Mail info@sick.nl Norge More representatives and agencies Phone +47 67 81 50 00 in all major industrial nations at E-Mail austefjord@sick.no www.sick.com SICK AG | Waldkirch | Germany | www.sick.com...
Need help?
Do you have a question about the WLL180T and is the answer not in the manual?
Questions and answers
Is it pnp or npn