Table of Contents
Advertisement
Advertisement
Table of Contents

Related Manuals for Drobo B810n


Summary of Contents for Drobo B810n
- Page 1 Drobo B810n Getting Started Guide...
-
Page 2: Table Of Contents
2.4.2 How to install Drobo Dashboard on Windows ..................13 2.4.3 How to install Drobo Dashboard on Mac ....................16 2.5 Initializing and updating your Drobo B810n to the latest firmware ........... 21 2.6 Registering your Drobo B810n ....................23 2.7 Shares and Users ......................... 25 2.8 Using Drobo B810n with Time Machine or backup software ............ - Page 3 3.3 Using online user guide ....................... 32 3.4 Using context-sensitive help ......................32 3.5 Using knowledge base ......................... 32 3.6 Registering your Drobo B810n ....................32 3.7 Getting technical support ......................33 3.8 Guide to meaning of indicator lights (LEDs) ................33 3.8.1 Indicator light messages ............................34...
-
Page 4: 1: Before You Begin
1: Before You Begin Before you begin to set up your Drobo B810n, it is recommended to check the operating system and hardware requirements. This section covers the following topics: Product features at a glance Checking box contents ... -
Page 5: Checking Box Contents
Optional Accessories Drobo 8-Bay Rack Mount Kit 1.3 Checking system requirements This article provides the system requirements for using Drobo B810n. Drobo System Requirements and Specifications Operating systems Operating systems supported for the Drobo B810n include: Apple® Macintosh® Mac OS X 10.8 or higher ... -
Page 6: Checking Hardware Requirements
Weight: 16 lbs 3 oz 1.4 Checking hardware requirements To use your Drobo B810n device, you will need at least two drives. If you plan to use Dual Disk Redundancy, which protects your data against two concurrent drive failures, you will need at least three drives. -
Page 7: Recommended Number And Type Of Drives
Warning: When you insert drives into the Drobo B810n device, the pre-existing data on the drives will be erased. You can choose HDDs from any manufacturer and with any capacity. For choosing SSDs, please visit our web page to view the compatible drive options. -
Page 8: Determining Drive Space Requirements
1.4.3 Determining drive space requirements Your Drobo B810n automatically divides the total disk capacity of all its drives between data storage, data protection, and expansion. We offer a tool for previewing that space allocation. 1.4.3.1 Capacity calculator... -
Page 9: Using Power Protection
2: Setting Up Drobo B810n Once you have unpacked your Drobo B810n device from its box and ensured that you meet all the operating system and hardware requirements, it is time to set up your device for use. The Drobo B810n shipped out will not have the latest firmware. So, it is recommended to upgrade the firmware to the latest version before using the device. -
Page 10: Inserting Drives
Drobo B810n. Note: Once you insert the drives into your Drobo B810n, they function as a unit or “pack.” To access the data on them, you will need the entire pack. -
Page 11: Connecting Ethernet And Power Cables
5. Insert additional drives in the same manner following Step 2 to Step 4. 6. When finished, replace the faceplate right side up so that when your Drobo B810n is turned on you will be able to see the indicator lights. For more information on Indicator lights, see Guide to meaning of indicator lights (LEDs). -
Page 12: Powering On The Drobo 810N
2.3 Powering on the Drobo 810n The next step is to power on the Drobo device. For this, you have to attach the power cord and then, turn on the Drobo using the power switch located on the back. The Drobo will take several minutes to complete the power on cycle. -
Page 13: How To Download Drobo Dashboard Application
If you are a first-time Drobo user, then simply install the latest version of the Drobo Dashboard. If you are an existing Drobo user and have a Drobo Dashboard version earlier than 2.7.0 installed, then you must uninstall the Drobo Dashboard prior to installing the latest version. For more information, see What is the proper way to uninstall and re-install Drobo Dashboard on my Windows computer? 1. - Page 14 3. The Drobo Dashboard Installer (or Installation Wizard) will appear. 4. Click the Next button to proceed. 5. Follow the instructions of the Installation Wizard by clicking the Next button after each page. 6. Once you reach the installation page, click the Install button.
- Page 15 9. The Drobo Dashboard application launches and you will be prompted to register your Drobo B810n. You can either register the Drobo B810n or skip the step and register it later. Select an option based on you preference. The serial number is printed on the compliance label at the bottom of the device.
-
Page 16: How To Install Drobo Dashboard On Mac
To install the Drobo Dashboard on Mac: Note: If you are a first-time Drobo user, then simply install the latest version of the Drobo Dashboard. If you are an existing Drobo user and have a Drobo Dashboard version earlier than 2.7.0 installed, then you must uninstall the Drobo Dashboard prior to installing the latest version. - Page 17 2. A pop up will appear asking whether to open the Installer. Click Open. 3. The Install Drobo Dashboard page will appear. Click Continue to proceed to the next screen. 4. The Firewall Warning page appears. Click Continue. 5. Next, the Installation Wizard page appears. Click Continue to proceed.
- Page 18 6. The Software License Agreement page appears. From here, you can choose the language in which you want to proceed the installation process. 7. After choosing the desired language, Click Continue. Drobo B810n Getting Started Guide...
- Page 19 10. You will be prompted to enter the administrator password. Enter the password and click Install Software. 11. Then, you will be prompted to restart your computer in order to complete the installation. Click Continue Installation to proceed. Drobo B810n Getting Started Guide...
- Page 20 14. Once the computer restarts, launch the Drobo Dashboard application. 15. The application will prompt you to register your Drobo B810n. You can either register it or skip the step and register it later. Select an option based on you preference.
-
Page 21: Initializing And Updating Your Drobo B810N To The Latest Firmware
What is the proper way to uninstall and re-install Drobo Dashboard on my Mac? If you are a first time user, please follow these steps to update the firmware of your Drobo B810n to the latest one: Connect the data port of the Drobo to an Ethernet switch. - Page 22 Warning: Powering on the Drobo will begin the disk format process. Please be aware that all data on the disks will be erased. 7. Your Drobo B810n will appear with a yellow Drobo device icon on your main dashboard screen.
-
Page 23: Registering Your Drobo B810N
This procedure will erase all data from all drives and return your Drobo 810n to default settings. 2.6 Registering your Drobo B810n If you did not register your Drobo B810n during setup, then you can register it from the Drobo Dashboard. - Page 24 Registration page. 4. Do one of the following: If you do not have a Drobo account, click the Create a new Drobo account link. The Login page opens in your web browser. Then, click the Create an Account button to open the Signup page.
-
Page 25: Shares And Users
Continue with step 4. 5. Click the Next button. The connected Drobo devices and their serial numbers will appear. 6. Select Drobo B810n and enter its purchase date. Then, select the region from where you purchased it, as shown in the image below. -
Page 26: Using Drobo B810N With Time Machine Or Backup Software
2.8.1 Overview Drobo B810n introduces the ability to create a dedicated backup volume for use with OS X Time Machine, Windows Backup and Restore, or other backup software. The backup volume is compatible with encrypted backup options. This article will show you how to set it up. - Page 27 Follow these steps: 1. Open the Drobo Dashboard, and wait for your Drobo B810n to appear under in the All Drobos page. Then, double-click the image of your Drobo B810n. 2. Then, click Volumes. 3. Click the Enable Backup button.
-
Page 28: Safely Shutting Down Your Drobo B810N
2.9 Safely shutting down your Drobo B810n If you plan to shut down your Drobo B810n for any reason, it is very important that you always do so safely. Improper Drobo device shutdowns may cause file corruption and/or data loss. -
Page 29: When To Shut Down Your Drobo B810N
2.9.2 Shutting down your Drobo B810n using Drobo Dashboard This is the recommended method for safely shutting down your Drobo B810n. 1. Check that the activity light on your Drobo B810n is off, indicating that no data is actively being transferred to or from your Drobo B810n. -
Page 30: 3: What To Do Next
Drobo B810n has shut down. 3: What To Do Next Once you set up the Drobo B810n device and start to use it, we recommend you to read the following topics to understand the different ways to enhance the performance of the device. -
Page 31: Using Best Practices For Protecting Data
Photographers, Here’s A Bulletproof Backup Method Using Drobo. Important Note: To help protect your data, if you are unsure on how to proceed when using your Drobo B810n, it is very important that you review the Online User Guide for your product, review our... -
Page 32: Using Online User Guide
3.3 Using online user guide After you have set up your Drobo B810n, you are ready to use it to store and back up data. To learn how to manage and use your Drobo B810n, refer to the Online User Guide for your product available... -
Page 33: Getting Technical Support
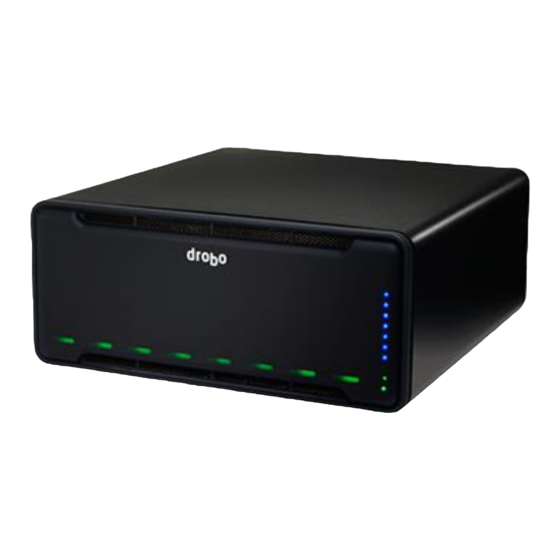
DroboCare FAQ. 3.8 Guide to meaning of indicator lights (LEDs) Your Drobo B810n provides a variety of status information via its indicator lights, as described in the table below. Figure 5: Drobo B810n Indicator lights Drobo B810n Getting Started Guide... -
Page 34: Indicator Light Messages
Data is actively being transferred between your computer Capacity and your Drobo. Gauge Blue (on/off) Shows the percentage of your Drobo that is full in 10 percent increments. For example: if your Drobo is 30 percent full, three blue lights are on. Drobo B810n Getting Started Guide...
Need help?
Do you have a question about the B810n and is the answer not in the manual?
Questions and answers