
Related Manuals for CRE 3000

Summary of Contents for CRE 3000
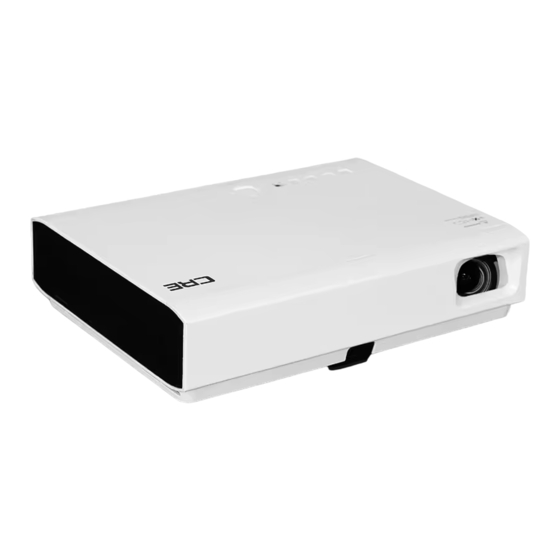
- Page 1 3000 MULTIMEDIA PROJECTOR Instruction Manual Multimedia Projector Instruction Manual...
-
Page 2: Table Of Contents
Contents Accessories-----------------------------------------------------------------------------------------------------------2 Chapter 1 Overview----------------------------------------------------------------------------------------------2 Chapter 2 Start Using--------------------------------------------------------------------------------------------4 Chapter 3 Media---------------------------------------------------------------------------------------------------8 Chapter 4 Screen Display(OSD)Setting ------------------------------------------------------------------12 Chapter 5 Maintenance----------------------------------------------------------------------------------------18 Distance and Screen Size---------------------------------------------------------------------------------------20... -
Page 3: Accessories
Accessories All packages will contain the following parts. If there is some missing, please contact with distributor. ●Projector------------------------------ 1pc ● Power supply Adapter--------------------------- 1pc ●Power Plug--------------------------- 1pc ● Instruction Manual -------------------------------- 1pc ●Remote Control -------------------- 1pc ● 4 Bolts for Fixing --------------------------------- 4pcs ●... - Page 4 Bottom Overview Projection Image Height Adjustment Heat Emission Hole( Don’t cover) Installation Diagram (Follow it to install ) Tilt Adjustment Knob (Rotate it to adjust the left and right height of the projection image) Back Overview Audio-out Audio-in HDMI- 2 HDMI-1 Adapter Anti-theft Lock...
-
Page 5: Chapter 2 Start Using
Chapter 2 Start Using Warning: To be safe, cut power between projector and relative equipment before connect cable. Select The Signal for the Projector When you connect projector with different equipment, you should press SOURCE key to choose corresponding input channel. Otherwise, there won’t be image could be projected out. - Page 6 Insert USB flash driver /TF card Insert the storage device into the corresponding port, and then the USB flash driver/TF card will be connected to the projector. Connect the Video Connect the video equipment to the projector by video cable. Connect the Audio Insert earphone or external mini speaker to the audio output of the projector,insert the audio cable from DVD , set top box or other signal devices to the audio input of...
- Page 7 Turn on /off the Projector Connect the AC power cord to the adapter's three hole socket (A), connect the other end of the AC power cord into a wall outlet.The output end of the adapter is connected to the projector (B). Note: Make sure the flat side of the output end of the adapter is up when connecting the projector.
- Page 8 Set the Remote Control The remote control is equipped with a 3V lithium battery (CR2025). Battery was pre-installed in the remote control. Before use the remote control, take out the plastic sheet from the battery warehouse . Note: If the goods shipped by Express or by Air(Battery is not allowed with cargo on the plane), the battery pre-installed will be taken out before shipping, so please buy the battery in your local store.
-
Page 9: Chapter 3 Media
Chapter 3 Media General View Media design helps you to access inserted USB flash driver or TF card’s file easily . Movies, musics, photos and other documents can be displayed. Media center menu includes four access application: • Movie – Video Player,can play multiple formats of videos. •... - Page 10 Under the directory menu,press “menu button” , you can perform to modify, add or remove files. Other applications operation is the same. Movie Playback Menu When playing movie ,press “menu button” ,the “playback menu “as following will jump out . If the time that the user don’t operate the menu over 15 seconds, the “...
- Page 11 Loop playback Song play list Song information Photo Browsing Photo browser support below format: • BMP ( Max 4000 x 3000 pixel ) • PNG ( Max 4000 x 3000 pixel ) • JPG (Max 4000 x 3000 pixel )
- Page 12 View photos If you want to see a photo via photo browser, do as follow steps 1. Press button ◄ and ► on media center menu to select “Photo ” icon. 2. Press button to open the document directory. 3. Press button ◄ and ► , select the folder which include the photo you need 4.
-
Page 13: Chapter 4 Screen Display(Osd)Setting
Chapter 4 Screen Display(OSD)Setting OSD Menu Control Projector have screen display (OSD) setting menu,which could be used to adjust and change setting. OSD Menu have 5 menus: • Picture - Adjust the image quality in all aspects in this menu •... - Page 14 Picture Menu Visit picture menu and adjust setting ,do it as following: enter into OSD menu then press ◄ and ► to go to “PICTURE" menu. 1. Press 2. Press ▲and ▼ move to the menu to be adjusted. to adjust option setting,or enter into then press◄ and ►or ▲and 3.
- Page 15 Option Settings To access the options menu and adjust the settings, perform the following steps: ◄ and ► Press the key to enter the OSD menu, press buttons select the “OPTION” menu. ▲and ▼ Press button to move to the item needs to be adjusted. 3.
- Page 16 3D Settings To access the 3D setting menu and adjust the settings, perform the following steps: 1. Press the key to enter the OSD menu. 2. Press buttons ◄ and ► to select the menu of 3D. 3. Press button ▲and ▼ to move to the item needs to be adjusted. 4.
- Page 17 Sound Settings To access the sound setting menu and adjust the settings, perform the following steps: 1. Press the key to enter the OSD menu. 2. Press buttons ◄ and ► to select the menu of sound. 3. Press button ▲and ▼ to move to the item needs to be adjusted. 4.
- Page 18 Item Instruction Temperature Read and display the working temperature of the light source. Software Update (USB) Press the key to enter , then press again to confirm the upgrade, press the menu key to exit and return. Press the key to enter into the mode of wireless Widi /Miracast transmission screen.
-
Page 19: Chapter 5 Maintenance
Chapter 5 Maintenance Cleaning the Projector Cleaning the projector to remove dust and grime will help running normally. Warning: 1. Before cleaning, turn off the projector and unplug the power cord. Otherwise, it may result in injury or damage to the system. 2. - Page 20 1. Can the projector be used together with PC, notebook or netbook ? Yes. Use a VGA cable or HDMI cable that comes. If there is a corresponding HDMI or VGA port on the PC, laptop or netbook, the projector can connect to these devices. To play the audio, you need a stereo audio cable to connect the projector's audio jack.
-
Page 21: Distance And Screen Size
Distance and Screen Size Keystone Angle Projection Distance Image Size- Image Image Projection distance Diagonal Width Height Max/Min (mm) (Inch) (mm) (mm) 1990/1640 2480/2050 3040/2533 3470/2870 1070 4040/3352 1215 4460/3700 2100 1300 5030/4176 2340 1485 5455/4520 2560 1600 6020/5000 Disclaimer: Our company reserve the right to make changes to the contents of this instruction manual without any advance notice . - Page 22 Warranty Card User’s Name Tel No.: Fax No.: Address Model No.: Serial No.: Invoice Date Problem Analysis User Signature Factory Signature Result...
Need help?
Do you have a question about the 3000 and is the answer not in the manual?
Questions and answers