Table of Contents
Advertisement
Advertisement
Table of Contents

Subscribe to Our Youtube Channel
Related Manuals for Novatel T2000

Summary of Contents for Novatel T2000
- Page 1 User guide. T2000 Wireless Home Phone...
- Page 2 “Trademarks”) used in this user manual are the property of Novatel Wireless or their respective owners. Nothing contained in this user manual should be construed as granting by implication, estoppel, or otherwise, a license or right of use of Novatel Wireless or any other Trademark displayed in this user manual without the written permission of Novatel Wireless or its respective owners.
-
Page 3: Table Of Contents
Contents Overview . . . . . . . . . . . . . . . . . . . . . . . . . . . . . . . . . . . . . . . . . . . . . . . . . . . . . . . . . . . . . . . . . . 1 System Requirements. - Page 4 General ................33 Technology/Bands.
-
Page 5: Overview
Overview System Requirements Components and Indicators Power Management Caring for Your Wireless Home Phone... -
Page 6: System Requirements
System Requirements The Wireless Home Phone gives you residential phone service as part of your cell phone account. It connects up to two wired phones or fax machines. To use it, you must subscribe to an eligible Verizon Wireless Voice plan. -
Page 7: Components And Indicators
Components and Indicators ➊ Power button — push button that turns the device on or off. ➋ Phone/Fax ports — RJ11 jacks for phone and/or fax. ➌ Alarm port — Alarm compatibility coming soon. Check with Verizon for information. ➍ Power connector port —... - Page 8 ➊ Wall mount brackets — for mounting the Wireless Home Phone to the wall. ➋ Battery port — jack for plugging in the Wireless Home Phone battery pack. ➌ Battery cover — lift to remove battery door so you can access the battery pack and/or reset button.
-
Page 9: Led Indicator States
LED Indicator States An LED light on the Menu button indicates the current state of the Wireless Home Phone unit. STATE DESCRIPTION Red Solid Wireless Home Phone is o and charging. Red Blinking Wireless Home Phone has an issue. Press button for more info. Blue Solid Wireless Home Phone is connected to the network. -
Page 10: Device Information Screens
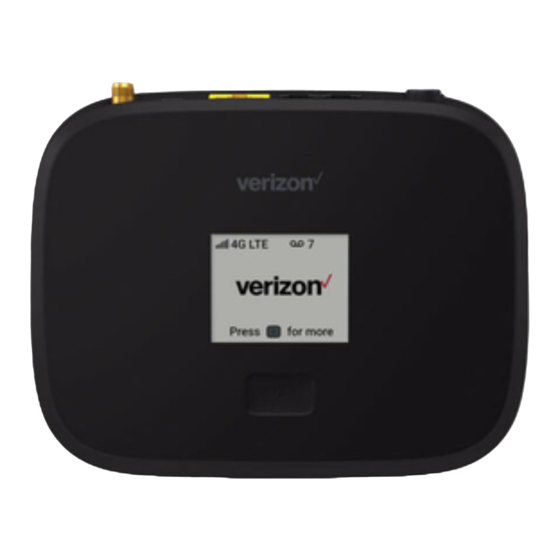
Device Information Screens The Wireless Home Phone display screen is used to communicate information while the device is in use. For example, during a call, it shows a timer that tracks call length. If you miss a call, you can view a list of missed calls on the screen. - Page 11 Press the Menu button to display the next screen of device information. Second Device Info Screen The second Device Info screen shows: the model of the Wireless Home Phone unit (T2000) • the phone number assigned to the unit •...
-
Page 12: Power Management
Power Management Your Wireless Home Phone comes with both a backup battery and an AC wall charger. It is possible to use the unit without AC power, but it will not function if the battery is not in place. AC Wall Charger — Position the Wireless Home Phone near an AC outlet and keep the unit •... -
Page 13: Caring For Your Wireless Home Phone
Caring for Your Wireless Home Phone Like any electronic product, the Wireless Home Phone must be handled with care to ensure reliable operation. The following guidelines are recommended: Protect the Wireless Home Phone from liquids, dust, and excessive temperatures. Do not apply adhesive labels to the Wireless Home Phone; they may cause the Wireless •... -
Page 14: Getting Started
Getting Started Setup Overview Installing and Charging the Battery Installing the Optional Antenna Powering On the Unit Connecting to Your Phone and/or Fax Connecting a Security System Alarm Initial Activation... -
Page 15: Setup Overview
Setup Overview To set up your Wireless Home Phone for the first time: ➊ Make sure you are subscribed to an eligible Verizon Wireless Voice Only or Voice and Data plan. ➋ Install and charge the battery. (See Installing and Charging the Battery on page 12.) ➌... -
Page 16: Installing And Charging The Battery
Installing and Charging the Battery ➊ Press your finger against the battery cover removal tab on the underside of the Wireless Home Phone, then lift and remove the cover. ➋ Press the battery cable plug into the internal port, keeping the red cable to the center of the battery case and the metal contacts facing out. -
Page 17: Removing The Battery
Removing the Battery Should you need to replace the battery, follow these steps to remove it: ➊ Power off and unplug the Wireless Home Phone. ➋ Press your finger against the battery cover removal tab on the underside of the Wireless Home Phone, then lift and remove the cover. -
Page 18: Installing The Optional Antenna
Installing the Optional Antenna To increase signal strength, you can install an optional antenna. To purchase the optional antenna for the Wireless Home Phone, please visit www.verizonwireless.com or go to a Verizon Wireless store. To install the optional antenna, align its plug with the antenna port on the Wireless Home Phone and screw it securely into place. -
Page 19: Powering On The Unit
Powering On the Unit Once you have installed the Wireless Home Phone battery and power cord, press the power button on the back of the unit to turn the system on. While the unit boots up, the Menu button indicator light blinks red. You’ll see “Hello” on the display screen, followed by the Verizon logo and then the Home screen. -
Page 20: Connecting Your Phone And/Or Fax
Connecting Your Phone and/or Fax The Wireless Home Phone provides two phone jacks (or ports). Typically, one is used for a phone and the other port is used for a fax machine. Both ports use the same phone number. ➊ Unplug your phone or fax from the wall jack. -
Page 21: Connecting A Security System Alarm
Connecting a Security System Alarm Alarm compatibility coming soon. Check with Verizon for information. -
Page 22: Initial Activation
Initial Activation A voice plan is required to make and receive calls. If you are not subscribed to a plan with voice service, dial *611 to sign up for service. Make a call to test service. Note that in most areas, you will need to include the three-digit area code, even for local calls. -
Page 23: Using Your Wireless Home Phone
Using Your Wireless Home Phone Making Calls Receiving Calls Using Voice Mail Call Forwarding Using a Text Telephone... -
Page 24: Making Calls
Making Calls Before making a call, make sure at least two of the voice signal strength indicators are lit. ➊ Place a call by entering the desired phone number. In most areas, you will need to include the three-digit area code, even when dialing a local number. As soon as your call is connected, the Wireless Home Phone display screen shows a counter that shows the length of your call. -
Page 25: Receiving Calls
Receiving Calls As soon as your Wireless Home Phone is set up and activated, it will be able to receive calls. NOTE If you have a new phone number, be sure to share it with family and friends. To view your phone number on the Wireless Home Phone screen, press the Menu button twice. -
Page 26: Call Waiting
Call Waiting If a call comes in while you are on the phone, you’ll hear a click and the incoming phone number appears on the Wireless Home Phone screen. Depress the Flash button on the phone to put the first call on hold and answer the second call. When you hang up or press Flash again, you are reconnected with the first call. -
Page 27: Using Voice Mail
Using Voice Mail Verizon includes integrated voice mail with its phone service. If you want to use it, you must first set it up for your account. Setting up Voice Mail To set up and manage your voice mail, dial *86 and follow the system prompts. For more details about your voice mail service, visit www.verizonwireless.com/voicemail. -
Page 28: Call Forwarding
Call Forwarding With Call Forwarding, you can automatically transfer all calls coming into your Wireless Home Phone to another phone number, including your mobile phone or office number. Your home phone will not ring until you turn off the service. To Turn on Call Forwarding ➊... -
Page 29: Using A Text Telephone
Using a Text Telephone A Text Telephone (TTY) is used by those who are hearing or speech impaired to translate typed text to voice and vice versa. To use the Wireless Home Phone with TTY, you must change the TTY mode from the default (None) to one of the following modes: Full TTY translates both text to voice and voice to text. -
Page 30: Troubleshooting
Troubleshooting Overview Common Problems and Solutions Technical Support... -
Page 31: Overview
Overview When properly installed, the Wireless Home Phone is a highly reliable product. Most problems are caused by one of these issues: Phones connected to incorrect ports. Please refer to the labels next to the ports for proper • connections. Network coverage is unavailable due to coverage area, an account problem, or a network •... -
Page 32: Common Problems And Solutions
Common Problems and Solutions The following are some common problems and solutions. Why am I not getting a dial tone on my handset? Check the power indicator on the Wireless Home Phone Menu button. If it is not illuminated, make sure the AC power adaptor is properly connected to both the •... - Page 33 How long is the backup battery life of the Wireless Home Phone? Talk usage time on backup battery is approximately 3 hours and standby time is approximately 33 hours. Actual values can vary with environmental conditions.** How does Caller ID (CID) work? CID allows you to see the caller’s name and/or phone number before you take the call.
-
Page 34: Technical Support
Technical Support IMPORTANT Before contacting support, be sure to restart the Wireless Home Phone and perform the troubleshooting steps in this guide. For additional information and technical support, the visit the Verizon online support web page at http://Verizonwireless.com/support. If you still need help, visit any Verizon Wireless store or contact Customer Service at 1-800-922-0204. -
Page 36: Product Specifications And Regulatory Information
Product Specifications and Regulatory Information Product Specifications Regulatory Information Limited Warranty and Liability Limited Warranty and Liability Safety Hazards Proper Battery Use and Disposal... -
Page 37: Product Specifications
Product Specifications General Name: Verizon Wireless Home Phone Model: T2000 Standards/Approvals/Certifications: FCC (North America)/IC, PTCRB, GCF, UL 2853, California CEC Weight: 420 g / 14.8 oz Dimensions: 105 mm x 125 mm x 30 mm, 4.13 in x 4.92 in x 1.18 in... -
Page 38: Regulatory Information
Regulatory Information Federal Communications Commission (FCC) Statement 15.21 You are cautioned that changes or modifications not expressly approved by the part responsible for compliance could void the user’s authority to operate the equipment. 15.105(b) This equipment has been tested and found to be within the limits for a Class B digital device, pursuant to part 15 of the FCC Rules. -
Page 39: Limited Warranty And Liability
(IV) damage caused by force of nature or act of any third person, (V) shipping damage, (VI) service or repair of Product by the purchaser without prior written consent from Novatel Wireless, (VII) products designated by Novatel Wireless as beta site test samples, experimental, developmental, reproduction, sample, incomplete or out of specification Products, or (VIII) returned products if the original identification marks have been removed or altered. -
Page 40: Safety Hazards
Safety Hazards Do not operate the Verizon Wireless Home Phone in an environment that might be susceptible to radio interference resulting in danger, specifically: Areas where prohibited by the law Follow any special rules and regulations and obey all signs and notices. Always turn off the host device when instructed to do so, or when you suspect that it might cause interference or danger. - Page 41 Electrostatic discharge (ESD) Electrical and electronic devices are sensitive to electrostatic discharge (ESD). Macintosh native connection software might attempt to reinitialize the device should a substantial electrostatic discharge reset the device. If the software is not operational after an ESD occurrence, then restart your computer.
-
Page 42: Proper Battery Use And Disposal
Proper Battery Use and Disposal IMPORTANT In event of a battery leak: • Do not allow the liquid to come in contact with the skin or the eyes. If contact has been made, wash the affected area with large amounts of water and seek medical advice. •... -
Page 43: Glossary
Glossary... - Page 44 Glossary ● 4G LTE — Fourth Generation Long Term Evolution. LTE is a standard for wireless data communications technology and an evolution of the GSM/UMTS standards. The goal of LTE is to increase the capacity and speed of wireless data networks using new DSP (digital signal processing) techniques and modulations that were developed around the turn of the millenium.
Need help?
Do you have a question about the T2000 and is the answer not in the manual?
Questions and answers