
Summary of Contents for F&U DVT98607
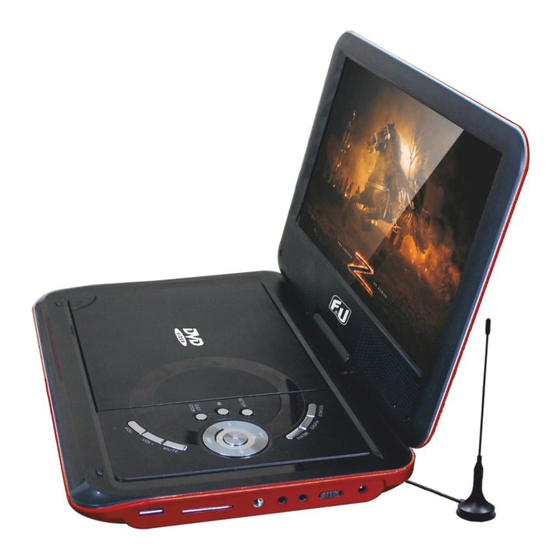
- Page 1 PORTABLE DVD WITH DIGITAL TV PLAYER DVT98607 LED WIDE SCREEN 9" BUILT-IN AV IN & AV OUT BUILT-IN USB & SD/MMC CARD BUILT-IN DVB-T2 TUNER REMOTE CONTROL ALL FUNCTION...
-
Page 2: Importan Safety Notes
IMPORTAN SAFETY NOTES: WARNING: TO REDUCE THE RISK OF FIRE OR ELECTRIC SHOCK, DO NOT EXPOSE MOISTURE. DO NOT REMOVE COVER (OR BACK). NO USER SERVICEABLE PARTS INSIDE. REFER SERVICING TO QUALIFIED SERVICE PERSONNEL. SERVICE MUST BE CARRIED OUT BY QUALIFIED PERSONNEL ONLY, OR THE WARRANTY IS NOT VALID. - Page 3 GENERAL PRECAUTIONS: 1) Read through this instruction manual before installation and use. 2) Do not touch the power plug with wet hand. 3) Switch off the main power when the unit is not in use. (Disconnect the power plug from the power outlet when you do not intend to use the unit for a longer period of time.) 4) Do not open the cover or touch any of the components inside the unit, only for qualified technicians.
-
Page 4: Table Of Contents
Table of Contents: IMPORTAN SAFETY NOTES ……………………………………………… 1 Table of Contents …………………………………………………………… 3 Remote Control ……………………………………………………………… 4 Indicators ……………………………………………………………………… 7 Powering and Installation ……………………………………………………8 Playing ………………………………………………………………………… 10 System Setup ………………………………………………………………… 14 DVB-T2 TV Operation ………………………………………………………… 16 Trouble Shooting …………………………………………………………… 24... -
Page 5: Remote Control
Remote Control: 1.USING THE REMOTE CONTROL To use the remote control,pull out the clear isolation strip from the battery compartment. Ensure that the OFF/ON switch at the side of the main unit is switched to the ON position.Point the in- frared transmitter on the remote control towards the remote co- ntrol sensor on the main unit and select the function button of choice/Point the remote control unit no more tha 5m frin the... - Page 6 1.Subtitle /Copy 15.Search 2.Standby 16.Setup Button 3.Number Button 17.repeat 4.10+ 18.Info Display 5.DVD Menu 19.Program 6.Direction Button 20.Text Angle 7.OK Button 21.Zoom 8.Stop/EXIT 22.Slow 9.Fast Reverse 23.EPG 10.Fast Forward 24.REC/PLAY/PAUSE 11.A-B repeat/TV /RADIO 25.Next Button 12.Mute 26.Previous Botton 13.Audio Button 27.Volume+Button 14.Source 28.Volume-Button...
-
Page 7: Key Functions
Key Functions: Note:Some buttons are only on the remote control and not on the DVD player. SUB/COP Y Press once for subtitle function and press twice for Copy function. SOURCE Press this button to enter into mode menu and select the mode between DVD ,DVB-T2,AV and MEDIA. - Page 8 1.Source 11.USB port (DVD function) 2.Audio 12.SD/MMC/CARD SLOT 3.Menu Button 13.Earphone Jack 4.Setup Button 14.AV Output Jack 5.Play/Pause Button 15.AV Input Jack 6.Direction and Ok Button 16.Powe On/Off Switch 7.Stop Button 17.DC Input Jack 8.Mute 9.Volume+Button 10.Volume-Button...
-
Page 9: Powering And Installation
18.TV Antenna in 19.TV-USB port Powering and Installation: A. Powering the system indoors Plug one end of the AC Adapter into the DC input jack on the side of the main unit, then plug the other end into the 100-240V AC power outlet. 2.To power outlet 1.To“DC IN”... - Page 10 Note: The included AC adapter is for use with this unit only. Do not use it with other equipment. Disconnect the player from the main outlet if you don't intend to use it for an extended period of time. B. Built-in Battery Plug one end of the AC to DC adapter into the DC jack on the side of the player, then plug the other end into the 100-240V AC power outlet.
-
Page 11: Playing
Playing: A. Loading and Playing a Disc: 1. After connecting power to the DVD player, push the Power On/Off switch to the “on” position. 2. Place a disc gently into the tray. - You should hear and feel the disc snap firmly into place. - Place a disc into the tray with the disc's label facing up. - Page 12 Title Elapsed Title Remain Chapter Elapsed Display Off Chapter Remain 2. ANGLE During playback of a disc, press “ANGLE” to display the available angles for discs containing multi-angles, with the current angle number and the total number of angles displaying. Press “ANGLE” to select another angle, then press again to exit and return to the normal viewing angle.
- Page 13 During playback press “ZOOM” to enlarge the picture by 2X, 3X or 4X with the current zoom multiple. 6. A-B REPEAT a. During playback press a first time “A-B” to set the Starting Point A. b. Press “A-B” a second time to set the Ending Point B and player will repeatedly play the part between Point A and Point B.
- Page 14 When a MP3/MPEG-4 disc is inserted into the unit, the menu screen appears automatically. You can use the menu screen to select your desired folders and songs or the system plays the songs in the order they were burned onto the disc. 1.
-
Page 15: System Setup
System Setup: A. On screen display Menu: 1) Press “SETUP” to display the main screen of the Setup Menu on the screen and “General Setup Page” appears. At same time, “General” is highlighted. Press to select other setting items. Press “SETUP” again to exit the Setup Menu and the unit will resume it's last playback mode. -
Page 16: Video Setup
RIGHT/LEFT Channel: Mixes a 5.1ch audio signal to 2 audio channels and then outputs to the left and right speakers. Stereo: Outputs a stereo signal to the left and right speakers. 3. Dolby Setup 3.1 DUAL MONO Stereo: Left/Right channel audio will be played back by the Left/Right speakers. - Page 17 DVB-T2 TV Operation 1. TV Start-UP Inser the DVB-T2 TV antenna to the DVB-T2 TV signal input jack . Press “SOURCE” button to switch to the TV mode. 2.Remote Control for DVB-T2 1.Power On/Off 2.Setup Button:Enter/Exit the menu operation of DVB-T2. 3.Number Button 4.Up Button: Add channels,move the cursor up in the menu opertion.
-
Page 18: Main Menu
DVB-T2 TV Operation 3.Function Operation 3.1 Main Menu Under the TV mode Press on the remote control, or touch it on the screen. enter the main menu. .Search Menu : enter search menu ; .Picture Menu:enter picture menu; .System Menu : enter system menu. .Press to choose the option that you want,press... -
Page 19: Dvb-T2 Tv Operation
DVB-T2 TV Operation 3.4 Manual Search Select "Manual Search",Press the remote control or touch it on the screen to enter the manual search menu. Press or , choose the frequency that you want to search. Press ,confirm and begin to search. Press ,return to the previous menu. -
Page 20: Picture Settings
DVB-T2 TV Operation 3.6 Picture Settings In the “Picture” menu,there are three options: (1)Aspect Ratio (2)Resolution (3)TV Format (4)Video output Press ,choose the option that you want. Press so that change the parameters. Aspect ratio contains multiple 16:9 and 4:3 screen ratio. - Page 21 DVB-T2 TV Operation In the play menu,press ,enter the “INFO” key to show the information of current programs when it is in normal playing state. Press again to show more detail information. In the play menu,press ,enter the EPG menu. In the EPG menu,it will display channel name, date of the program guide, the program schedule and the program introduction.
- Page 22 DVB-T2 TV Operation Two options in this Menu. Multimedia: contains music, photo, movie, PVR. PVR Configure: config the PVR parameters. In Multimedia menu, four options here Music: play songs. Photo: browse pictures Movie: watch movies PVR : record video In order to achieve these functions, you need to access external USB memory.
- Page 23 DVB-T2 TV Operation Select USB Photo option, press “ENTER”key to confirm . Press “ENTER ” key to enter next directory. Follow the bottom key guide to operation Picture format surpported: jpeg,bmp,png,tiff,gif Select USB Movie option, press “ENTER”key to confirm . Press “ENTER ”...
- Page 24 DVB-T2 TV Operatio 3.19 PVR Function The device provides PVR function, you can save your favorite program and playback . Press the key "REC/TV" to starting video record,After poping "enter record,waiting...", the program recording is starting. Press the key "REC/TV" once again to stopping the record,it will ask you if you stop recording program or not,choose "OK"...
-
Page 25: Specifications
Specifications: Portable DVD Player: Compatible Disc: DVD /VCD/CD/MP3/JPG/MPEG-4 Signal System: PAL/NTSC Screen Size: 9 Inch Frequency Response: 20Hz to 20KHz Video Output: 1 Vp/p/75 Ohm, Unbalanced Audio Output: 1.4Vrms/10 KOhm(1 KHz,0dB) Audio S/N: Better than 60 dB Dynamic range: Better than 85 dB Laser: Semiconductor Laser, Wave Length:650nm/795 nm Power source:... -
Page 26: Trouble Shooting
Trouble Shooting: Trouble Shooting for DVD: No sound or distorted sound? Make sure your DVD is connected properly. Make sure all cables are securely inserted into the appropriate jacks. Can’t advance through a movie? You can’t advance through the opening credits and warning information that appears at thebeginning of movies because the disc is programmed to prohibit that action. - Page 27 Trouble Shooting for DVB-T2: There is on signals or there are weak signals. The antenna has not been adjusted to the appropriate location. Adjust the antenna, or double check the antenna,you can reinstall the antenna if you are not sureabout the problem Channel interference of invalid.
- Page 28 In the European Union there are separate collection systems for used electrical and electronic products. Please help us to conserve the environment we live in! DECLARATION OF CONFORMITY Herewith, Amiridis-Savvidis S.A. states that product DVT98607, complies with the requirements of below directives: EMC-Directive: 14 / 30 / EU...
Need help?
Do you have a question about the DVT98607 and is the answer not in the manual?
Questions and answers