Table of Contents
Advertisement
1. Safety Precautions and Warnings......................1
2. Using the Auto Computer ...................................2
2.1
2.2
2.3
2.4
2.5
2.6
2.7
2.8
2.9
3. Trip Computer...................................................17
4. Gauges ................................................................19
5. Scan Tool ............................................................20
5.1
5.2
5.3
5.4
6. Vehicle Black Box ..............................................23
7. Warranty and Service .......................................25
7.1
7.2
Table of Contents
Tool Descriptions ......................................2
Specifications .............................................3
Accessories .................................................3
Navigation Characters..............................3
Connecting to the Vehicle.........................4
Setup...........................................................6
Fill-up .......................................................12
Speed ........................................................14
Tool Information.....................................16
Reading and Erasing Codes ...................20
Retrieving I/M Readiness Status ...........21
Reading Freeze Frame Data ..................22
Viewing VIN Number .............................22
Limited One Year Warranty .................25
Service Procedures..................................25
Advertisement
Table of Contents

Summary of Contents for Autel MaxiTrip TP100
-
Page 1: Table Of Contents
Table of Contents 1. Safety Precautions and Warnings......1 2. Using the Auto Computer ........2 Tool Descriptions ........2 Specifications ..........3 Accessories ..........3 Navigation Characters......3 Connecting to the Vehicle......4 Setup............6 Fill-up ............12 Speed ............14 Tool Information........16 3. Trip Computer...........17 4. Gauges ..............19 5. -
Page 2: Safety Precautions And Warnings
1. Safety Precautions and Warnings To prevent personal injury or damage to vehicles and/or the auto computer, read this instruction manual first and observe the following safety precautions at a minimum whenever working on a vehicle: Always keep attentive while driving. DO NOT try to make any adjustments while driving. -
Page 3: Using The Auto Computer
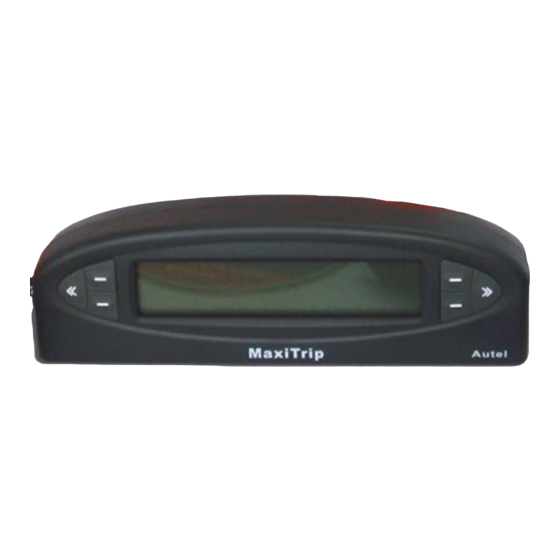
2. Using the Auto Computer 2.1 Tool Descriptions LCD Display – Displays retrieved data. ○ Menu Selection Buttons -- When there is ► or ◄ icon ○ ○ ○ ○ on the screen next to the button, press it to do what is displayed next to it or to change to next available items. -
Page 4: Specifications
2.2 Specifications Display: Backlit, 2 lines * 16 character display Operating Temperature: 0 to 60°C (32 to 140 F°) Storage Temperature: -20 to 70°C (-4 to 158 F°) Power: 8 to 16 volts provided via vehicle battery Dimensions: Length Width Height 140 mm (5.51”)*43.6 mm (1.72”)*26.6 mm (1.05”) NW: 0.2kg (0.44lbs) GW: 0.5kg(1.11lb) -
Page 5: Connecting To The Vehicle
2.5 Connecting to the Vehicle Follow steps below to connect the tool to the vehicle: Connect the OBD II cable to the tool. Place the tool to the position you have chosen. Locate DLC on vehicle. • The DLC is usually located 12 inches from the center of the instrument panel (dash), under or around the driver’s side for most vehicles. - Page 6 If the auto computer fails to communicate with the vehicle’s ECU (Engine Control Unit), a “Link Error” message shows as below: Link Error! ◄ AGAIN EXIT► Use the button next to AGAIN to try to connect to the vehicle, and the tool re-attempts to communicate with the ECU.
-
Page 7: Setup
GAUGE► ◄TRIP SETUP ◄SCAN The HOME screen is defaulted to display 4 menu options as shown in the figure above. It can be set to show the CURRENT trip information also. HOME screen hereafter in the manual refers to the default setting. - Page 8 used in another vehicle and then return it back to this one, or it is reset to factory defaults. Fuel Press the button next to FUEL to enter fuel setup menu. FUEL SIZE► UNITS► ◄ENGINE Use the button on the upper left or upper right to select the fuel type your vehicle uses.
- Page 9 FUEL SIZE► UNITS► ◄ENGINE Use the button next to “-” or “+” to change the tank size, and press SAVE button to save, and return to previous menu. LITERS Tank Size SAVE ► Engine • The limits of engine size are 0-9.9L (0-2.6G) Press the button next to ENGINE.
- Page 10 B. Tool Setup Time Press from home screen. TIME► RATE► ◄FILLUP • If the home screen is set to display information of current trip, first and then press button. Press the button next to TIME. 19:36:26 2007/11/26 Press to enter time adjustment screen. 19:36:26 ←...
- Page 11 NORMAL ◄ ► SMP Rate SAVE► Use the upper left or upper right button to select a sampling rate between “NORMAL” and “SLOW”, and press SAVE button. • NORMAL is the factory default rate. If this causes some updates to be skipped or irregular operation, SLOW should be used.
- Page 12 MODE HOME► ◄CONTRAST To change the display of trip items, press the button next to MODE. 2 Items ◄ ► Trip Mode SAVE► Use the upper left or upper right button to change between “2 Items” and “4 Items”, and press SAVE. “X Items”...
-
Page 13: Fill-Up
◄ ► Contrast SAVE► Default To reset the auto computer to factory defaults, press from home screen twice. SPEED DISPLAY► DEFAULT► ◄ABOUT Press the button next to DEFAULT. Are you sure? NO► ◄YES Press YES to reset the tool to factory defaults, or press NO to exit. - Page 14 TIME► RATE► ◄FILLUP Use the button next to “-” or “+” to change the adjustment factor in 0.1% step till the number to the right of “→”agrees with the value reported by the fuel dispenser. 1.2% LITRE 15.0 → 16.8 DONE►...
-
Page 15: Speed
λ Variations in vehicle sensors due to temperature and time; λ Pump accuracy limits. 2.8 Speed A. To Do Speed Correction Speed and distance adjustments are used to compensate for changes in tire size, gears, tire wear, etc... There are several means of speed correction: A. - Page 16 Press the button next to SPEED. SPEED DISPLAY► DEFAULT► ◄ABOUT Use the button next to ADJUST to enter speed correction screen. ADJUST ◄LIMITED Use the button next to “-” or “+” to adjust in 1% step till the adjustment factor reaches the computed percentage, and press SAVE button.
-
Page 17: Tool Information
English unit of measure. Press twice from home screen. SPEED DISPLAY► DEFAULT► ◄ABOUT Use the button next to ABOUT. VERSION ◄CONVERSION Press the button next to VERSION to view software version on screen. Version 1. 0 2008 Autel Maxitrip Press to exit. -
Page 18: Trip Computer
To lookup unit conversions, press the button next to CONVERSION. VERSION ◄CONVERSION View the conversion results on screen, and Press to exit. 1 Mile=1.61Km 1Km=0.621Mile 3. Trip Computer A trip is a process that driving data is recorded. The auto computer automatically records trip data when the engine is started. - Page 19 LHK (MPG): Fuel economy per 100 kilometer/mile XX:XX: Time driven KM (MI): Distance driv (MI ): Distance remaining before tank is empty KH∮(MH∮): Average speed KPH (MPH): Maximum speed OTE: When vehicle speed is 0, LHK (MPG), Fuel economy per 100 kilometer/mile, is automatically changed to LPH (GPH), fuel used per hour.
-
Page 20: Gauges
shows these items directly when viewing trip information next time. When viewing current trip information, hold button for about 3 seconds to reset current trip data manually. Reset CURRENT? NO► ◄YES Press YES to clear data of current trip or use th e button next to to e xit. -
Page 21: Scan Tool
31 KPH ℃ 107 RPM ℃ e th e button next to a gauge or use change to next available gauges until they return to the arting ones. The information available varies from vehicle to vehicle. If the information is not available for a certain gauge, or a reading is invalid, the trip computer shows “---”. -
Page 22: Retrieving I/M Readiness Status
To er ase codes, use the button next to ERASE P0238 Pd ERASE► ◄ A wa ng message comes up asking for your c onfirmation. Erase Codes ? NO► ◄YES If yo ish to erase codes, press YES. When co des are cleared successfully, an “Erase Done!”... -
Page 23: Reading Freeze Frame Data
View readiness status on screen. OK CAT OK H EVAP OK AIR the button next to any of the items or use button to view additional information. Press button to exit. eading Freeze Frame Data To view freeze frame data, press FR ZD button. -
Page 24: Vehicle Black Box
I/M► VIN► ◄FRZD If the vehicle does not support this mode, a “Not Supported!” message comes up on the display. Press BACK or wait a few seconds to return. 2) View VIN no. on screen. VIN: 2HGES16684H907941 3) Press to exit. 6. - Page 25 Select a set of trip information to view. TRIP2 ► ◄TRIP1 TRIP4 ◄TRIP3 to view trip information in next screen. Distance: 250Km Max SPD: 100KPH When viewing recorded data, hold for about 3 seconds to clear VBB manually. Reset VBB? NO►...
-
Page 26: Warranty And Service
7. Warranty and Service 7.1 Limited One Year Warranty Autel warrants to its customers that this product will be free from all defects in materials and workmanship for a period of one (1) year from the date of the original purchase, subject to the following terms...
Need help?
Do you have a question about the MaxiTrip TP100 and is the answer not in the manual?
Questions and answers