Table of Contents
Advertisement
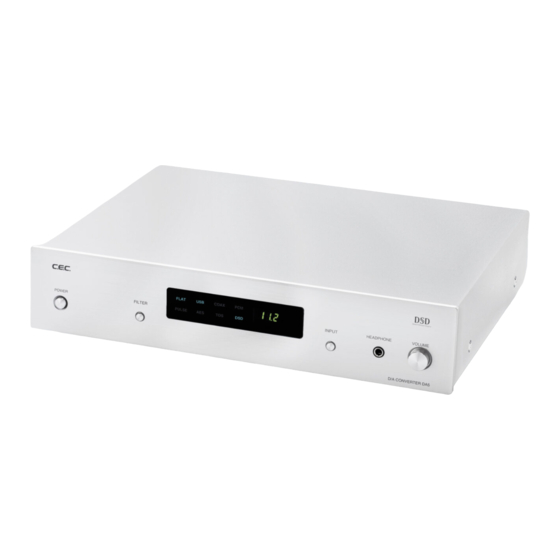
D/A CONVERTER
USB Sound System
Thank you for purchasing a DA5.
Please read through and refer to this Owner's Manual to use your DA5
safely and adequately.
It is recommended to keep the packaging available for future transport-
ation needs.
POWER
FILTER
Owner's Manual
FLAT
USB
COAX
PCM
PULSE
AES
TOS
DSD
DA5
INPUT
HEADPHONE
VOLUME
D/A CONVERTER DA5
Advertisement
Table of Contents

Summary of Contents for cec DA5
- Page 1 USB Sound System Owner's Manual Thank you for purchasing a DA5. Please read through and refer to this Owner's Manual to use your DA5 safely and adequately. It is recommended to keep the packaging available for future transport- ation needs.
-
Page 2: Table Of Contents
DA5 has a digital volume function which changes the analog outputs level in the digital domain without any sound deterioration. It is possible to connect DA5 to a power amplifi er directly and control the system volume through DA5. -
Page 3: Important Safety Instructions
DA5 User's Manual Important Safety Instructions CAUTION RISK OF ELECTRIC SHOCK! DO NOT OPEN! CAUTION: TO REDUCE THE RISK OF ELECTRIC SHOCK, DO NOT REMOVE THE COVER OR REAR PANEL. IT DOES NOT CONTAIN ANY USER-SERVICEABLE PARTS. REFER SERVICING TO QUALIFIED SERVICE PERSONNEL. - Page 4 D/A CONVERTER / USB SOUND SYSTEM DA5 Important Safety Instructions for replacement of the obsolete outlet. (For European Countries: ) Do not defeat the safety purpose of the grounding-type plug. This plug has two poles and a third grounding hole.
-
Page 5: Handling Precautions
DA5 User's Manual Important Safety Instructions For CANADA AC POWER CORD CONNECTION CAUTION: TO PREVENT ELECTRIC SHOCK, MATCH THE BLADE WIDTH OF THE PLUG TO THE SLOT WIDTH. THE PLUG MUST BE FULLY INSERTED TO THE SLOT. Handling Precautions Connecting Other Devices Unplug the AC power cord from the outlet before connecting or disconnecting other devices. - Page 6 D/A CONVERTER / USB SOUND SYSTEM DA5 Handling Precautions parts to rust, causing this appliance to malfunction. Dusty locations may cause this appliance to malfunction. The accumulation of dust inside the CD tray may lower the performance of music signal reading. It may also cause contact failure of the switches, and/or noise.
-
Page 7: Accessories
AC Power Cord Remote Control unit Owner's Manual Keep the packaging available for future transportation needs. The delivered AC power cord should not be used for any other device than DA5. t d . . , L ld in s t e... -
Page 8: Front Panel Functions
PULSE D/A CONVERTER DA5 POWER button Press to turn the power ON or OFF. When DA5 is turned on, digital volume ex. "0" (initial setting = maximum 0 dB) will blink at Sampling frequency indicator in the display. Approximately 5 seconds later the display will change to indicate the current function settings and now DA5 is ready for playback. -
Page 9: Dimmer
DA5 User's Manual Front Panel Functions Display Digital Filter indicator A selected digital filter type PULSE or FLAT lights up. Pressing FILTER button on the front FLAT COAX panel or D.FILTER button on the PULSE remote control unit will change the filter. -
Page 10: Digital Volume
D/A CONVERTER / USB SOUND SYSTEM DA5 Digital Volume DA5 has a digital volume function which changes the analog outputs level at XLR, RCA and headphones in the digital domain. Press the D.VOL-UP/DN buttons on the remote control unit to change the volume between minimum -99(dB) and maximum 0(dB). -
Page 11: Digital Filter
5 seconds until the blinking of the volume level ends. From the next time DA5 will be turned on at the last volume memorized. Digital Filter Press the FILTER button on the front panel or D.FILTER button on the remote control unit to select a digital fi... -
Page 12: Rear Panel Functions And Connections
Pressing D.VOL-UP/DN buttons on the remote control unit the analog outputs level changes between minimum -99(dB) and maximum 0(dB) in the digital domain. This volume function allows DA5 to connect to a power amplifi er directly as well as a pre- amplifi er with a volume control function. - Page 13 PC-Music player should be prepared yourself. Installing ASIO and DSD drivers to a freeware PC-Music player foobar2000 for Windows, up to DSD256 11.2896MHz fi les can be reproduced as well. Those drivers are appeared at the download site in CEC home page. Visit at www.cec-web.co.jp/service/download/driver/index_ex.html for the drivers.
-
Page 14: Remote Control Unit
D/A CONVERTER / USB SOUND SYSTEM DA5 Remote Control unit Buttons function buttons work for DA5 and the others are compatible with the other CEC products like CD Transport TL5, CD Player CD5, D/A Converter DA3N and so on. Here refers to DA5 function only. - Page 15 Battery Replacement Period If the distance at which the remote control unit can be used to operate DA5 seems to be decreasing, replace both batteries with new ones. Precaution on handling batteries Never use different types of batteries together. Both rechargeable and non- rechargeable batteries can be used, but the two should not be used together.
-
Page 16: Basic Operation
Playback of a digital audio device at COAX, TOS or AES/EBU connection Power on DA5 and CD transport or the other digital audio player connected to DA5. Current digital volume level ex. "0" blinks and 5 seconds later the other current settings are displayed. - Page 17 FLAT COAX PULSE Ex. PCM 48kHz through USB connection in PULSE digital fi lter Start on the PC music player and adjust the volume at the amplifi er or DA5. FLAT COAX PULSE Ex. DSD256 11.2MHz through USB connection in FLAT digital fi lter (PULSE fi lter is not available...
-
Page 18: Maintenance
D/A CONVERTER / USB SOUND SYSTEM DA5 Maintenance If the surface of the DA5 case becomes soiled, wipe with a soft cloth or use diluted neutral cleaning liquid. Be sure to remove any fluid completely. Do not use thinner, benzene, alcohol, chemical cloths or bleaching agents as these may damage the surface of the CD5 case. -
Page 19: Troubleshooting
Replace with new batteries DA5 contains a microcomputer that can malfunction due to the external noise or interference. If this seems to be the case, turn the unit off and wait for a short while before turning it back on... -
Page 20: Service Contact Preparation
D/A CONVERTER / USB SOUND SYSTEM DA5 Service Contact Prepareation In case you need to contact a service center please prepare the following information. Model name and serial number: Purchase date: Dealer name and contact information: Description of the unit's problem:... -
Page 21: Specifi Cations
DA5 User's Manual Specifi cations AES/EBU x 1: PCM up to 24bit/192kHz (2pin: hot) COAXIAL x 1: PCM up to 24bit/192kHz Digital input/ Sampling frequency TOS x 1: PCM up to 24bit/192kHz USB2.0 x 1: PCM up to 32bit/384kHz, DSD up to 11.2896MHz... -
Page 22: Usb Driver Installation And Setup For Windows
Windows PC Introduction The USB Interface equipped with DA5 is compatible to USB 2.0 audio device. It is necessary for Windows PC users to install special driver for PCM music fi les, which is possible to download from the CEC home page. -
Page 23: Usb Driver Installation
DA5 User's Manual USB Driver Installation Install a USB driver, BRAVO-HD* on your Windows PC to recognize DA5 as USB audio device and playback PCM music fi les. *BRAVO-HD is an exclusive USB driver that a USB Audio IC maker, SAVITEC company provides for DA5. - Page 24 D/A CONVERTER / USB SOUND SYSTEM DA5 USB Driver Installation 1.4. BRAVO-HD install wizard will start. Click "Next" to continue. 1.5. Select an install folder and Windows user. Click "Browse" to select an installation folder other than the default folder being showed.
- Page 25 DA5 User's Manual USB Driver Installation 1.6. Click "Next" to start the installation. 1.7. When the installation finishes a short-cut icon "BRAVO-HD Audio CPL" will be created on desktop and the restart wizard will appear. Click "Yes(Y)" to restart the...
- Page 26 Ex. WindowsXP Ex. Windows7 1.10. Starting a PC-music after selecting the USB input on DA5 you can listen to the playback music through the analog and/or headphones output on DA5. DA5 USB input is compatible with up to 32bit/384kHz PCM signal but the sampling frequency may be limited by the PC system setting or PC-Music player.
-
Page 27: Installation And Setup For Dsd Playback
Installation and Setup for DSD Playback Installing ASIO and DSD drivers to a freeware PC-music player foobar2000 for Windows PC DSD64(2.8224MHz) to DSD256(11.2896MHz) fi les can be played through DA5. Before starting these steps install foobar2000 to your Windows PC, which can be downloaded from http://www.foobar2000.org/. - Page 28 D/A CONVERTER / USB SOUND SYSTEM DA5 Installation and Setup for DSD Playback 2.5. The installing component "foo_out_asio" will be listed up marked with (unknown). Click "Apply" to continue the installation. 2.6. Click "OK" to complete the installation and change. foobar2000 will restart.
-
Page 29: Asio Proxy Installation On Foobar2000
DA5 User's Manual Installation and Setup for DSD Playback 3. ASIO Proxy Installation on foobar2000 3.1. Double-click "ASIOProxyInstall-0.7.2.exe" in the "da5_dsd-plugin_fb2k" folder. 3.2. Click "Next" on ASIO Proxy for foobar2000 Setup wizard to continue. - Page 30 D/A CONVERTER / USB SOUND SYSTEM DA5 Installation and Setup for DSD Playback 3.3. Select an install folder. Click "Browse" to select a folder other than the default folder being showed. Click "Install" to start the installation. 3.4. Install will fi nish soon and click "Close" to complete the installation.
-
Page 31: Dsd Driver Installation On Foobar2000
DA5 User's Manual Installation and Setup for DSD Playback 4. DSD Driver Installation on foobar2000 4.1. Double-click "foo_input_sacd.fb2k-component" in the "da5_dsd-plugin_fb2k" folder. 4.2. foobar2000 Component Installer will start. Click "Yes(Y)" to continue. - Page 32 D/A CONVERTER / USB SOUND SYSTEM DA5 Installation and Setup for DSD Playback 4.3. The installing component "foo_input_sacd" will be listed up marked with (unknown). Click "Apply" to continue the installation. 4.4. Click "OK" to complete the installation and change. foobar2000 will restart.
-
Page 33: Dsd Playback Setup On Foobar2000
DA5 User's Manual Installation and Setup for DSD Playback 5. DSD Playback Setup on foobar2000 5.1. Click "File" on foobar2000 to open "Preferences". 5.2. Click "Tools - SACD" on the left side tree and select "DSD" at Output Mode. 5.3. Click "Playback - Output - ASIO" on the left side tree, and double-click... - Page 34 D/A CONVERTER / USB SOUND SYSTEM DA5 Installation and Setup for DSD Playback 5.4. Dialog for foo_dsd_asio v0.7.2 setting will appear. Select "BRAVO-HD" at ASIO Driver. And select "ASIO Native" at DSD Playback Method. Any others are not compatible with DSD256.
- Page 35 ASIO at foobar2000, set the output of reproduction to the other than CEC DA5 HS USB Audio at Sound and Audio Device property at your PC (refer to page 26). The volume control and/or mute function can be operated by foobar 2000, DA5 and/or amplifi er.
-
Page 36: Bravo-Hd Control Panel
D/A CONVERTER / USB SOUND SYSTEM DA5 BRAVO-HD Control Panel 1. Start "BRAVO-HD Audio CPL" from the short- 2. Turning on DA5 connected via USB cable the BRAVO-HD control panel will change to show cut on desktop or programs menu. BRAVO- a current setting. - Page 37 DA5 User's Manual BRAVO-HD Control Panel 3. Changing the sample rate and bits per sample on BRAVO-HD control panel the Windows system setting on "sound - digital output property" will change accordingly, and vice versa. Note: Setting 352.8kHz or 384kHz the sound from ex. an internet browser may be unstable...
- Page 38 D/A CONVERTER / USB SOUND SYSTEM DA5 BRAVO-HD Control Panel 4. PCM, bit rate, sampling frequency and buffer Ex. Playback after changing the bit rate and size of a current PCM playback via ASIO like buffer size during stop will show the new a foobar2000 output setting are displayed.
- Page 39 DA5 User's Manual BRAVO-HD Control Panel 5. Displaying a DSD64/2.8MHz playback. Note: Start BRAVO-HD Audio CPL to see a current playback or change the settings. You don't need to start it every playback. Note: Selecting ASIO Native at DSD Playback...
- Page 40 CEC Holdings Co., Ltd., Japan 1701-B...
Need help?
Do you have a question about the DA5 and is the answer not in the manual?
Questions and answers