Table of Contents
Advertisement
Advertisement
Table of Contents

Related Manuals for AUDAC ISP40

Summary of Contents for AUDAC ISP40
- Page 1 ISP40 User Manual www.audac.eu...
- Page 2 This manual is put together with much care, and is as complete as could be on the publication date. However, updates on the specifications, functionality or software may have occurred since publication. To obtain the latest version of both manual and software, please visit the Audac website @ www.audac.eu.
-
Page 3: Table Of Contents
Chapter 1: Pin connections and connectors Connection standards Chapter 2: Front & rear panel Front panel overview Front panel description Rear panel overview Rear panel description Chapter 3: Using the ISP40 Database updates Main screen Station selection ISP40 settings General settings Chapter 4: Additional information... -
Page 5: Introduction
Introduction Professional internet audio player The ISP40 is a professional internet radio player featuring the unique Linum™ technology which eleminates any unwanted behaviour such as sudden channel hopping or music stops. An internal buffer will avoid any music interruptions for short term connection interruptions and will make sure the audio stream will be automatically restored afterwards. -
Page 6: Precautions
Precautions READ FOLLOWING INSTRUCTIONS FOR YOUR OWN SAFETY ALWAYS KEEP THESE INSTRUCTIONS. NEVER THROW THEM AWAY ALWAYS HANDLE THIS UNIT WITH CARE HEED ALL WARNINGS FOLLOW ALL INSTRUCTIONS NEVER EXPOSE THIS EQUIPMENT TO RAIN, MOISTURE, ANY DRIPPING OR SPLASHING LIQUID. AND NEVER PLACE AN OBJECT FILLED WITH LIQUID ON TOP OF THIS DEVICE. DO NOT PLACE THIS UNIT IN AN ENCLOSED ENVIRONMENT SUCH AS A BOOKSHELF OR CLOSET. -
Page 7: Waste Of Electrical And Electronic Equipment (Weee)
WASTE ELECTRICAL AND ELECTRONIC EQUIPMENT (WEEE) The WEEE marking indicates that this product should not be disposed with regular houshold waste at the end of its life cycle. This regulation is created to prevent any possible harm to the environment or human health. -
Page 9: Chapter 1: Pin Connections And Connectors
ISP40 RX PIN 5 Settings 19200 Baud 8 Bit 1 Stop bit No parity No Handshaking RS232 The complete command set for controlling the ISP40 through RS-232 is available in the ISP40 commands user manual which is freely downloadable on www.audac.eu... -
Page 10: Chapter 2 Front & Rear Panel
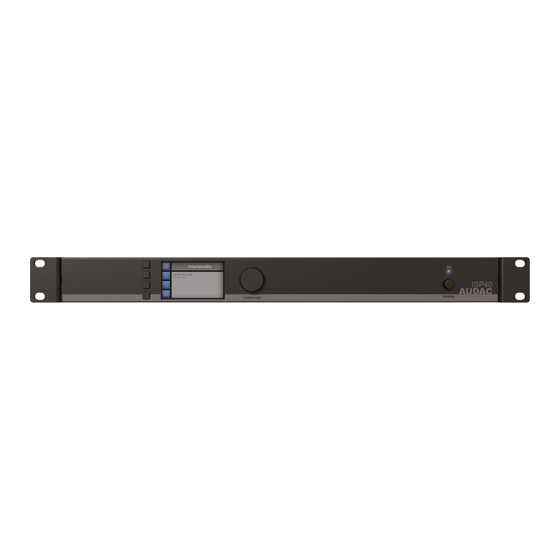
Chapter 2 Front & rear panel Front Panel overview Front panel description Graphical LCD display with tactile push buttons and rotary selection dial: A clear system overview and intuitive user experience is offered using the 2.8” graphical LCD display accompanied with four tactile selection buttons (left side) and a rotary selection dial (right side). -
Page 11: Rear Panel Overview
The Ethernet connection implemented using an RJ45 type connectors. This Ethernet connection works as the audio stream input of the ISP40. Hereby it shall get connected to any LAN network with internet access for reaching the database and audio streaming servers. -
Page 12: Chapter 3 Using The Isp40
Chapter 3 Using the ISP40 The ISP40 control and configuration is done through the front panel of the device which includes a 2.8” graphical LCD display, which is accompanied with four tactile push buttons (left side) and a rotary selection dial (right side). This combination allows you to navigate through the systems user interface and access all the available control and configuration possibilities of the system. -
Page 13: Database Updates
How to start the manual update process is described in the ISP40 Settings > DB info chapter of this instruction manual. -
Page 14: Isp40 Settings
The autoupdate function allows automatic updating of the database. When enabled, the ISP40 automatically synchronizes with the database server whether a new update becomes available, and if so, automatically start the database update process without any noticeable consequences for the user / listener. - Page 15 IP Settings > DHCP: In default configuration, the DHCP function for the ISP40 is enabled whereby the IP address and other network settings are automatically assigned through the DHCP server in your network. Since the ISP40 doesn’t support any control commands from other devices over TCP/IP in contrast to other TCP/IP control supporting devices, the ISP40 doesn’t need to have a ‘fixed’...
-
Page 16: General Settings
(if the password is enabled). Info: Info will give an overview of the software versions the ISP40 is running. LCD Settings: Adjustments for the LCD settings can be made here. The brightness can be adjusted within a range of 10% to 100% (standard is 80%). -
Page 17: Chapter 4: Additional Information
IP range, the AUDAC products will not be accessible from your network. You can change the IP address of the AUDAC products to make them work properly in your network. This can be done in the settings menu, and is described extensively in the “Settings” chapter of this user manual. -
Page 18: Technical Specifications
Technical specifications Input RJ45 Ethernet connection Output Balanced stereo line output (2 x 3-pin Euro Terminal Block ~ 3.81 mm) Output level +8 dB ~ -92 dB (Software configurable) Supported filetypes streaming MP3, WMA, AAC Control Front panel RS232 (DB9 connector) RMT40 Remote control (optional) Display 2.8”... -
Page 19: Notes
Notes... - Page 20 Notes...
Need help?
Do you have a question about the ISP40 and is the answer not in the manual?
Questions and answers