Table of Contents
Advertisement
Advertisement
Chapters
Table of Contents

Summary of Contents for Artistic SD-16
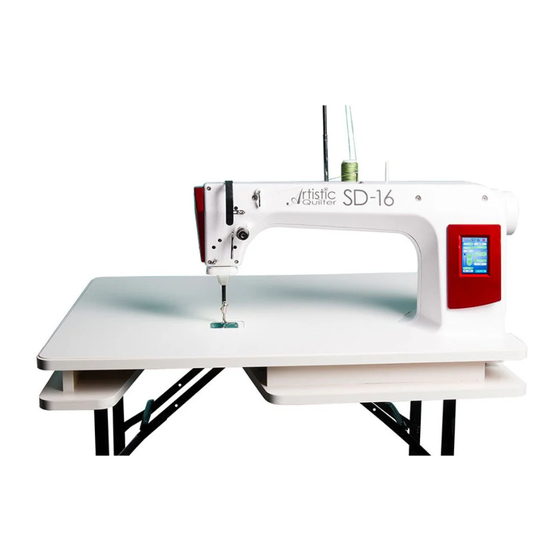
- Page 1 Artistic Quilter SD-16 User Manual...
- Page 2 Page 2 Artistic Quilter SD-16 User Manual...
-
Page 3: Table Of Contents
Artistic Quilter SD-16 Registration Information . . . . . . . . . . . . . . . . . . -
Page 4: Safety Section
• The Artistic Quilter SD-16 should only be used indoors away from moisture. Please note: Do not operate your Artistic Quilter • The Artistic Quilter SD-16 should not be stored or SD-16 quilting machine until you have completely used in extreme temperatures. -
Page 5: Quick Facts
Artistic Quilter SD-16 when used improperly or not in accordance with the should never be used. guidelines stated in this manual or when used on machine- quilting tables not recommended by Artistic. - Page 6 Cet appareil est conforme à la partie 15 de la réglementation de la FCC. Son fonctionnement est soumis aux deux conditions • La AQ SD-16 ne doit pas être rangée ou utilisée à des suivantes : (1) cet appareil ne doit pas causer d’interférences températures extrêmes.
- Page 7 à domicile un niveau de fonctionnalités et une facilité d’utilisation inégalés dans l’industrie du quilting. La machine à quilter AQ SD-16 est une machine de grande qualité qui intègre des fonctions de conception très robustes et qui est très facile à...
-
Page 8: Accessories Included In The Box
For more product information and updates, visit our website at www.artisticcreativeproducts.com. The contents of this manual and product specifications are subject to change without prior notice. Artistic Quilter SD-16 Accessories Included in the box: • TruStitch Stitch Regulator • Power Cord •... -
Page 9: Components (Front Side View)
Figure 1 Thread Mast Components Not Identified Thread Guide A Because the Artistic Quilter SD-16 is upgradeable to a Three-Hole Thread Guide B stand-up frame quilting system, there are components found on the machine that are not used for sit-down Thread Guide C machine quilting (such as threaded holes for handlebars). -
Page 10: Components (Back Side View)
11. Needle Bar 19. Back Casing/Frame 12. Needle Bar Thread Guide 20. Threaded Horizontal Spool Pin Mounting Hole 13. Needle 14. Ruler Foot 15. Needle Plate 16. Feet mount 17. Presser Bar Figure 2 Page 10 Artistic Quilter SD-16 User Manual... -
Page 11: Components (Rear And Front Views)
Rear and Front Views 21. On/Off Switch 25. Fuse 22. Power Cord Connector 26. Bobbin Assembly 23. Foot Pedal Connector 27. LED Light Ring 24. Spool Pins Rear Front Figure 3 ArtisticCreativeProducts.com Page 11... -
Page 12: Installing Power Cord,Installing Foot Pedal
6. Ensure the overlay is securely attached to the table, adjusting as needed. Installing the Foot Pedal NO TE: If the Artistic Quilter must be removed after the table overlay is installed, lift the machine upward at 1. Plug in the foot pedal cord end into the foot pedal the back a couple of inches so the needle plate drops connector (see page 11, Figure 3, #27). -
Page 13: Installing The Thread Mast
Installing the Thread Mast 1. Locate the threaded hole on top of the machine near the rear by the hand wheel. 2. The thread mast comes with a washer and a nut. Remove the nut and washer, replace the nut onto the mast for two or three turns. -
Page 14: Inserting Needle Needle/Thread Selection Guide
20 (120) 30 wt., 20 wt., 12 wt. remove the machine from the box. For these reasons, Artistic recommends that you replace the needle before CAUTION: Your Artistic machine stitches at a much beginning to quilt with your new machine. -
Page 15: Changing The Hopping Foot
Changing the Hopping Feet Your machine comes with two hopping feet: a ruler foot and an open-toe foot. Use the ruler foot for ruler work and everyday quilting, and the open-toe foot when you need greater stitch visibility (such as micro quilting). -
Page 16: Threading The Machine
You may try skipping one or two holes on thread guide B when using these threads. Page 16 Artistic Quilter SD-16 User Manual... - Page 17 This is not the case with the Artistic Quilter SD-16 quilting machine where the top tension is always tight and the tension discs are never open.
-
Page 18: Bobbin Case And Bobbin Thread Tension Adjustments
The lever should be used only for removing the bobbin case from the machine. 2. Slide the thread through the slot (Figure 13) and under the tension spring leaving 5-6 inches of thread hanging loose (Figures 14 and 15). Page 18 Artistic Quilter SD-16 User Manual... -
Page 19: Achieve Balanced Tension
Drawing the Bobbin Thread to the Top of the Quilt 1. After threading the machine, plug it in and turn on the power. Place quilt sandwich under hopping foot. 2. While firmly holding the tail of the needle thread with the left hand, choose one of the following methods to cycle the needle through one full rotation to bring the bobbin thread to the top of the quilt. -
Page 20: Maintenance
Quilter SD-16. Internal oiling is not necessary on the any other chemicals to clean your display as they may Artistic Quilter SD-16 except when the machine is taken to adversely affect the touch-screen response and clarity. a service technician for routine maintenance and cleaning. -
Page 21: Using The Touch-Screen Display
Using the Touch-Screen Display The Artistic Quilter SD-16 has a color touch-screen display on the front of the machine. Settings are changed using this display. Main Screen Button Functions (Figure 19) On/Off Indicator The circle in the top right of Figure 19 indicates whether or not the motor is running. - Page 22 Figure 22 Basting Mode The Artistic Quilter SD-16 has a basting mode that causes a stitch to be formed at a specified time interval – every half second, every three/quarters of a second, every second, every 1.5 second, or every two seconds. (Figure 23) Touch the basting icon (Figure 24) to activate basting mode.
- Page 23 Bobbin Thread Indicator If you use the Low-Bobbin Estimator feature, The Bobbin Thread Indicator box (Figure 26) shows how much bobbin Low Bobbin thread remains on the bobbin. The value counts down Indicator until it gets to zero, at which time the low-bobbin alarm alerts you that it is time to put in a new bobbin.
- Page 24 Artistic Quilter SD-16. Low Bobbin Figure 29 The Artistic Quilter SD-16 includes a low bobbin alarm so you can estimate how soon your bobbin thread will run out. Timers The Artistic Quilter SD-16 has two useful timers. One timer...
- Page 25 (Figure 33). When recording the capacity of a bobbin, the Artistic Quilter SD-16 assumes you will stitch at 10 stitches per inch when stitch regulation is not attached to your machine. Therefore, if you estimate bobbin capacity and stitch using...
- Page 26 Timers The Artistic Quilter SD-16 has two useful timers. One timer enables you to set a reminder alarm (like a kitchen timer) and the other timer tracks how much time you spend on a quilt. The first (top) timer is a reminder timer. It enables you to...
- Page 27 If you hear a constant beep or no beep at all for a full 360° rotation of the hand wheel, this indicates a failed test and the machine should be inspected by a quali fied Artistic Figure 37 repair technician.
- Page 28 Motor Speed Sensor Test The “Speed” Sensor test can help you determine whether or not there is a problem with the Artistic Quilter SD-16 speed sensor. Before performing this test, remove the Remove bobbin case and top bobbin case and the top thread. Press the foot pedal so thread.
- Page 29 1 . Remove the tension knob. Calibration should only be done 2 . Gently press the spring against the tension discs under the guidance of an Artistic Quilter Technician. while not compressing the spring. Carefully remove tension knob.
-
Page 30: Getting Started Quilting
With any quilting machine, it is important to under stand touch on the fabric. Gripping the fabric too tightly may the basics of free motion quilting. The Artistic Quilter SD- cause body tension resulting in poor quilting quality 16 Quilting Machine does not have feed dogs like domestic and discomfort. -
Page 31: Correcting Common Issues
• Replace the needle often, normally once or twice per day for continuous bent, or installed improperly quilting or at least once per quilt. Use Artistic Quilter SD-16 recommended needles. • Always change the needle if the needle has struck any hard object such as a straight pin, etc. - Page 32 Foot pedal is unplugged • Verify that the foot pedal is plugged in. If the main screen status message in the upper left hand corner says “Check Pedal”, then the pedal is not properly installed. Page 32 Artistic Quilter SD-16 User Manual...
- Page 33 • Bobbin rotation is not smooth • Change the bobbin. The slightest hesitation of the bobbin rotation can be the cause of dramatic tension change and thread breakage. Use ONLY Artistic bobbins • Needle is burred, bent or dull, •...
- Page 34 Page 34 Artistic Quilter SD-16 User Manual...
- Page 35 ArtisticCreativeProducts.com Page 35...
- Page 36 Page 36 Artistic Quilter SD-16 User Manual...
-
Page 37: Bobbin Winding User Manual
Artistic BOBBIN WINDER USER MANUAL Revision 2.0, Part number QM31500 © 2016 Artistic Quilter, Inc. - Page 38 Troubleshooting the Bobbin Winder . . . . . . . . . . . . . . . . . . . . . . . . . . . . . . . . . . . . . . . . . . . . . . 48 Page 38 Artistic Quilter SD-16 User Manual...
-
Page 39: Important Information
Important Information Réglementations Regulatory Information Cet appareil numérique de la classe B est conforme This equipment has been tested and found to comply with aux norms NMB-003 et CNR-210 du Canada. Son the limits for a Class B digital device, pursuant to part 15 fonctionnement est assujetti aux deux conditions of the FCC Rules. -
Page 40: General Safety Considerations
General Safety Considerations Environmental Considerations WARNING Recycling Information Artistic Quilter recommends customers dispose of any To protect against risk of fire, bodily injury, electrical shock used electronic products in an environmentally sound or damage to the product: manner by reusing parts or whole products and recycling •... -
Page 41: Artistic Bobbin Winder Components
Artistic Bobbin Winder Components Thread Tracking Adjustment Thread Mast Thread Post Speed Selector Thread Guide Base Thread Tensioner Bobbin Post Adjustment Screw Bobbin Stop Sensor Power Adapter AC Power Cord ArtisticCreativeProducts.com Page 41... -
Page 42: Assembly Instructions
Loop Thread Mast Pigtail Thread Guide Assembly Assembly Figure 2 Detail Figure 2 Page 42 Artistic Quilter SD-16 User Manual... - Page 43 Contact your local Artistic Quilter retailer to obtain the appropriate power cord. Figure 3...
-
Page 44: Bobbin Winder Controls
Using the Artistic Bobbin Winder The Artistic Bobbin Winder is designed to wind bobbins for your Artistic Quilter machine and will wind all M-class bobbins. The bobbin winder includes a winding speed control that allows winding bobbins at up to 3500 RPM. - Page 45 Hold thread end as you begin to wind. Optional Accessory If using a spool of thread rather than a thread cone, use an optional horizontal spool pin (available from Artistic Quilter) attached to the thead post (Figure 9). See your Artistic Dealer to order.
-
Page 46: Adjusting The Bobbin Sensor Assembly
Retighten the adjustment screw. 3. Place an empty bobbin on the bobbin post, thread the Artistic Quilter Bobbin Winder and press the start (green) button to start the winder. When the sensor stops the winder, press the green button until the bobbin is as full as you want. -
Page 47: Adjusting The Thread Tension
Adjusting the Thread Tension 2. Rotate this knob to extend or retract the thread tensioner on the front for better alignment with the The Artistic Bobbin Winder was designed to give you the bobbin. flexibility you need to work with different threads and bobbins. -
Page 48: Troubleshooting The Bobbin Winder
If after checking the four items above the bobbin winder still has no power, take it to an authorized Artistic Quilter representative for service. Bobbin winder doesn’t automatically shut If the bobbin winder receives too much sunlight, it is possible for the shut-off sensor to be overpowered by the ambient light and it will not shut off when the bobbin is full. - Page 49 Mechanical Issues Issue Action Cannot tighten the thread mast The bobbin winder thread mast may have a little thread relief at the top of the threads, causing the nut to spin and preventing it from tightening the thread mast loop over the thread cone. Turn the nut counterclockwise to ensure connects with the threads on the thread mast, then tighten it to secure the mast over the thread cone.
- Page 50 Artistic Quilter SD-16 User Manual...
-
Page 51: Trustitch For Artistic User Manual
USER MANUAL ArtisticCreativeProducts.com Page 51... - Page 52 TruStitch for Artistic Components . . . . . . . . . . . . . . . . . .
-
Page 53: Safety Section
Important Information Radio Frequency Interference This product uses the unlicensed Industrial, Scientific and Regulatory Information Medical (ISM) radio band, which begins at 2.400 GHz and This equipment has been tested and found to comply extends to 2.483 GHz. Many commonly used products also with the limits for a Class B digital device, pursuant to part share this band, including WiFi (wireless) network routers 15 of the FCC Rules. - Page 54 Pile (ou batterie) doit être remplacée à l’usine par un your Artistic Dealer. représentant autorise et entraîné par Artistic. Contactez Artistic si vous avez besoin de remplacer la pile (batterie). Important Battery Information Ne jetez pas la batterie de votre produit au feu ni avec Caution –...
-
Page 55: Product Description
Health Warning Product Description When using this product, as with many activities, you The TruStitch for Artistic is designed to turn the Artistic may experience occasional discomfort in your hands, arms, Quilter SD-16 into a stitch-regulated quilting machine. shoulders, neck, or other parts of your body. However, if... - Page 56 Produit laser de CLASSE 1 mettant l'équipement hors et sous tension, l'utilisateur est Le contrôleur Artistic contient un laser invisible conforme encouragé à essayer de corriger les interférences à l'aide aux normes de sécurité les plus strictes. Le produit répond d'une ou de plusieurs des mesures suivantes : aux normes de sécurité...
- Page 57 Artistic formés à cet effet. Contactez Artistic si vous avez entiers et le recyclage des produits, des composants et / ou besoin de remplacer la batterie.
- Page 58 Le régulateur de points TruStitch for Artistic est Avertissement concernant la santé conçu pour transformer la Artistic Quilter SD-16 en une Lors de l'utilisation de ce produit, comme dans de machine à quilter à régulation de points. Il utilise une nombreuses activités, vous pouvez ressentir une gêne...
-
Page 59: Trustitch For Artistic Components
Machine Interface Cable Coaster USB-Style Controller Charging Cable (may be white or black) Figure 1. TruStitch for Artistic Components Pre-installation Instructions Battery Charging The battery on the Controller may not be fully charged when the product arrives. It is a good idea to plug the charging cable into the Controller and Receiver and then plug the wall power module into the Receiver to start the charging. -
Page 60: Installation Instructions
Caution: Use only the Power Module that came with (Figures 2 & 3). Please note that the Machine Interface TruStitch for Artistic to power the Receiver. If you use a Cable has one end that is identical to the Foot Pedal different power supply, such as the power supply that Connector. - Page 61 2. Install remaining end of Controller Charging Cable into 3. With the machine and Controller turned off, install the the Controller as shown in Figures 4 & 5 . Machine Interface Cable Connector to the machine foot pedal port (Figure 6). Secure the connector by turning the screw shafts (Figure 7).
-
Page 62: Indicator Led Identification
Left: Connection Indicator LED (flashes RED when no connection) Middle: Charge Indicator LED (turns YELLOW when Controller needs charging) Right: Power Indicator LED (turns BLUE when Receiver is powered on) Figure 9. Receiver Indicator LED Placement Page 62 Artistic Quilter SD-16 User Manual... -
Page 63: Activating Stitch Regulation
Stitch Regulated features. In this mode, you have access to the stitching speed Presets and other features that are standard with the Artistic Quilter SD-16. Regulated Mode Pressing the Manual button on the main screen will change the mode to Stitch Regulated and the display will change. -
Page 64: Machine Operation
There is also a “foot pedal-free” mode of regulated machine stitching. When the Controller stops moving, the operation with the TruStitch for Artistic. When in Regulated machine stops stitching, possibly in mid-stroke. The default mode, a “Play/Pause” button can be found on the main Needle Up/Down choice is overridden by Precision. -
Page 65: Using The Stitch Regulator
Using the Stitch Regulator The Controller is designed to track the motion of the Controller across the table, not the motion of the fabric during quilting. For proper stitch regulation, always keep the Controller moving with the fabric as described below. 1. -
Page 66: Trustitch For Artistic Accessories
TruStitch for Artistic Accessories Two Accessories are provided with the TruStitch for Artistic to give the quilter more flexibility in quilting. Magnet 1. The Magnet allows you to quilt “hands-free” without holding onto the Controller through the quilt sandwich. Place the Controller on the table, just outside of where you wish to place your hands. -
Page 67: Tips And Techniques
2. When you have finished a section of quilting, readjust Artistic Quilter SD-16 arm is placed. This gap will cause the position of the Controller to make the next section a break in the information sent to the Receiver and will easier to work on. -
Page 68: Limited Warranty Coverage
If your product does not work properly because of a defect THERE ARE NO EXPRESS WARRANTIES EXCEPT AS in materials or workmanship, Artistic (hereafter referred LISTED UNDER "LIMITED WARRANTY COVERAGE". to as “the warrantor”) will, for the length of the period... - Page 69 ArtisticCreativeProducts.com Page 69...
-
Page 70: Artistic Quilter Sd-16 Registration Information
Artistic Quilter Limited Warranty We thank you for purchasing this Artistic Quilter machine (the “Product”) and hope you will enjoy it for years to come. In the event that your Product needs service covered by this warranty, please contact the authorized Artistic Quilter dealer from whom you purchased it. - Page 71 The warranty does not cover and the user assumes the risk of and there is hereby excluded any liability to Artistic for failure, defects, loss, deterioration, personal injury or damage which are due to: (1) ordinary wear and tear or exposure, (2) abuse, misuse, negligence, or (3) use of parts not authorized by Artistic.
- Page 72 ArtisticCreativeProducts.com Printed April 2015...
Need help?
Do you have a question about the SD-16 and is the answer not in the manual?
Questions and answers