Table of Contents
Advertisement
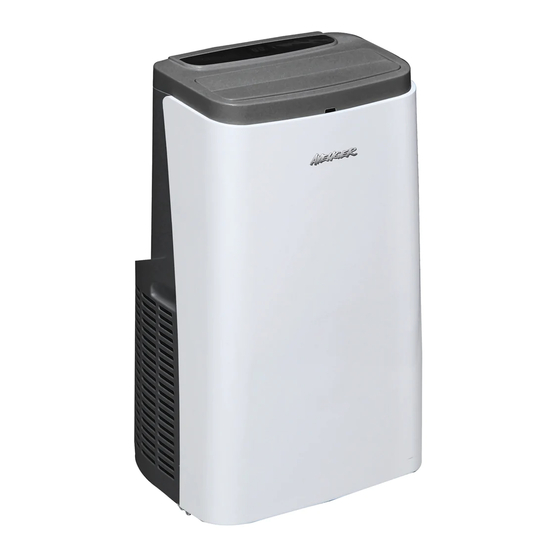
PORTABLE AIR CONDITIONER
ASSEMBLY AND OPERATING INSTRUCTIONS
WARNING: Read and follow all warnings and instructions
in this manual to avoid personal injury or property damage.
INSTALLER: Leave this manual with the appliance.
CONSUMER: Leave these instructions with the product
and retain for future reference.
Questions, problems, missing parts? Before returning to your retailer, call our
customer service department at 1-855-607-6557, 8:00 am - 4:30 pm EST, Monday
OWNER'S MANUAL
through Friday or email info@factorybuysdirect.com
Providing Factory Direct Pricing
and Exceptional Products
MODELS:
JHS-A018-10KR
SKU#: 130004
JHS-A018-12KRH
SKU#: 130005
Advertisement
Table of Contents

Summary of Contents for Avenger JHS-A018-10KR
- Page 1 PORTABLE AIR CONDITIONER OWNER’S MANUAL ASSEMBLY AND OPERATING INSTRUCTIONS MODELS: JHS-A018-10KR SKU#: 130004 JHS-A018-12KRH SKU#: 130005 WARNING: Read and follow all warnings and instructions in this manual to avoid personal injury or property damage. INSTALLER: Leave this manual with the appliance.
-
Page 2: Table Of Contents
Control Setting .......... 8 Warranty ..........15 SAFETY INFORMATION Thank you for purchasing the Avenger Portable Air Conditioner. Please keep the manual for later review, and read the manual carefully before use. NOTE: Please read and understand this entire manual before attempting to assemble, operate or install the product. -
Page 3: Additional Notes And Features
NOTES CONT. 3. Place the appliance in a flat and dry place and keep a distance of above 20 inches between the machine and the surrounding objects or walls. 4. After the air conditioner is installed, ensure that the power plug is intact and firmly plugged into the power outlet. -
Page 4: Specifications And Dimensions
SPECIFICATIONS SKU#: 130004 SKU#: 130005 Product Weight 53 lbs 61 lbs PRODUCT DIMENSIONS SKU#: 130004 16" W 28.5" H SKU#: 130005 16" W 28.5" H www.factorybuysdirect.com M130004/5-01... -
Page 5: Components
COMPONENTS Control Panel Top Cover Louver Front Housing Rear Housing Casters EVA Filter Housing Handle Rear Housing Continuous Drainage Hole Air Vent Cord Wrap CON Filter Screen Air Inlet Grille Drainage Hole Power Cord Plug (adjustable according to customer requirements) Exhaust Pipe Assembly Window Sealing Plate Assembly www.factorybuysdirect.com... -
Page 6: Installation
INSTALLATION WARNING: Before using the portable air conditioner, keep upright for at least two hours. The air conditioner can be easily moved in the room. In the moving process, ensure that the air conditioner is in the upright position and the air conditioner is placed on a flat surface. - Page 7 INSTALLATION CONT. 3. Move the appliance with installed heat pipe and fittings in front of the window. The distance between the body and walls or other objects shall be least .20 inches (as shown in Figure 4). 20 in. Figure 4 4.
-
Page 8: Control Setting
CONTROL SETTING OPERATING INSTRUCTIONS: Figure 7 1. When the machine is powered on for the first time, the buzzer will play power- on music, and then the machine will get into standby status. 2. Power Key: Press the key to turn on and turn off the appliance. 3. -
Page 9: Protection Functions
CONTROL SETTING CONT. OPERATING INSTRUCTIONS OF THE REMOTE CONTROL: Figure 8 cool only remote control cool + heat pump remote control SKU#: 130004 SKU#: 130005 Key operation of the high-quality remote control are as follows: 1. Power: Press the key to turn on or turn off the machine. 2. -
Page 10: Drainage Instructions
PROTECTION FUNCTIONS CONT. 3. Automatic Defrosting (heating and cooling models have this function): • The machine has automatic defrosting functions: during defrosting, heating symbol on the display screen will flash. 4. Automatic Thermal Protection: • To protect the service life of the appliance, the machine has automatic ther- mal protection in heating mode. -
Page 11: Maintenance
DRAINAGE INSTRUCTIONS CONT. 2. Continuous Drainage (only applicable to cooling and dehumidification mode), as shown in figure: • Unscrew the drainage cover, and unplug the water plug. • Set the drainage pipe into the water outlet. • Connect the drainage pipe to the bucket Figure 10 MAINTENANCE Before cleaning and maintenance, turn off the appliance and unplug the plug. -
Page 12: Troubleshooting
MAINTENANCE CONT. 2a. Cleaning the Upper Filter Screen Frame Clasp the wedging block of the EVA filter screen frame with hands. Force down from the outside to remove the EVA filter screen frame. Unscrew four screws holding the EVA filter screen to the rear housing to remove the EVA filter screen (as shown in the figure 11). - Page 13 TROUBLESHOOTING CONT. Problems Reasons Solutions There is no electricity. Turn it on after connecting it to a socket with electricity. The overflow indicator displays Discharge the water inside. "FL". The ambient temperature is too Recommend to use The air conditioner low or too high.
-
Page 14: Appendix
APPENDIX Fuse Parameters Type: FSD or 50F Voltage: 250V Current: 3.15A Schematic Diagram ELECTRIC CIRCUIT DIAGRAM For model, technology and specific parameters please refer to product name- plate. Treatment: Don't put the abandoned appliance with other unsorted waste. Such waste should be placed separately for other special use. www.factorybuysdirect.com M130004/5-01... -
Page 15: Warranty
WARRANTY KEEP THIS WARRANTY Model _______________________________ Serial No. ____________________________ Date Purchased _______________________ Keep receipt for warranty verification. REGISTER YOUR PRODUCT AT WWW.FACTORYBUYSDIRECT.COM FACTORY BUYS DIRECT LIMITED WARRANTIES New Products Standard Warranty: Factory Buys Direct warrants this new product and any parts thereof to be free from defects in material and workmanship for a period of one (1) year from the date of first purchase from an authorized dealer provided the product has been installed, maintained and operated in accordance with Factory Buys Direct’s warnings and instructions.
Need help?
Do you have a question about the JHS-A018-10KR and is the answer not in the manual?
Questions and answers