
Related Manuals for switel DE31 Series


Summary of Contents for switel DE31 Series
- Page 1 Strahlungsarmes schnurloses DECT−/GAP−Telefon DE31x Bedienungsanleitung Version 1.0 − 31.07.2008...
-
Page 2: Aufladbare Akkus
Sicherheitshinweise 1 Sicherheitshinweise Lesen Sie diese Bedienungsanleitung sorgfältig durch. Bestimmungsgemäße Verwendung Dieses Telefon ist geeignet zum Telefonieren innerhalb eines Telefonnet- zes. Jede andere Verwendung gilt als nicht bestimmungsgemäß. Eigen- mächtige Veränderungen oder Umbauten sind nicht zulässig. Öffnen Sie das Gerät in keinem Fall selbst und führen Sie keine eigenen Reparatur- versuche durch. - Page 3 Sicherheitshinweise Medizinische Geräte Achtung: Benutzen Sie das Telefon nicht in der Nähe von medi- zinischen Geräten. Eine Beeinflussung kann nicht völlig ausge- schlossen werden. DECT −Telefone können in Hörgeräten einen unangenehmen Brummton verursachen. Entsorgung Wollen Sie Ihr Gerät entsorgen, bringen Sie es zur Sammelstelle Ihres kommunalen Entsorgungsträgers (z.
- Page 4 Störungen kommen kann. Schließen Sie die Basisstation wie auf der Skizze abgebildet an. Verwen- den Sie aus Sicherheitsgründen nur das mitgelieferte Netzteil sowie das beigefügte Telefonanschlusskabel. Unter www.switel.com erfahren Sie, ob dieses Telefon/Telefonset be- reits erhältlich ist.
- Page 5 Telefon in Betrieb nehmen Telefonanschlussdose Netzsteckdose Verwenden Sie für die Basisstation das Netzteil mit der Nr. VD060025D und den Ausgangsdaten 6 V, 250 mA. Ladestation anschließen Schließen Sie die Ladestation wie auf der Skizze abgebil- det an. Verwenden Netzsteckdose Sie aus Sicherheits- gründen nur das mit- gelieferte Netzteil.
-
Page 6: Akkus Aufladen
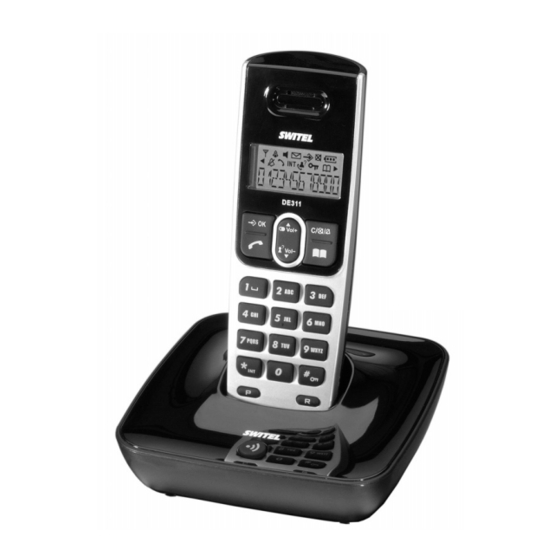
Telefon in Betrieb nehmen Akkus aufladen Stellen Sie das Mobilteil bei der ersten Inbetriebnahme für min- destens 16 Stunden in die Basisstation / Ladestation. Haben Sie das Mobilteil richtig in die Basisstation / Ladestation gestellt, ertönt ein Hinweissignal. Das Mobilteil erwärmt sich beim Laden. Dies ist normal und ungefährlich. - Page 7 Bedienelemente 3 Bedienelemente Die Tasten Ihres Telefons werden in dieser Bedienungsanleitung nachfol- gend mit vereinheitlichten umrandeten Symbolen dargestellt. Leichte Ab- weichungen der Tastensymbole Ihres Telefons gegenüber den hier ver- wendeten Tastensymbolen sind daher möglich. Mobilteil Lautsprecher LCD−Display (Flüssigkeitskristallanzeige) Pfeiltaste Aufwärts Wahlwiederholung Hörerlautstärke erhöhen Eingaben löschen...
- Page 8 Einführende Informationen Basisstation Ladekontakte Paging−Taste 4 Einführende Informationen In diesem Kapitel finden Sie grundlegende Informationen zur Handha- bung der Bedienungsanleitung und des Telefons. Darstellungsweise in der Bedienungsanleitung Darstellung Beschreibung Darstellung von Tasten Abgebildete Taste kurz drücken 2 Sek. O Abgebildete Taste 2 Sekunden drücken Beliebige Taste kurz drücken ë...
- Page 9 Einführende Informationen Symbole und Texte im Display des Mobilteils Symbol Beschreibung Konstant: Anzeige der Akkukapazität. Blinkend: Laden Sie die Akkus. Durchlaufende Segmente: Die Akkus werden geladen. Interne Rufnummer des Mobilteils. 04/07 12-20 Anzeige des Datums und der Uhrzeit. Konstant: Sie führen ein externes Gespräch. Blinkend: Es erreicht Sie ein externer Anruf.
- Page 10 Einführende Informationen Das Mikrofon ist stummgeschaltet. Konstant: Die Verbindung zur Basisstation ist gut. Blinkend: Die Verbindung zur Basisstation bricht ab. Nä- hern Sie sich der Basisstation. Bereitschaftsmodus Alle Beschreibungen in dieser Bedienungsanleitung gehen davon aus, dass sich das Mobilteil im Bereitschaftsmodus befindet. Das Mobilteil ist im Bereitschaftsmodus, wenn kein Gespräch geführt wird und kein Menü...
- Page 11 Menüstruktur 5 Menüstruktur Hauptmenü In das Hauptmenü gelangen Sie, wenn Sie die Taste ” drücken. Da- nach wählen Sie mit den Tasten + oder , einen Eintrag aus und be- stätigen Sie Ihre Auswahl mit der Taste O. Weitere Informationen zum Menü und zur Bedienung . Kapitel 4. SETUP MT KLINGELTON MELODIE 1...10...
- Page 12 Menüstruktur NEUER PIN ' SETUP BS PIN ÄNDERN PIN EINGEBEN ' PIN ERNEUT WAHLMODUS TONWAHL IMPULSWAHL FLASH−ZEIT 100MS ... 800MS VMWI VMWI OFF? RESET PIN EINGEBEN RESET? DATUM/ZEIT JAHR DATUM UHRZEIT AN/ABMEL- ANMELDEN BASIS 1...4 PIN EINGEBEN DUNG BASIS WÄHLEN Auto BASIS 1...4 MT ABMELDEN PIN EINGEBEN...
-
Page 13: Namen Eingeben
Telefonbuch 6 Telefonbuch Im Telefonbuch können Sie 25 Rufnummern mit den dazugehörigen Na- men speichern. Geben Sie bei allen Rufnummern immer die Vorwahl mit ein, damit auch eingehende Ortsgespräche einem Telefonbucheintrag zugeordnet werden können. Ist die Speicherkapazität erschöpft, zeigt das Display beim nächsten Speichern die Meldung SPEICHERVOLL . - Page 14 Telefonbuch ë, O Rufnummer eingeben (max. 16 Ziffern) und bestätigen ë, O Namen eingeben (max. 16 Stellen) und bestätigen Telefonbucheinträge ändern ¤ Telefonbuch öffnen + oder , Eintrag auswählen ” Menü öffnen + oder , ÄNDERN , Untermenü auswählen und bestätigen ë, O Rufnummer ändern und bestätigen ë, O...
- Page 15 Anrufliste + oder , ALLELÖSCHEN? , Untermenü auswählen und bestätigen BESTÄTIGEN? O oder C Löschvorgang bestätigen oder abbrechen 7 Anrufliste Insgesamt werden 20 Rufnummern in einer Anrufliste gespeichert. Die Rufnummernanzeige (CLIP ) ist ein Zusatzdienst Ihres Netzbetreibers. Ihr Telefon zeigt die Rufnummern im Display, wenn Ihr Netzbetreiber diesen Service anbietet.
- Page 16 Anrufliste Rufnummer aus der Anrufliste im Telefonbuch speichern Eine Rufnummer kann direkt aus der Anrufliste im Telefonbuch gespei- chert werden. «, + oder , Anrufliste öffnen und Eintrag auswählen ” Menü öffnen + oder , SPEICHERN , Untermenü auswählen und bestätigen ë, O ggf.
- Page 17 Telefonieren Alle Rufnummern löschen « Anrufliste öffnen ” Menü öffnen + oder , ALLELÖSCHEN? , Untermenü auswählen und bestätigen BESTÄTIGEN? O oder C Löschvorgang bestätigen oder abbrechen 8 Telefonieren Anruf annehmen {í}, ƒ oder è Anruf annehmen Gespräch beenden ƒ oder é Gespräch beenden Anrufen ë...
- Page 18 Telefonieren Wahlwiederholung Ihr Telefon speichert die 10 zuletzt gewählten Rufnummern in einer Wahl- wiederholungsliste. £, + oder , Wahlwiederholungsliste öffnen und Eintrag auswählen ƒ Verbindung herstellen Das Bearbeiten von Rufnummern in einer Wahlwiederholungsliste ist identisch zur Bearbeitung von Rufnummern in der Anrufliste (.
-
Page 19: Intern Telefonieren
Telefonieren ¤ Telefonbuch öffnen + oder ,, O Call−by−Call−Nummer auswählen und Nummer übertragen + oder , AUSWÄHLEN Menüpunkt auswählen und bestätigen dann ¤ Telefonbuch erneut öffnen + oder ,, O, ƒ Eintrag auswählen und Verbindung herstellen oder ë, ƒ Rufnummer manuell eingeben und Verbindung herstellen Intern telefonieren Interne Gespräche führen... - Page 20 Telefonieren Externe Gespräche intern weiterleiten MT1: 2 Sek. I Während des externen Gesprächs z. B. " interne Rufnummer wählen MT2: ƒ Internes Gespräch am anderen Mobilteil annehmen MT1: ƒ Gespräch weiterleiten Sollte sich das gerufene Mobilteil nicht melden, wird das externe Gespräch nach 30 Sek.
-
Page 21: Mikrofon Im Mobilteil Stummschalten
Telefonieren Mikrofon im Mobilteil stummschalten Sie können während eines Telefongesprächs das Mikrofon des Mobilteils aus− und einschalten. — Mikrofon ausschalten (stummschalten) — Mikrofon einschalten Tastensperre Die Tastensperre soll verhindern, dass versehentlich Funktionen ausge- löst werden. 2 Sek. Œ Tastensperre einschalten Bei eingeschalteter Tastensperre können eingehende Anrufe wie gewohnt angenommen werden. - Page 22 Über den international genormten GAP −Standard ist die Kompatibilität von Mobilteilen und Basisstationen unterschiedlicher Hersteller geregelt. So ist es möglich, SWITEL−Geräte und Geräte anderer Hersteller zusam- men in ein Telefonsystem zu integrieren. Es ist jedoch möglich, dass ei- nige Funktionen nicht zur Verfügung stehen.
-
Page 23: Mehrere Basisstationen
Erweitern des Telefonsystems Mehrere Basisstationen Sie können die Reichweite Ihres Mobilteils vergrößern, wenn Sie es an mehrere Basisstationen anmelden. Es kann gleichzeitig an 4 verschiede- nen Basisstationen angemeldet sein. Jede Basisstation benötigt eine ei- gene Telefonsteckdose. Es können Anschlüsse mit derselben und auch mit unterschiedlichen Rufnummern sein. - Page 24 Besondere Funktionen 10 Besondere Funktionen Wahlverfahren Sie können Ihr Telefon sowohl an den analogen Vermittlungsstellen (Im- puls−Wahlverfahren) als auch an den neuen digitalen Vermittlungsstellen (Ton−Wahlverfahren) betreiben. Das Wahlverfahren wird über das Menü eingestellt. In Kapitel 5 finden Sie die Position im Menü. 11 Nebenstellenanlagen / Zusatzdienste R−Taste an Nebenstellenanlagen Ist Ihr Telefon an einer Nebenstellenanlage angeschlossen, können Sie...
- Page 25 Nebenstellenanlagen / Zusatzdienste R−Taste und Zusatzdienste Ihr Telefon unterstützt Zusatzdienste Ihres Netzbetreibers, wie z. B. Ma- keln, Anklopfen und Konferenz. Über die R−Taste können Sie diese Zu- satzdienste nutzen. Bitte fragen Sie Ihren Netzbetreiber, welche Flash− Zeit Sie zur Nutzung von Zusatzdiensten einstellen müssen. Zur Freischaltung von Zusatzdiensten wenden Sie sich bitte an Ihren Netzbe- treiber.
- Page 26 Falls es Probleme gibt 12 Falls es Probleme gibt Service−Hotline Haben Sie Probleme mit Ihrem Telefon, kontrollieren Sie zuerst die fol- genden Hinweise. Bei technischen Problemen können Sie sich an unsere Service−Hotline unter Tel. 0900 00 1675 innerhalb der Schweiz (Kosten Swisscom bei Drucklegung: CHF 2.60/min) wenden.
- Page 27 Falls es Probleme gibt Das System reagiert − Setzen Sie alle Funktionen in den Werks- zustand zurück . Kapitel 5. nicht mehr − Ziehen Sie kurzzeitig das Netzteil aus der Steckdose. Die Akkus sind in − Die Akkus sind leer oder defekt. kürzester Zeit leer −...
- Page 28 Technische Eigenschaften 13 Technische Eigenschaften Technische Daten Merkmal Wert Standard DECT −GAP Stromversorgung (Basisstation) Eingang: 220/230 V, 50 Hz Ausgang: 6 V, 250 mA Nr. VD060025D Stromversorgung (Ladestation) Eingang: 220/230 V, 50 Hz Ausgang: 6 V, 150 mA Nr. VD060015D Reichweite Außen: ca.
- Page 29 1999/5/EG Richtlinie über Funkanlagen und Telekommunikati - onsendeinrichtungen und die gegenseitige Anerkennung ihrer Konformität. Die Konformität mit der o. a. Richtlinie wird durch das CE−Zeichen auf dem Gerät bestätigt. Für die komplette Konformitätserklärung nutzen Sie bitte den kostenlosen Download von unserer Website www.switel.com.
- Page 30 Sollte Ihr Gerät dennoch einen Defekt innerhalb der Garantiezeit aufwei- sen, wenden Sie sich bitte unter Vorlage Ihrer Kaufquittung ausschließlich an das Geschäft, in dem Sie Ihr SWITEL − Gerät gekauft haben. Alle Ge- währleistungsansprüche nach diesen Bestimmungen sind ausschließlich gegenüber Ihrem Fachhändler geltend zu machen.
- Page 31 Notizen Notizen...
- Page 32 Cet équipement est conforme à la directive européenne R&TTE. Pour obtenir la déclaration de conformité intégrale, veuillez vous servir du téléchar- gement gratuit de notre site Internet www.switel.com. Quest’apparecchiatura è conforme alla direttiva europea R&TTE. Per la dichiarazione di conformità completa si prega di voler usufruire del servizio gratuito di download dal nostro sito Internet www.switel.com.
- Page 33 Téléphone sans fil DECT−/GAP à faible rayonnement DE31x Mode d’emploi Version 1.0 − 31.07.2008...
-
Page 34: Piles Rechargeables
Consignes de sécurité 1 Consignes de sécurité Lisez très attentivement ce mode d’emploi. Utilisation conforme aux prescriptions Ce téléphone convient pour téléphoner à l’intérieur d’un réseau téléphoni- que. Tout autre utilisation est considérée comme non conforme à l’usage. Des modifications ou changements effectués d’un propre gré ne sont pas autorisés. - Page 35 Consignes de sécurité Appareils médicaux Attention : N’utilisez pas ce téléphone à proximité d’appareils médicaux. Leur influence ne peut pas être entièrement exclue. Les téléphones DECT peuvent causer un bourdonnement désagréable dans les prothèses auditives. Élimination Si vous ne voulez plus vous servir de votre appareil, veuillez l’ap- porter au centre de collecte de l’organisme d’élimination des déchets de votre commune (par ex.
- Page 36 Raccordez la base comme représenté sur le croquis. Pour des raisons de sécurité, n’utilisez que le bloc d’alimentation fourni avec l’appareil ainsi que le câble de raccordement téléphonique ci−joint. À l’adresse www.switel.com, vous apprendrez si ce téléphone/kit téléphonique est déjà disponible à la vente.
-
Page 37: Raccorder Le Chargeur
Mettre votre téléphone en service Prise de raccorde- ment téléphonique Prise réseau Utilisez pour la base le bloc secteur portant le n° VD760025D et les données de sortie 6 V, 250 mA. Raccorder le chargeur Raccordez le char- geur tel que représenté... - Page 38 Mettre votre téléphone en service Recharger les piles rechargeables Pour la première mise en service, mettez le combiné sur la base / le chargeur et l’y laisser pendant au moins 16 heures. Si vous avez placé le combiné correctement sur la base / le chargeur, un signal indicateur se fait entendre.
- Page 39 Éléments de manipulation quand le combiné repose sur la base. En mode de communication, le rayonnement est réduit en fonction de l’éloignement du combiné par rapport à la base. 3 Éléments de manipulation Dans ce mode d’emploi, les touches de votre téléphone seront représentées par la suite par des icônes encadrées standardisées.
- Page 40 Introduction 12 Touche * communications internes 13 Touche communication / pour raccrocher 14 Touche mémoire / touche de confirmation Base Contacts de chargement Touche de paging 4 Introduction Vous trouverez dans ce chapitre des informations de base vous expli- quant comment vous servir du mode d’emploi et du téléphone. Mode de représentation dans le mode d’emploi Visualisation Description...
- Page 41 Introduction é Poser le combiné sur la base Visualisation des textes de l’écran EFFACER? Visualisation des icônes de l’écran Icônes et textes à l’écran du combiné Icône Description Constant : affichage de la capacité des piles rechargea- bles. Clignotant : rechargez les piles rechargeables. Segments continus : les piles rechargeables se rechar- gent .
- Page 42 Introduction Vous vous trouvez dans le menu. Vous vous trouvez dans le répertoire. Répondeur dans le réseau téléphonique. Service de votre opérateur . chapi- supplémentaire VMWI tre 11). Le microphone est mis sur silencieux. Constant : la liaison avec la base est bonne. Clignotant : la liaison avec la base s’interrompt.
- Page 43 Structure du menu ë Saisir des chiffres ou des lettres via le pavé numérique Confirmer les saisies Reculer d’une position ƒ Interrompre les opérations de programmation et de sauvegarde et retourner en mode de veille Chaque opération est automatiquement interrompue si vous n’effectuez pas de saisie dans les 30 secondes.
- Page 44 Structure du menu DÉCROCH ACTIVER AUTO DÉSACTIVER ALARME ACTIVER HEURE DÉSACTIVER NOM COMBINÉ LANGUE DEUTSCH, FRANCAIS, ITALIANO, ENGLISH REGL DÉFAUT RÉGL DEFAUT? NOUVEAU PIN ' MENU BASE CHANGER PIN ENTRER PIN ' CONFIRMER MODE NUM DÉCIMALE TOUCHE R 100MS ... 800MS MESSAGE VOC.
- Page 45 Répertoire BASE 1...4 SUPP COMBINÉ ENTRER PIN COMBINÉ 1...6 6 Répertoire Vous pouvez enregistrer 25 numéros d’appel et le nom y afférant dans vo- tre répertoire. Saisissez toujours les numéros d’appel avec l’indicatif afin que le téléphone puisse aussi attribuer les communications locales entrantes à...
- Page 46 Répertoire + ou , AJOUTER , Sélectionner le sous−menu et confirmer ë , Saisir le numéro d’appel (max. 16 chiffres) et confirmer ë , Saisir le nom (max. 16 chiffres) et confirmer Modifier des enregistrements du répertoire ¤ Ouvrir le répertoire + ou , Sélectionner l’enregistrement ”...
- Page 47 Liste d’appels Effacer tous les enregistrements ¤ Ouvrir le répertoire ” Ouvrir le menu + ou , EFFACER TOUT , Sélectionner le sous−menu et confirmer CONFIRMER? O ou C Confirmer l’effacement ou l’interrompre 7 Liste d’appels Dans l’ensemble, 20 numéros d’appel sont enregistrés dans la liste d’ap- pels.
- Page 48 Liste d’appels l’écran de l’affichage "Nom", "Numéro" et "heure d’entrée". Sauvegarder des numéros d’appel dans le répertoire à partir de la liste d’appels Vous pouvez enregistrer un numéro d’appel dans le répertoire directe- ment à partir de la liste d’appels. «, + ou , Ouvrir la liste d’appels et sélectionner l’enregistrement...
- Page 49 Téléphoner Effacer tous les numéros d’appel « Ouvrir la liste d’appels ” Ouvrir le menu + ou , EFFACER TOUT , Sélectionner le sous−menu et confirmer CONFIRMER? O ou C Confirmer l’effacement ou l’interrompre 8 Téléphoner Prendre un appel {í}, ƒ ou è Prendre un appel Terminer la communication ƒ...
- Page 50 Téléphoner Touche de répétition automatique des derniers numéros Votre téléphone enregistre les 10 derniers numéros composés dans une liste de répétition des derniers numéros. £, + ou , Ouvrir la liste de répétion automatique des derniers numéros et sélectionner l’enregistrement ƒ...
- Page 51 Téléphoner entrés à la main. Ci−dessous un exemple pour la composition préalable de numéro d’un numéro Call−by−Call. ¤ Ouvrir le répertoire + ou ,, O Sélectionner un numéro Call−by−Call et le transmettre + ou , SÉLEC LISTE , Sélectionner l’option et confirmer dann ¤...
- Page 52 Téléphoner Transférer des communications externes en interne CB1: 2 sec. I Par ex. composer le numéro d’appel " interne pendant la communication externe CB2: ƒ Prendre une communication interne sur un autre combiné CB1: ƒ Transférer une communication Si le combiné appelé ne se signale pas, la communication ex- terne retourne au combiné...
-
Page 53: Verrouillage Du Clavier
Téléphoner Mettre le microphone du combiné sur silencieux Pendant une communication, vous pouvez activer et désactiver le micro- phone du combiné. — Désactiver le microphone (le mettre sur silencieux) — Activer le microphone Verrouillage du clavier Le verrouillage du clavier doit empêcher que des fonctions soient déclenchées par inadvertance. - Page 54 Il est ainsi possible d’intégrer ensemble des appareils SWITEL et des appareils d’autres fabri- cants dans un système téléphonique. Il est toutefois possible que certai- nes fonctions ne soient pas disponibles.
- Page 55 Fonctions particulières Plusieurs bases Vous pouvez élargir la portée de votre combiné si vous le déclarez simul- tanément à plusieurs bases. Il peut être déclaré simultanément sur 4 ba- ses différentes. Chaque base a besoin d’une prise téléphonique indivi- duelle. Ces raccordements peuvent porter le même numéro d’appel ou bien des numéros différents.
- Page 56 Installat. à postes supplém. / Services confort res, vous pouvez, via la touche R, tirer profit de certaines fonctions comme par ex. le transfert d’appels et le rappel automatique. Veuillez lire dans le mode d’emploi de votre installation à postes supplémentaires quel temps de flash vous devez paramétrer pour l’utilisation de ces fonctions.
- Page 57 Installat. à postes supplém. / Services confort Touche R et services confort Votre téléphone supporte des services confort de votre opérateur tels que le va−et−vient, la signalisation d’appel en instance et la conférence. Vous pouvez les utiliser via la touche R. Demandez à votre opérateur quel temps de flash vous devez paramétrer pour utiliser ces services conforts.
- Page 58 En cas de problèmes 12 En cas de problèmes Hotline de service Si vous avez des problèmes avec votre téléphone, contrôlez d’abord les indications suivantes. S’il s’agit de problèmes techniques, vous pouvez vous adresser à notre hotline de service en Suisse au numéro de tel.
- Page 59 En cas de problèmes Le système ne réagit plus − Remettez toutes les fonctions en configu- ration usine . chapitre 5. − Retirez le bloc secteur de la prise de cou- rant pendant un court instant. Les piles rechargeables se −...
- Page 60 Caractéristiques techniques 13 Caractéristiques techniques Caractéristiques techniques Caractéristique Valeur Standard DECT1−GAP Alimentation en courant (base) Entrée : 220/230 V, 50 Hz Sortie : 6 V, 250 mA N° VD060025D Alimentation en courant (chargeur) Entrée : 220/230 V, 50 Hz Sortie : 6 V, 150 mA N°...
- Page 61 La conformité à la directive ci−dessus est confirmée sur l’appa- reil par le symbole CE. Pour obtenir la déclaration de conformité intégrale, veuillez vous servir du téléchargement gratuit de notre site Internet www.switel.com.
- Page 62 N’utilisez pas de produits d’entretien ou de solvants. Garantie Les appareils SWITEL sont fabriqués et contrôlés selon les procédés les plus modernes. Des matériaux sélectionnés et des technologies de pointe ont pour effet un fonctionnement irréprochable et une longue durée de vie.
- Page 63 Notes Notes...
- Page 64 Cet équipement est conforme à la directive européenne R&TTE. Pour obtenir la déclaration de conformité intégrale, veuillez vous servir du téléchar- gement gratuit de notre site Internet www.switel.com. Quest’apparecchiatura è conforme alla direttiva europea R&TTE. Per la dichiarazione di conformità completa si prega di voler usufruire del servizio gratuito di download dal nostro sito Internet www.switel.com.
- Page 65 Telefono senza fili DECT−/GAP a bassa emissione di radiazioni DE31x Istruzioni per l’uso Version 1.0 − 31.07.2008...
- Page 66 Indicazioni di sicurezza 1 Indicazioni di sicurezza Leggere attentamente le presenti istruzioni per l’uso. Impiego conforme agli usi previsti Il presente telefono consente di svolgere telefonate all’interno di una rete telefonica. Qualsiasi altro impiego è considerato come non conforme agli usi previsti.
- Page 67 Indicazioni di sicurezza Apparecchiature mediche Attenzione: Non utilizzare il telefono in prossimità di apparec- chiature mediche. Non è infatti possibile escludere il rischio di possibili interferenze. Telefoni DECT possono causare un fastidioso ronzio in apparecchi acu- stici. Smaltimento Procedere allo smaltimento dell’apparecchio esaurito conse- gnandolo presso uno dei punti di raccolta istituiti dalla propria so- cietà...
- Page 68 Procedere al collegamento della stazione base seguendo quanto raffigu- rato nella figura. Utilizzare per motivi di sicurezza solo l’alimentatore di rete oltre al cavo di collegamento telefonico fornito in dotazione. Per ulteriori informazioni riguardo la disponibilità di questo telefono/set telefonico si prega di visitare il sito www.switel.com.
- Page 69 Mettere in funzione il telefono Presa telefonica Presa elettrica Utilizzare per la stazione base l’alimentatore di rete con il codice VD060025D e i dati di output 6 V, 250 mA. Collegare la stazione di carica Procedere al colle- gamento della sta- zione di carica se- guendo la figura.
- Page 70 Mettere in funzione il telefono Caricare gli accumulatori Riporre l’unità portatile in sede di prima messa in funzione per minimo 16 ore nella stazione base / stazione di carica. Non appena il portatile è posizionato correttamente nella stazione base / stazione di carica, si avverte un segnale acustico di avviso.
- Page 71 Elementi di comando In modalità di conversazione le radiazioni sono ridotte in base alla di- stanza dell’unità portatile rispetto alla base. 3 Elementi di comando I tasti del telefono riportati nel presente manuale d’istruzioni per l’uso sono raffigurati sotto forma di simboli uniformi all’interno di un riquadro. Sono possibili lievi scostamenti dei simboli dei tasti sul telefono rispetto ai simboli qui raffigurati.
- Page 72 Informazioni introduttive Stazione base Contatti di carica Tasto di paging 4 Informazioni introduttive In questo capitolo sono riportate le principali informazioni riguardo l’uso delle presenti istruzioni e del telefono. Modi di rappresentazione nelle istruzioni per l’uso Rappresenta- Descrizione zione Rappresentazione dei tasti Premere brevemente il tasto raffigurato 2 sec.
- Page 73 Informazioni introduttive Rappresentazione di testi sul display ELIMINARE? Rappresentazione di simboli sul display Simboli e testi sul display dell’unità portatile Simbolo Descrizione Costante: Indicazione dello stato di carica del pacco bat- teria. Lampeggiante: Caricare le batterie ricaricabili. Segmenti che scorrono: Le batterie sono in fase di rica- rica.
- Page 74 Informazioni introduttive Ci si trova nel menu. Ci si trova nella rubrica telefonica. Segreteria telefonica integrata nella rete telefonica. VMWI − Servizio addizionale del proprio gestore di rete telefonica (. capitolo 11). Il microfono è disattivato. Costante: Il collegamento con la stazione base è buono. Lampeggiante: Il collegamento con la stazione base si interrompe.
- Page 75 Struttura dei menu Tornare indietro di un livello ƒ Interrompere le procedure di programmazione e memorizzazione e tornare indietro alla modalità di stand−by Ogni singolo processo si interrompe automaticamente se entro 30 secondi non si procede con una immissione. 5 Struttura dei menu Menu principale Per passare al menu principale, premere il tasto ”.
- Page 76 Struttura dei menu NOME LINGUA DEUTSCH, FRANCAIS, ITALIANO, ENGLISH RESET RESETTARE? CONF.BASE? CAMBIA PIN INS. PIN NUOVO PIN' ' RIPET. PIN DIAL MODE TONO IMPULSO TEMP.RICH. 100MS ... 800MS VMWI VMWI SPENTO? RESET INS. PIN RESETTARE? DATA/ORA ANNO DATA REGISTR. REGISTRA BASE 1...4 INS.
- Page 77 Rubrica telefonica 6 Rubrica telefonica Nella rubrica telefonica è possibile memorizzare 25 numeri di chiamata con rispettivi nomi. Assegnare a tutti i numeri di chiamata sempre un prefisso in modo da poter riconoscere anche una chiamata urbana in arrivo ed abbinarla ad una voce presente nella rubrica telefonica. Con capacità...
- Page 78 Rubrica telefonica ë, O Immettere il numero di chiamata (max. 16 cifre) e confermare ë, O Immettere il nome (max. 16 segni) e confermare Modificare voci nella rubrica telefonica ¤ Aprire la rubrica telefonica + o , Selezionare la voce ”...
- Page 79 Elenco chiamate + o , ELIM.TUTTO? , Selezionare il sottomenu e confermare CONFERMARE? O o C Confermare o interrompere la procedura di cancellazione 7 Elenco chiamate All’interno dell’elenco chiamate è possibile memorizzare in tutto 20 nu- meri telefonici. La visualizzazione del numero di chiamata (CLIP ) è...
- Page 80 Elenco chiamate Memorizzare nella rubrica telefonica un numero di chiamata presente nell’elenco chiamate È possibile memorizzare un numero di chiamata direttamente dall’elenco chiamate nella rubrica telefonica. «, + o , Aprire l’elenco chiamate e selezionare una voce ” Aprire il menu + o , SALVA NUMERO , Selezionare il sottomenu e confermare ë, O...
- Page 81 Compiere telefonate Cancellare tutti i numeri di chiamata « Aprire l’elenco chiamate ” Aprire il menu + o , ELIM.TUTTO? , Selezionare il sottomenu e confermare CONFERMARE? O o C Confermare o interrompere la procedura di cancellazione 8 Compiere telefonate Accettare una chiamata {í}, ƒ...
- Page 82 Compiere telefonate Ripetizione di chiamata Il telefono memorizza gli ultimi 10 numeri di chiamata selezionati in un elenco disponibile per la funzione di ripetizione di chiamata. £, + o , Aprire l’elenco di ripetizione di chiamata e selezionare una voce ƒ...
- Page 83 Compiere telefonate ¤ Aprire la rubrica telefonica + o ,, O Selezionare il numero di call by call e trasmettere il numero + o , SELEZIONARE , Selezionare la voce di menu e confermare quindi ¤ Aprire di nuovo la rubrica telefonica + o ,, O, ƒ...
- Page 84 Compiere telefonate Trasferire internamente chiamate esterne UP1: 2 sec. I Selezionare con telefonata esterna in corso ad es. " il numero di chiamata interno UP2: ƒ Accettare una telefonata interna presso l’altra unità portatile UP1: ƒ Trasferire la chiamata Nel caso in cui il portatile chiamato non dovesse rispondere, tra- scorsi 30 sec.
-
Page 85: Blocco Tastiera
Compiere telefonate Silenziamento del microfono nell’unità portatile È possibile attivare e disattivare il microfono dell’unità portatile con chia- mata telefonica in corso. — Disattivare il microfono (silenziamento) — Attivare il microfono Blocco tastiera Il blocco tastiera aiuta ad impedire l’attivazione inavvertita di determinate funzioni. - Page 86 In tal modo è possibile adoperare ap- parecchi SWITEL in combinazione con apparecchi di altri costruttori all’in- terno di un unico sistema telefonico. Può comunque anche verificarsi la mancata disponibilità...
- Page 87 Funzioni speciali Maggior numero di stazioni base La portata della propria unità portatile può essere aumentata registrando l’apparecchio ad un numero maggiore di stazioni base. È possibile regi− strarsi contemporaneamente presso 4 stazioni base differenti. Ogni sta- zione base necessita di una propria presa telefonica. Si può trattare di al- lacciamenti con lo stesso o differente numero di chiamata.
- Page 88 Impianti telefonici interni / Servizi addizionali 11 Impianti telefonici interni / Servizi addizionali Tasto R in impianti telefonici interni Avendo collegato il telefono ad un impianto telefonico interno, il tasto R consente di accedere a tutte le altre funzioni disponibili come per es. tras- ferimento di chiamata e funzione di richiamata automatica.
- Page 89 Impianti telefonici interni / Servizi addizionali Tasto R e servizi addizionali Il telefono supporta servizi addizionali messi a disposizione dal proprio gestore di rete telefonica come ad es. le funzioni di chiamata in attesa, av- viso di chiamata e chiamata a conferenza. Il tasto R consente di acce- dere a questi servizi addizionali.
- Page 90 In presenza di problemi 12 In presenza di problemi Hotline di assistenza tecnica In presenza di problemi con il telefono, seguire le indicazioni riportate qui di seguito. In caso di problemi tecnici è possibile rivolgersi alla nostra hot- line di assistenza tecnica chiamando al numero 0900 00 1675 valido per la Svizzera (spese da rete Swisscom alla data di stampa: CHF 2.60 / min).
- Page 91 In presenza di problemi Non è possibile condurre − Il telefono non è collegato correttamente una chiamata telefonica oppure presenta un guasto. Utilizzare esclusivamente il cavo di collegamento telefonico fornito. − Provare con un altro telefono se l’allaccia- mento telefonico in questione è funzio- nante.
- Page 92 Specifiche tecniche 13 Specifiche tecniche Specifiche tecniche Caratteristica Valore Standard DECT1−GAP Alimentazione elettrica (stazione Ingresso: 220/230 V, 50 Hz base) Uscita: 6 V, 250 mA N. VD060025D Alimentazione elettrica (stazione di Ingresso: 220/230 V, 50 Hz carica) Uscita: 6 V, 150 mA N.
- Page 93 La conformità con la Diret- tiva di cui sopra viene confermata dal marchio CE applicato sull’apparecchio. Per la dichiarazione di conformità completa si prega di voler usufruire del servizio gratuito di download dal nostro sito Inter- net www.switel.com.
- Page 94 Non utilizzare mai detergenti o solventi. Garanzia Gli apparecchi SWITEL sono costruiti e collaudati in osservanza dei pro- cessi di produzione più moderni. L’impiego di materiali selezionati e tec- nologie altamente sviluppate sono garanti di una perfetta funzionalità e lunga durata in vita.
- Page 95 Appunti Appunti...
- Page 96 Cet équipement est conforme à la directive européenne R&TTE. Pour obtenir la déclaration de conformité intégrale, veuillez vous servir du téléchar- gement gratuit de notre site Internet www.switel.com. Quest’apparecchiatura è conforme alla direttiva europea R&TTE. Per la dichiarazione di conformità completa si prega di voler usufruire del servizio gratuito di download dal nostro sito Internet www.switel.com.
-
Page 97: Operating Instructions
Low radiation cordless DECT/GAP telephone DE31x Operating Instructions Version 1.0 − 31.07.2008... - Page 98 Safety Information 1 Safety Information Please read this operating instruction manual thoroughly. Intended use The telephone is suitable for telephoning within a public telephone net- work system. Any other use is considered unintended use. Unauthorised modification or reconstruction is not permitted. Under no circumstances open the device or complete any repair work yourself.
-
Page 99: Medical Equipment
Safety Information Medical equipment Attention: Never use the telephone in the vicinity of medical equipment. Effects on such equipment cannot be fully ruled out. DECT telephones can cause an unpleasant humming sound in hearing aids. Disposal In order to dispose of your device, take it to a collection point pro- vided by your local public waste authorities (e.g. - Page 100 Connect the base station as illustrated in the diagram. For reasons of safety, only use the power adapter plug and telephone connection line supplied. Visit www.switel.com to find out whether the telephone/telephone set is already available.
-
Page 101: Connecting The Charging Station
Preparing the Telephone Telephone line socket Mains power outlet For the base station, use the power adapter plug labelled with No. VD060025D and output data 6 V, 250 mA. Connecting the charging station Connect the charg- ing station as illus- trated in the dia- gram. -
Page 102: Charging The Batteries
Preparing the Telephone Charging the batteries Before the handset is used for the first time, insert it in the base station / charging station for at least 16 hours. When the handset is properly inserted in the base station / charging sta- tion, you will hear an acoustic signal. - Page 103 Operating Elements 3 Operating Elements The buttons in this operating manual are subsequently depicted with a uniform contour. Therefore, slight deviations in the appearance of the symbols on the telephone buttons compared to those depicted here are possible. Handset Loudspeaker LCD display (liquid crystal display) Arrow Up button...
- Page 104 Preliminary Information Base station Charge contacts Paging button 4 Preliminary Information This chapter provides basic information on using the operating instruction manual and the telephone. Description of operating sequences in the manual Display Description Displays the contour of buttons Press the button depicted briefly 2 sec.
- Page 105 Preliminary Information Icons and texts in the handset display Icon Description On: Indicates the battery charge status. Flashing: The batteries must be charged. Run−through segments: The batteries are being charged. Internally assigned call number of the handset. 04/07 12-20 Display of date and time. On: An external call is currently being made.
-
Page 106: Standby Mode
Preliminary Information The microphone has been muted. On: The connection to the base station is good. Flashing: The connection to the base station is interrup- ted. Move nearer to the base station. Standby mode All descriptions in this operating manual assume that the handset is in Standby mode. - Page 107 Menu Structure 5 Menu Structure Main menu Press the ” button to open the main menu. Then use the + or , button to move to an entry to select it and confirm the selection by pres- sing the O button. Further information on the menu and operation: .
- Page 108 Menu Structure NEW PIN ' SETUP BS CHANGE PIN ENTER PIN ' REPEAT PIN DIAL MODE TONE PULSE RECALL TIME 100MS ... 800MS VMWI VMWI OFF? RESET ENTER PIN RESET? DATE/TIME YEAR DATE TIME REGISTRATION REGISTER BASE 1...4 ENTER PIN SEL BASE AUTO BASE 1...4...
- Page 109 Phone Book 6 Phone Book You can use the phone book to store up to 25 phone numbers together with the associated names. Always enter the area access code with the phone numbers so that incoming local calls can also be assigned to a phone book entry.
- Page 110 Phone Book ë, O Enter the phone number (max. 16 digits) and confirm it ë, O Enter the name (max. 16 characters) and confirm it Editing phone book entries ¤ Open the phone book + or , Select the required entry ”...
- Page 111 Call List + or , DELETE ALL? Select the submenu and confirm it CONFIRM? O or C Confirm the deleting process or cancel 7 Call List A total of 20 calls are stored in the call list. The caller number display (CLIP ) is a supplementary service of- fered by your telephone network provider.
- Page 112 Call List Storing a phone number in the calls list in the phone book A phone number in the call list can be stored in the phone book directly. «, + or , Open the call list and select an entry ”...
- Page 113 Telephoning Deleting all phone numbers « Open the call list ” Open the menu + or , DELETE ALL? , Select the submenu and confirm it CONFIRM? O or C Confirm the deleting process or cancel 8 Telephoning Taking a call {í}, ƒ...
-
Page 114: Chain Dialling
Telephoning Redialling The telephone stores the last 10 phone numbers dialled in a redialling list. £, + or , Open the redialling list and select an entry ƒ Dial the number The way in which to edit numbers in a redialling list is identical to that to edit phone numbers in the call list (. -
Page 115: Internal Calls
Telephoning ¤ Open the phone book + or ,, O Select the call−by−call number and transfer it + or , SELECT Select the menu option and confirm it then ¤ Open the phone book again + or ,, O, ƒ Select the phone number and dial it ë, ƒ... -
Page 116: Setting The Receiver Volume
Telephoning Forwarding external calls internally HS1: 2 sec. I Dial the internal call number of the e.g. " handset required during the external call HS2: ƒ Take the internal call on the other handset HS1: ƒ Transfer the call If the handset called does not reply, the external call is transfer- red back to the calling handset after 30 sec. -
Page 117: Key Lock
Telephoning Muting the microphone in the handset The microphone in the handset can be activated and deactivated during a telephone conversation. — Deactivate the microphone (muting — Activate the microphone Key lock The key lock feature prevents functions assigned to buttons being acti- vated accidentally. - Page 118 As a result, it is possible to integrate SWITEL devices and equipment from other manufac- turers together in one telephone system. It is possible, however, that cer- tain functions are not available.
- Page 119 Extending the Telephone System Multiple base stations You can increase the range of your handset by registering it on several base stations. The handset can be registered on up to 4 different base stations simultaneously. Each base station requires its own telephone line socket.
- Page 120 Special Functions 10 Special Functions Dialling mode The telephone can be operated in analogue exchanges (PULSE mode) as well as new, digital exchanges (TONE/DTMF mode). The dialling mode is controlled via the menu. Chapter 5 indicates the location within the menu.
- Page 121 PABX / Supplementary Services R−button and supplementary services Your telephone supports supplementary services provided by your tele- phone network provider, such as brokering, call waiting and conference facilities. The R−button is used in connection with these supplementary services. Please contact your telephone network provider regarding which Recall (Flash) time must be set to use the supplementary services.
- Page 122 In Case of Problems 12 In Case of Problems Service Hotline Should problems arise with the telephone, please refer to the following in- formation first. In the case of technical problems, you can contact our hot- line service, Tel. 0900 00 1675 within Switzerland (cost via Swisscom at time of going to print: CHF 2.60/min).
- Page 123 In Case of Problems The system no longer − Reset all the functions to their default set- tings; . Chapter 5. responds − Disconnect the power adapter plug briefly from the power socket. The batteries are empty − The batteries are empty or defective. within a short time −...
- Page 124 Technical Properties 13 Technical Properties Technical data Feature Value Standard DECT1−GAP Power supply (base station) Input: 220/230 V, 50 Hz Output: 6 V, 250 mA No. VD060025D Power supply (charging station) Input: 220/230 V, 50 Hz Output: 6 V, 150 mA No.
-
Page 125: Default Settings
Conformity with the above mentioned directive is confirmed by the CE symbol on the device. To view the complete Declaration of Conformity, please refer to the free download available on our web site www.switel.com. - Page 126 Clean the housing surfaces with a soft, fluff−free cloth. Do not use any cleaning agents or solvents. Guarantee SWITEL equipment is produced and tested according to the latest produc- tion methods. The implementation of carefully chosen materials and highly developed technologies ensure trouble−free functioning and a long service life.
- Page 127 Notes Notes...
- Page 128 Cet équipement est conforme à la directive européenne R&TTE. Pour obtenir la déclaration de conformité intégrale, veuillez vous servir du téléchar- gement gratuit de notre site Internet www.switel.com. Quest’apparecchiatura è conforme alla direttiva europea R&TTE. Per la dichiarazione di conformità completa si prega di voler usufruire del servizio gratuito di download dal nostro sito Internet www.switel.com.
Need help?
Do you have a question about the DE31 Series and is the answer not in the manual?
Questions and answers