Table of Contents
Advertisement
Quick Links
Ningbo Ginlong Technologies Co., Ltd.
No. 57 Jintong Road, Binhai Industrial Park,
Xiangshan, Ningbo, Zhejiang, 315712, P.R.China
Tel: +86 (0)574 6578 1806
Fax: +86 (0)574 6578 1606
Email: info@ginlong.com
Web: www.ginlong.com
Please record the serial number of your inverter and quote this when you contact us.
Wind Grid Tie Inverter
GCI-2G-W Single Phase Inverter
Installation and Operation Manual
2014, Ningbo Ginlong Technologies Co., Ltd.
C
-US version
Ver 2.2
Advertisement
Table of Contents

Subscribe to Our Youtube Channel
Related Manuals for Ningbo GCI-2G-W

Summary of Contents for Ningbo GCI-2G-W
- Page 1 Xiangshan, Ningbo, Zhejiang, 315712, P.R.China Tel: +86 (0)574 6578 1806 Fax: +86 (0)574 6578 1606 Email: info@ginlong.com Web: www.ginlong.com Please record the serial number of your inverter and quote this when you contact us. 2014, Ningbo Ginlong Technologies Co., Ltd. Ver 2.2...
-
Page 2: Table Of Contents
Contents ……………………………………………… 1. Introduction 1.1 Product Descriptions ………………………………… 1.2 Packaging ………………………………………… 2. Safety Instructions ……………………………………… 2.1 Safety Symbols …………………………………… 2.2 General Safety Instructions ……………………… ……………………………………… 2.3 Notice For Use ……………………………………………… 3. Overview 3.1 Front Panel Display ……………………………… 3.2 LED Status Indicator Lights ………………………... -
Page 3: Introduction
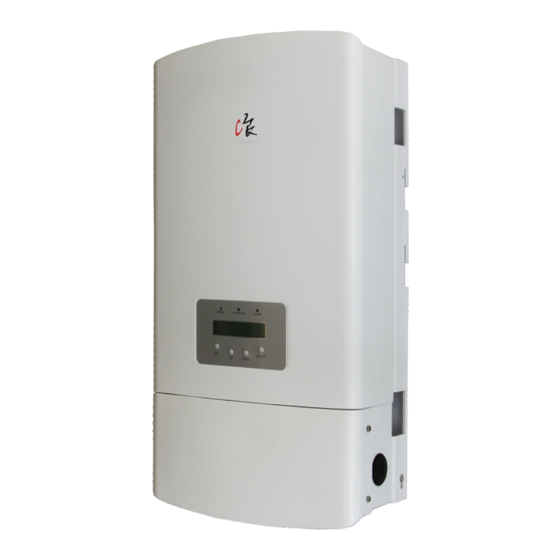
1. Introduction Contents 1.1 Product Descriptions 6. Operation ………………………………………………… GCI single phase US series inverters can transfer DC power from wind turbine controller …………………………………………… 6.1 Main Menu into AC power and feed into grid. GCI single phase US series inverters contain 9 models which are listed below: ……………………………………………... -
Page 4: Packaging
GCI-W Single Phase Inverter -US version Installation and Operation Manual CAUTION: CAUTION, HOT SURFACE symbol indicates safety instructions, which if not correctly followed, could result in burns. 2014, Ningbo Ginlong Technologies Co., Ltd. Ver 2.1 2.2 General Safety Instructions Description Number Part NO. -
Page 5: Notice For Use
3. Overview 2.Safety Instructions 3.1 Front Panel Display WARNING: To reduce the risk of fire, branch-circuit over-current protective devices (OCPD) are required for circuits connected to the Inverter. The trip current for over current for AC and DC isolator should be 110%- 125% of inverter Maximum current. -
Page 6: Keypad
3. Overview 4. Installation 3.3 Keypad 4.1 Select a Location for the Inverter To select a location for the inverter, the following criteria should be considered: There are four keys in the front panel of the Inverter(from left to right): ESC, UP, DOWN and ENTER keys. -
Page 7: Mounting The Inverter
4. Installation 4. Installation 4.2 Mounting the Inverter 3. Carefully hang the inverter on the upper part of the wall mount bracket by fitting the hooks into the slot of the bracket. Use M4×25 stainless steel screws and washers at holes E and F (in Figure 4.2) to secure the mounting hooks to the rear of the inverter. Please use suitable fixings for wall type (e.g. -
Page 8: Connect Pv Input Of Inverter
4. Installation 4. Installation Before electrical connection Please make sure below steps are strictly followed: Please refer figure 4.2 to connect the DC1 and DC2 in the DC terminal of inverter, then connect the ground wire of two DC input. The DC wire connected to DC terminals (shown a. -
Page 9: Inverter Monitoring Connection
4. Installation 5. Start & Stop 5.1 Start the Inverter 4.3.3 Inverter monitoring connection To start up the Inverter, it is important that the following steps are strictly followed: The inverter can be monitored by Wi-Fi or GPRS functions. All the communication functions are optional (Figure 4.6), please refer to communication connection 1. -
Page 10: Operation
6. Operation 6. Operation During normal operation, the display alternately shows the power and the operation Display Description Duration status with each screen lasting for 10 seconds (see Figure 6.1). Screens can also be scrolled manually by pressing the UP and DOWN keys. Press the ENTER key to access V_DC1: Shows input 01 voltage value. -
Page 11: Settings
6. Operation 6. Operation 6.3 Settings 6.4 Advanced Info - Technicians Only The following submenus are displayed when the Settings menu is selected: NOTE: 1. Set Time To access to this area is for fully qualified and accredited technicians only. 2. -
Page 12: Temperature
6. Operation 6. Operation 6.5 Advanced Settings - Technicians Only 6.4.2 Temperature NOTE: The screen shows the temperature inside the inverter (see Figure 6.7). To access to this area is for fully qualified and accredited technicians only. Please follow 6.4 to enter password to access this menu. Temperature 046.6 ℃... -
Page 13: Grid On/Off
6. Operation 6. Operation Selecting the “User-Def” menu will access to the following submenu (see Figure 6.12), 6.5.3 Power curve OV-V: 262V Select the Power Curve menu to display the following submenu: UN-V: 210V Set power Curve Figure 6.12 Select Power Curve NOTE: NOTE: The "... - Page 14 6. Operation 6. Operation Step4: Set power curve Step5: Select corresponding power curve. Pressing UP/DOWN keys to set power curve. Pressing ENTER key to move the Enter select power curve, select the power curve No. you want to execute. selected digit to the next (from left to right). Press the ESC key to save the power NOTE: curve point ( see Figure 6.16).
-
Page 15: Maintenance
8. Trouble Shooting 7. Maintenance The inverter is designed in accordance with the most important international grid-tied GCI Single Phase Inverter does not require any regular maintenance. However, cleaning standards and safety and electromagnetic compatibility requirements. Before delivering to the dust on heat-sink will help the inverter to dissipate the heat and increase its life time. the customer, the inverter has been subjected to several tests to ensure its optimal operation The dust can be removed with a soft brush. - Page 16 8. Trouble Shooting NOTE: If the inverter displays any alarm message as listed in Table 8.1; please turn off the inverter (refer to Section 5.2 to stop your inverter) and wait for 5 minutes before restarting it (refer to Section 5.1 to start your inverter). If the failure persists, please contact your local distributor or the service center.
- Page 17 208V/240V 208V/240V 183V-229V/211V-264V(adjustable) 183V-229V/211V-264V(Adjustable) NEMA 3R NEMA 3R .30. .31.
- Page 18 208V/240V 208V/240V 183V-229V/211V-264V(adjustable) 183V-229V/211V-264V(Adjustable) NEMA 3R NEMA 3R .32. ..33...
Need help?
Do you have a question about the GCI-2G-W and is the answer not in the manual?
Questions and answers