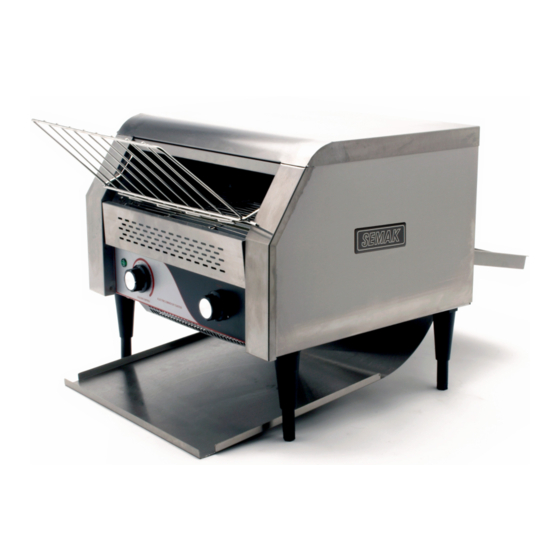
Summary of Contents for SEMAK CT450
- Page 1 – CT450 OMMERCIAL ONVEYOR OASTER PERATION AND ARRANTY OOKLET 18, 87-91 H VIC 3803 EMAK USTRALIA ACTORY ALLAM OUTH ALLAM 03 9796 4583 03 9796 4586 EB WWW SEMAK...
-
Page 2: Table Of Contents
Table of Contents General Safety Instructions for All Semak Products ..........4 Safety Instructions ....................5 Installation Instructions ..................6 Operating Instructions ..................10 Cleaning Instructions ..................11 Service & Maintenance ..................12 Electrical Compliance ..................12 Warranty ......................12 WARRANTY REGISTRATION .................14 Page | 2... - Page 3 RETAIN THESE SAFETY INSTRUCTIONS Page | 3...
-
Page 4: General Safety Instructions For All Semak Products
Do not operate any appliance with a damaged cord or plug, or after the appliance malfunctions or has been dropped or damaged in anyway. Return to Semak or an authorised service agent for repair. CAUTION Hot Surfaces. NEVER leave the appliance ON unattended. ALWAYS unplug the conveyor toaster after use. -
Page 5: Safety Instructions
Safety Instructions Plug toaster into a properly grounded electrical outlet of the correct voltage, size, and plug configuration. If the plug and receptacle do not match, contact a qualified electrician to determine the proper voltage and size, and install the proper electrical outlet. -
Page 6: Installation Instructions
Installation Instructions Unpacking 1. Remove unit and all packing materials from shipping carton. 2. Open the large box. Remove all packing materials and protective covering from the unit and parts. 3. Remove tape from discharge chute, crumb tray and toast collector pan. 4. - Page 7 Toast Feed Ramp The toast feed ramp is installed at the factory and can be used in two positions. 1) When in the upright position, the toaster is set for automatic feed. Bread products enter the toaster by placing them on the feed ramp and releasing. 2) For manual feeding of product, tip the feed ramp until it rests on top of the unit.
- Page 8 Step by Step Assembly Instructions For Front Toast Discharge Turn Toaster on its side and install feet by gently screwing clockwise Sit the toaster right side up on its feet and adjust feet height if necessary. Insert curved section of the crumb tray into the front of the appliance and push back until it meets the stop pins.
- Page 9 Step by Step Assembly Instructions For Rear Toast Discharge Turn Toaster on its side and install feet by gently screwing clockwise Sit the toaster right side up on its feet and adjust feet height if necessary. Insert section of the crumb tray into the back of the appliance and push back until it meets the stop pins.
-
Page 10: Operating Instructions
Operating Instructions For Model Equipped with rocker switch 1) Plug toaster into a properly grounded electrical outlet of the correct voltage, size and plug configuration. (See the Rating Label) 2) Place the On/Off switch in the On position. 3) Turn the Colour Control to the lightest position while the unit heats up. (Note: Allow approximately 15 to 21 minutes for a warm-up period.) 4) After warm-up period, set the Colour Control to the medium position and toast two slices of bread product then re-adjust the Colour Control to the desired... -
Page 11: Cleaning Instructions
Cleaning Instructions Exterior To preserve the bright finish of the unit, it is recommended that the exterior surfaces be wiped daily with a damp cloth. Stubborn stains may be removed with a good stainless steel cleaner or on-abrasive cleaner. Hard to reach areas should be cleaned with a small brush and mild soap. -
Page 12: Service & Maintenance
All warranty repairs should be undertaken by Semak Australia. It is against company policy to authorize warranty repairs over the phone. Service Agents will require a work order number from Semak to conduct warranty repairs. Page | 12... - Page 13 Failure to do this will void product warranty. 5. Cost of transport of any appliance or part to and from SEMAK or its Service Agent is to be paid by the owner. 6. A charge will be made where failure is due to neglect, abuse or accidental damage on the part of the operator, or when no fault can be found or the fault is due to causes outside the control of Semak Australia.
-
Page 14: Warranty Registration
WARRANTY REGISTRATION Retain for Future Reference DO NOT SEND Please complete one registration for each Semak appliance. You may be required to provide this information when requesting after sales service. Please staple your proof of purchase to this page. Company Name: ________________________________________________...


Need help?
Do you have a question about the CT450 and is the answer not in the manual?
Questions and answers