Advertisement
Page 1 of 7
Si4703 FM Radio Receiver Quickstart Guide
Skill Level: Beginner
by a1ronzo | June 22, 2011 |
Time to Rock
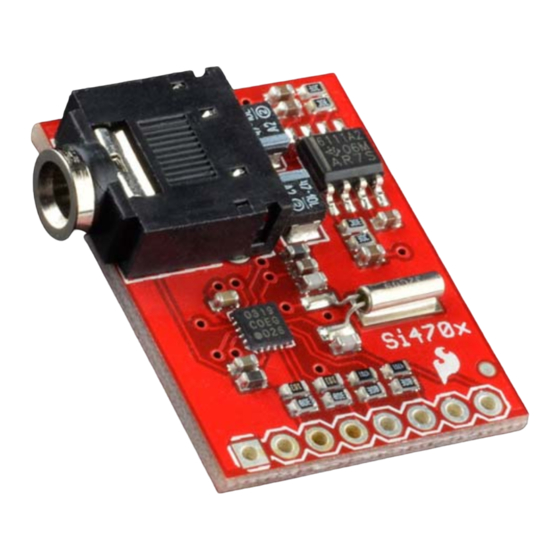
This Si4703 FM Tuner Eval Board breaks out the Silicon Laboratories Si4703 FM
tuner chip. Beyond being a simple FM radio, the Si4703 is also capable of detecting
and processing both Radio Data Service (RDS) and Radio Broadcast Data Service
(RBDS) information. The Si4703 even does a very good job of filtering and carrier
detection, or rather, it's good at detecting when a station is coming in clear. It also
enables data such as the station ID and song name to be displayed to the user.
Using this board, we are able to pick up multiple stations just as well as with a
standard FM radio. The board breaks out all major pins and makes it easy to
incorporate this great chip into your next radio project. Also, by plugging headphones
into the 3.5mm audio jack, you effectively use the cable in your headphones as an
antenna! Therefore, this board does not require an external antenna if using
headphones or a 3.5mm audio cable longer than 3 feet.
This quickstart guide will lead you through assembling the radio receiver, hooking it
up to an Arduino platform, and getting an Arduino to talk to the Si4703. The Arduino
sketch will illustrate how to set the radio receiver to tune an FM frequency, and we'll
be able to change the station and the volume using the serial terminal in Arduino.
There will be some extra hardware required for the example: headphones or
speakers, some wire, and an Arduino Pro 3.3V (or similar platform) will get you
through the basic example.
Advertisement
Table of Contents

Summary of Contents for Sparkfun Electronics Si4703
- Page 1 This quickstart guide will lead you through assembling the radio receiver, hooking it up to an Arduino platform, and getting an Arduino to talk to the Si4703. The Arduino sketch will illustrate how to set the radio receiver to tune an FM frequency, and we’ll be able to change the station and the volume using the serial terminal in Arduino.
- Page 2 Page 2 of 7 Software Required • Arduino 1.0 (or later) Hardware Required • FM Radio Receiver (included in FM Radio Receiver Kit) • Male/Male Jumpers (or just wire) • Female Headers • Arduino Mini Pro 3.3V (or similar) • Headphones or Speakers Firmware Required •...
- Page 3 Page 3 of 7 Assembly Guide The assembly of the radio receiver is quick and easy. In order to interface with the radio receiver we’ll need to interact with the pins on the board. All of the pins that we need are accessible from the header holes located along the side of the radio receiver board.
- Page 4 SDIO SCLK It’s very important to realize that the Si4703 radio receiver breakout is a 3.3V device; that’s why we’re using an Arduino Mini Pro 3.3V. Using a 5 Volt Arduino (like the Arduino) can ruin the radio receiver if proper care isn’t taken to shift the voltage levels down to an acceptable level.
- Page 5 ‘radio.’ In the setup section all we do is create a serial connection, and use the ‘begin’ function of the radio library to initialize the Si4703. Finally we tell the Si4703 to tune to 97.3 MHz. Once things are set up, we get into the loop routine which handles the...
- Page 6 Si4703 is executed. Conclusion To find out what other functions there are in the Si4703 library, go into your libraries folder for Arduino (the same one you unzipped the folder in) and open the Si4703.h file with a text editor.
- Page 7 Page 7 of 7 2/12/2015...
Need help?
Do you have a question about the Si4703 and is the answer not in the manual?
Questions and answers