Table of Contents
Advertisement
Advertisement
Table of Contents

Summary of Contents for Fresenius Vial INJECTOMAT 2000 Anästhesie
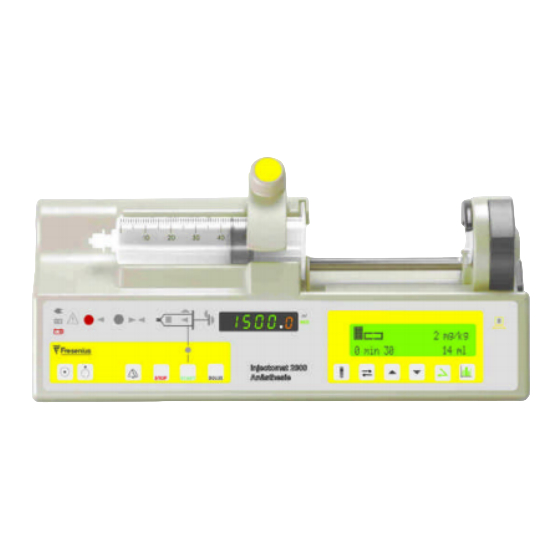
- Page 1 TECHNICAL MANUAL INJECTOMAT 2000 Anästhesie...
- Page 3 TABLE OF CHANGES The information given in this document only concern devices of Injectomat 2000 Anästhesie. Technical reference N°..........NT 0928 Revision date: ............20/09/99 Applicable from serial N°......... Date Revision no. Pages concerned Changes 20/09/98 creation...
-
Page 5: Table Of Contents
TABLE OF CONTENT OVERVIEW ..................5 1.1. Block diagram ......................5 1.2. Precautions before use.....................6 1.3. Overall product specifications ..................6 1.3.1. Biological specifications..................6 1.3.2. Mechanical specifications ..................6 1.3.3. Dimensions ......................6 1.3.4. Electrical specifications..................6 1.3.5. Electronic specifications ..................6 1.3.6. Injectomat 2000 Anästhesie Operator's guide ............6 ELECTRONIC BOARD................ - Page 6 3.3.12. Analog input display tESt.B ................41 3.3.13. Driving block position display tESt.C............... 41 3.3.14. Buzzer test tESt.d ..................41 3.3.15. Calibration values display tESt.E ..............42 3.3.16. Syringe type display tESt.F ................42 3.3.17. Displays of the last 10 events before the last blocking error tESt.J....42 3.3.18.
- Page 7 5.20.3. Operating mode....................62 ANNEX 1: ILLUSTRATED PARTS LIST........... 64 6.1. Subassembly traceability table ................64 6.1.1. Introduction ......................64 6.1.2. Replacement parts table..................64 6.2. Exploded views and related parts lists..............65 6.2.1. Mechanical part list....................65 6.2.2. Electronical parts list....................70 6.2.3. Operator's guide and labels references..............71 ANNEX 2: ELECTRONIC LAYOUT...........
- Page 8 Page : 4 NT 0928 Rev.A0...
-
Page 9: Overview
1 OVERVIEW 1.1. Block diagram 12/15V Step DC-DC Motor 230V by step ON / OFF Power supply driver Converter motor Battery EPROM Motor 128K x 8 rotation sensor 8K x 8 Syringe barrel EEPROM sensor Antisiphon sensor Occlusion strength Watch sensor Displacement opto... -
Page 10: Precautions Before Use
1.2. Precautions before use Please consult the user guide 1.3. Overall product specifications 1.3.1. Biological specifications Infusion liquid only comes into contact with the syringe and associated disposable. 1.3.2. Mechanical specifications Device operation is based on a "lead screew/nut" principle. The mechanism pushes the piston of a sy- ringe, of a given diameter, in a linear manner. -
Page 11: Electronic Board
2 ELECTRONIC BOARD 2.1. MOTOR POWER SUPPLY AND CONTROL BOARD 2.1.1. Functional description In order to simplify wiring the motor power supply control board concentrates 6 functional modules, which may be described separately: power supply module, motor control module, analog output module, disengage and anti-siphon opto switch module, microswitch input module, optional nurse call and RS232 interface module. - Page 12 2.1.1.1.2. External 12-15V AC/DC power supply The DC power supply input is designed to provide the syringe pump with a constant, external power source, such as a 12V battery. Maximum input voltage ± 15 volts protection against polarity inversion by the PR2 WO4 diode bridge. Minimum input voltage ±...
- Page 13 2.1.1.1.4.2 Operation: Press TON briefly to turn power on. Press TOFF continuously (5s<t<7s) to turn power off during a technical Failure. Press OFF 3 seconds to power OFF via CDALIM micro signal. The device can set ON or OFF via an external. Master module using the CD ON or CD OFF signal. 2.1.1.1.5.
- Page 14 2.1.1.2.1.3 Booster module BOOST = 0 The motor is powered via VBAT voltage. BOOST = 1 Booster function activated, the motor is powered at 12 Volts. L2 reactor, D18 diode, C15 capacitor and T8 transistor assembly allows a voltage of 12 V +/- 2 volts to be obtained from VBAT.
- Page 15 2.1.1.3. Analog output module The analog output module is built around a 10 bit, 5 channel analog/digital converter (MC 145053 U17) with an SPI bus. The following SPI CLK, SI, SO, CSADC bus signals are available on connector J2: In addition the component generates an end of conversion signal (EOC). The CDANA signal, which is active when set to 1, controls the transistor T14 IRFD 9120 which digitally drives VREF.
- Page 16 2.1.1.3.3. Driving bloc position sensor The absolute position of the driving bloc is obtained by a potentiometric sensor driven by a movement of the driving bloc. The transfer function of the sensor can be characterised by calibration in two known positions. The sensor is powered by a pulsated voltage.
- Page 17 J8 is the ribbon cable linking the occlusion, disengagement and position sensors located on the syringe pump driver. The CDOPT2 and SOPT2 signals are emitted by the CPU board and available on J2 connector. The opto diode is powered by pulsated voltage in order to save energy. 2.1.1.5.
-
Page 18: Description Of Connectors
2.1.2. Description of connectors 2.1.2.1. J1 mains connector description Neutral Phase 2.1.2.2. J2 board / CPU connection Description + 5V controlled power supply power supply + VBAT power supply power supply phase A motor control phase B motor control phase C motor control phase D motor control... - Page 19 2.1.2.3. J3 potentiometric sensor connector Description VREF center point 2.1.2.4. J4 internal battery connector Description battery + battery - 2.1.2.5. J5 motor connector Description + VBAT + VBAT PHASE D PHASE C PHASE B PHASE A opto rotation anode diode/ + 5V opto rotation cathode diode opto rotation collector transistor opto rotation transmitter transistor / GND...
-
Page 20: Electrical Layout
Description + VREF + internal gauge bridge internal gauge bridge/occlusion input internal gauge bridge/occlusion input internal gauge bridge C DOPT2 anti-siphon cathode diode + 5V opto anti-siphon anode diode / + 5V S OPT 2 opto anti-siphon collector transistor DEB / ON disengage microswitch DEB / OFF disengage microswitch... -
Page 21: Cpu Board
2.2. CPU BOARD Overview The CPU board is fitted to Injectomat 2000 Anästhesie version, around a 80C32 microprocessor used in open mode. It concentrates all the peripheral devices directly connected to the 80C32 bus. It is connected to the power supply board by a 40 contacts ribbon cable and to the display board by fixed connectors. - Page 22 The duration of the reset, in the active state, at power-up is set by the C10 capacitor 220nF 100 ms. Page : 18 NT 0928 Rev.A0...
- Page 23 2.2.1.2.2. Watch-dog The WATCHDOG circuit comprises the following elements: U10, U11, C12, D2, D1, R4, C11. When powered up the capacitor C12 is charged by the U10 circuit, via diode D1. The charge is maintained at a threshold of over 1.5 V during operation. The software writes, every 1 ms.This writing generates a 5V/1µs impulse on the U7.10 output, which re- charges the capacitor C12 via a high pass peak detector circuit made up C8, D3, D2.
- Page 24 2.2.1.4. SPI bus EEPROM The SPI bus is synchronous series communication bus using various peripheral circuits. The SPI bus is driven by the 80C32 ports. The Injectomat 2000 Anästhesie syringe pump has 2 peripheral devices on the SPI bus: The EEPROM 2 Ko 24C16 U12 located on the CPU board. The MC 145053 analog/digital converter located on the motor board.
-
Page 25: Description Of Connectors
2.2.1.6.1. Opto switch body syringe measurement. Note: The CI opto and the obturator are specific to the Injectomat 2000 Anästhesie equipped with "flange detector" and are not compatible with previous versions. 2 opto devices allow to detect 2 syringe sizes: 60 cc and 20 cc. J2.1 opto diode +5V anode J2.2... - Page 26 2.2.2.3. J3 Power supply/CPU ribbon cable A 40 channel ribbon cable is soldered directly to J3, linking the power supply and the CPU. Description + 5V controlled power supply " + VBAT " " A phase motor control B phase "...
-
Page 27: Electrical Layout
2.2.2.4. J4 Display board interconnection Description SEG1 display matrix line 1 SEG2 display matrix line 2 SEG3 display matrix line 3 SEG4 display matrix line 4 SEG5 display matrix line 5 SEG6 display matrix line 6 SEG7 display matrix line 7 SEG8 display matrix line 8 COL1 display matrix... -
Page 28: Display Board
2.3. DISPLAY BOARD 2.3.1. Overview The display board is mounted directly beneath the front plate of the syringe pump. It brings together all the facilities for operator/device dialogue: Keyboard, buzzer and display. It is connected to the CPU by rigid connectors, forming a sandwich, with the former, held in place by struts. - Page 29 2.3.2.1.2. Seven segment display units Name Type hundreds green 0 to 7 tens green 0 to 7 units green 0 to 7 tenths orange 0 to 7 thousands green 0 to 7 2.3.2.2. Keyboard interface The keyboard is an 18 key matrix keyboard. The keys are arranged in 3 rows of 6, with two separate keys with a common point (GND), TON and TOFF, and power on and off switches, connected to J2.
-
Page 30: Description Of Connectors
2.3.3. Description of connectors 2.3.3.1. J2 Display board / CPU board connection Description SEG0 display matrix and command LCD display line 1 SEG1 display matrix and command LCD display line 2 SEG2 display matrix and command LCD display line 3 SEG3 display matrix and command LCD display line 4... -
Page 31: Configurations, Calibrations And Check
The different operating possibilities presented will be particularly useful for adapting the syringe pump to the specific needs of each department. Fresenius Vial recommends the presence of its qualified personnel or of a member of the Technical De- partment of your establishment to help you implement the configuration procedures you wish to choose. -
Page 32: Other Parameters Configuration
PrES.2 PrES.2 3.1.2.2. Maximum pressure limits Allows to memorize the maximum limit pressure for each type of syringe: From 100 to 1100 mmHg by 50 mmHg for 50 cc syringes From 100 to 1500 mmHg by 50 mmHg for 20 cc syringes PrES.1 This value is the upper limit of PrES.3... - Page 33 3. Enter a value or a name; example: Allows to select the digit or the letter (underlined). Allows to increase the value of the selected character. Allows to decrease the value of the selected character. Allows to valid this choice. At any time, the key STOP allows to get out the parameter entering mode without saving the out- standing parameters.
- Page 34 PAr.2 PAr.2 3.1.3.2. Syringe selection mode: This parameter allows to choose a syringe selection mode among two: SEL 3 = automatic selection SEL 4 = manual selection SEL 3 has been chosen and if there is more than one selectable syringe, Injectomat 2000 Anästhesie PAr 4 PAr 4 goes automatically to "...
- Page 35 PAr.5 PAr.5 3.1.3.5. Compulsory purge (yes or no): This parameter allows to choose if the purge is compulsory or not after the syringe selection. : Compulsory purge. : Not compulsory purge. PAr.6 PAr.6 3.1.3.6. Infusion quick start (yes or no): This parameter allows to activate or not the infusion quick start: Par6 Par6...
- Page 36 PAr.B PAr.B 3.1.3.9. Time to preventive check: This parameter allows to choose the time to the next preventive check between 1 and 9999 continuous running. Par B 3500 H When this running time is over, at the switching on, the Injectomat 2000 Anästhesie will display this flashing message: Par.C It will be possible to stop this message with but it will flash again at each switching on until the check be...
- Page 37 3.1.3.10.1. Protocol modification: see operator’s guide. Keys description: allows to increase a digit or a letter. allows to decrease a digit or a letter. enter the outstanding value and goes to the next or comes back to protocol choice after entering the outstanding value.
- Page 38 PArE PArE 3.1.3.12. Programmed bolus flow rates configuration: This parameter allows to memories or not the last programmed bolus flow rate when switching off the device: ParE ParE : Last programmed bolus flow rate. : Default bolus flow rate; when switching on the device will propose the bolus flow rate enter in this parameter: ParE ParE...
-
Page 39: Calibration
3.2. Calibration NOTE: The access to calibration mode is only allowed with a secret code. Calibration mode access is activated by simultaneously pressing, when switching on, on the keys: and BOLUS until the display: EtAL. and flashing of the validation key. If the key is not pressed within 3 seconds the Injectomat 2000 Anästhesie comes back to normal running. -
Page 40: Movement Sensor Calibration: Etal.6
3.2.2. Movement sensor calibration: EtAL.6 EtAL.6 High High Display " " and place a wedge of 115 mm +/- 0.05 mm, ref : T300940, in syringe flange groove and push the driving block up against it. Keep the driving block in disengaged position. One press on START reads this tension and store it in the EEPROM. -
Page 41: Checking The Injectomat
3.3. CHECKING THE INJECTOMAT N.B.: the tests outlined below do not include the occlusion tests, the flow rate tests, the electrical safety tests, etc. 3.3.1. The After Sale Service test The ASS test is activated by pressing simultaneously on the keys: until following display: TESt.1 The validation LED flashes.If START is not pressed, within 3 seconds, the device returns to normal... -
Page 42: Running Time Test.1
3.3.2. Running time tESt.1 tESt.1 This test allows to display, first, the running time in hours, days and months. Press on gives the maintenance date. This date may actualised with the key board. 3.3.3. Lights test tESt.2 tESt.2 This test allows to check the lighting of LED’s of the front panel, of the 7 segments display and of the LCD screen. -
Page 43: Battery Voltage Display Test.4
3.3.5. Battery voltage display tESt.4 tESt.4 This test displays the battery voltage over 5 digits. The voltage is calculated in accordance with corre- sponding analog input value and calibrating values. The values used are those for escape from an alarm or pre-alarm (6.3 V) or starting an alarm (5.7 V). The display is in volts and tenths of volts. -
Page 44: Total Running Time Test.6
The error codes: 10 (internal Ram self-test(+) 20 (external Ram self-test(+) 30 (EEPROM check-sum self-test) and 40 (EEPROM access) These errors cannot be stored in the EEPROM; the running of the device is too pertubated to allow it to write in the EEPROM. When normally stop, the “OFF”... -
Page 45: Software Version Test.a
3.3.11. Software version tESt.A tESt.A This test allows to display the software number version, the check sum and the loading date. Press on allow to display the language. Example: screen Test A V01.4 OCFO 01/12/1998 screen Test A Francais V01.0 09/09/1998 3.3.12. -
Page 46: Calibration Values Display Test.e
3.3.15. Calibration values display tESt.E tESt.E This test allows to show the calibration values stored in the EEPROM. Every value is displayed on 3 digits. The first line gives the shorted name of the value. Example: Test E Test E The keys allows to pass from one channel to an other. -
Page 47: Nt 0928 Rev.a0 Page
NT 0928 Rev.A0 page : 43... -
Page 48: Replacing Sub-Assemblies
4 REPLACING SUB-ASSEMBLIES Important: Disassemble the flexible circuit holder on the supply board before extracting the me- chanical assembly from the lower box. Important: Device operation must be completely checked after all intervention inside the device. 4.1. Mounting the flexible circuit Important: Handle the flat cable with great care when mounting this sub-assembly: damage to the flat cable will result in complete disassembly of the mechanical block. -
Page 49: Wiring The Components On The Flexible Circuit
4.2. Wiring the components on the flexible circuit Important: it is essential that the component mounting direction be respected. 1. Position the strut (1.5mm) between the 4 pin photo switch and weld the syringe head detection photo switch flattening it against the flat cable. Important: use a silicone between the optical switch and the flat ribbon cable. -
Page 50: Mounting The Potentiometer
6. Mount the force sensor on the driving block holder using a TF HC M4x10 screw with weak lactate. Important: avoid all contact between the force sensor and its holder. 7. Mount the contact plate on the force sensor using a TF M4x10 screw with weak loctite. Important: Before calibrating the force sensor, adjust the threshold voltage (0.6V + 0.05V) using an os- cilloscope between pin 1 (earth) of J09 and pin 4 of J09 (square pulse). -
Page 51: Plug Holder Connector
4.2.3. Plug holder connector If the total pins on the plug holder connector does not correspond to the total pins on the power supply board connector, the connecting method should be done as follows plug holder straight Power supply board NT 0928 Rev.A0 page : 47... -
Page 52: Maintenance
If the device has to be returned to our After-Sales Service, it must be packed very carefully, if possible in its original packaging before being sent. FRESENIUS VIAL is not liable for loss or damage to the device during transport to our After-Sales Service. - Page 53 NT 0928 Rev.A0 page : 49...
- Page 54 Page : 50 NT 0928 Rev.A0...
- Page 55 NT 0928 Rev.A0 page : 51...
- Page 56 Page : 52 NT 0928 Rev.A0...
-
Page 57: Checking Disengagement System
5.4. Checking disengagement system 1.Start the device. 2.Place a 50/60 ml syringe in the INJECTOMAT 3.Activate the disengaging lever. Ensure an acoustic and visual alarm is present. 4.Maintain the disengagement lever in high position and move the driving block Check easy driving block displacement (manual displacement). 5.Release the lever Ensure there is no alarm. -
Page 58: Checking Registered Syringe List /Syringe List Label
50 ml/h. Any non-correspondence between the value measured and the table value indi- cates a mechanical and electronic failure which could cause flow rate errors. A checking software ISCTRL allow to carry out this test automatically (call FRESENIUS VIAL After- Sale- Service for further information) 5.9.1. -
Page 59: Operating Mode
5.9.2. Operating mode 1. Switch the device on by pressing on the ON key. 2. Place a 50/60 ml Braun Perfusor syringe on the device. over view 3. Measure the distance X (in millimeters) as shown on the diagram -> X 4. -
Page 60: End Of Infusion Alarm
2. Select a 50 ml Braun Perfusor syinge, 20 ml full. 3. Select a flow rate of 120 ml/hr. For normal flow rates, the end of infusion pre-alarm is activated 5 minutes before end of infu- sion. For higher flow rates (50 ml/hr), the pre-alarm is activated when the volume remaining to be in- fused equals 10% of total syringe capacity. -
Page 61: Trouble Shooting
5.14. Trouble Shooting Problem Causes • • Perfusion end detected too Syringe used does not fit to selected one. early (about 10 ml). • • No occlusion prealarm and Syringe used does not fit to selected one. alarm at perfusion end. •... -
Page 62: Error Message Er(-)0, Er01, Er(-)2, Er03, Cfpc
5.15. Error message Er(-)0, Er01, Er(-)2, Er03, CFPc Error code Error code definition Cause ER (-) 0 Electronic control + soft- Check Sum: faulty RAM, EPROM, ware anomaly EEPROM Device self test on start up was not successful When rewriting EEPROM on switching off the device the Check Sum is re- Er10 Internal RAM anomaly... -
Page 63: Equipment Used
The test procedure outlined below can be carried out with a 50 ml or 20 ml syringe. The operating mode described below, reflects the flow rate Measurement software used by Fresenius Vial according to the Pr EN 60-601-2-24 Standard for Infusion pumps. It is up to the user to adapt this procedure to the software he uses. -
Page 64: Operating Mode
5.16.3. Operating mode Remark: the software works following the operating mode described in the Pr EN 60-601-2-24 Standard for infusion pumps. 1. Start the acquisition program for the scales. 2. Enter the data necessary to carry out the program without validating the flow rate. 3. -
Page 65: Installation
5.17.2. Installation 1. The equipment should be installed according to the installation drawings shown in 5.18.3. Remark: Make sure that the horizontal installation plane is respected. 2. Fill the syringe with 50 ml of distilled water. Prime if necessary to eliminate any air bubbles. 3. -
Page 66: Flow Rate Control: Flow Rate Measurement Using A Test Tube
5.18. Flow rate control: flow rate measurement using a test tube 5.18.1. Equipment used Stop clock Test tube or beaker with 1 ml 0.5 ml graduating Liquid: distilled water +/ oil) Luer Lock type plastic syringe (50 or 20 ml) Catheter extension with Luer Lock end piece (length 150 cm, inside diameter 2.5 mm). - Page 67 NT 0928 Rev.A0 page : 63...
-
Page 68: Annex 1: Illustrated Parts List
6 ANNEX 1: ILLUSTRATED PARTS LIST 6.1. Subassembly traceability table 6.1.1. Introduction This chapter allows the technician to find which component has been changed on the product, also to order the right part when it necessary for the pump maintenance. 6.1.2. -
Page 69: Exploded Views And Related Parts Lists
6.2. Exploded views and related parts lists 6.2.1. Mechanical part list Upper and lower cases NT 0928 Rev.A0 page : 65... - Page 70 6.2.1.1. Upper case Référence Repère Quantité Désignation Diam.17.5 Injectomat label Syringe clamp Injectomat Upper case Inject shaped Diam 5 retaining ring Syringe clamp compression spring Injected PC opto support Injectomat Anästhesie window Injectomat Anästhesie front panel Injected Diam.6 block Female hybrid M3x12 spacer CPU board protector film Buzzer foam Opto...
- Page 71 Mechanical plunger unit Injectomat 2000 Anästhesie NT 0928 Rev.A0 page : 67...
- Page 72 6.2.1.3. Plunger / mechanism unit Ref.: Diag. Ref. Number Component 200/207 Diam. 3.5 mm retaining ring Half nut spring cap Half nut spring Disengagement came Upper machined half nut Lower machined half nut Tube retainer Mechanical block + injected pad Flexible circuit clip Flexible circuit Complete disengagement shaft...
- Page 73 Motor reduction bloc Mechanical kits NT 0928 Rev.A0 page : 69...
-
Page 74: Electronical Parts List
6.2.1.4. Motor reduction block Reference Diag. Ref. Number Component Injected M5 gear HE13 wired potientiometer Motor rotation photo switch Support opto Motor rotation blade Injectomat 2 Ph motor Injectomat motor gear R80 reducer frame 6.2.1.5. Mechanical kits Reference Diag. Ref. Number Component Main cord 122/123... -
Page 75: Operator's Guide And Labels References
6.2.3. Operator's guide and labels references References ITEM Injectomat 2000 Anästhesie operator’s guide Buzzer adjust sticker Danger sel PIL. DIN Battery compartiment stick Main DANGER 12.5 mm label. Main Danger PIL label. Diam. 17.5 Inj labe 1.1/1.2 Ah 6V BAT label UC board label It is possible to get the Operator’s guide, reference : , on simple request to our commercial service... -
Page 76: Annex 2: Electronic Layout
7 ANNEX 2: ELECTRONIC LAYOUT 7.1. Rear door wiring Designation FV.REF DESIGN. REF Rév. Rear door wiring for INJECTOMAT 15 VA (1/1 x A4) 7.2. Power supply and control board 7.2.1. Electronic layout Designation FV.REF DESIGN. REF Rév. Motor power supply and control board ( 5/5 X A3) D195BN000 7.2.2. - Page 77 NT 0928 Rev.A0 page : 73...
- Page 78 Page : 74 NT 0928 Rev.A0...
-
Page 79: Addenda
8 ADDENDA NT 0928 Rev.A0... - Page 80 NT 0928 Rev.A0...
-
Page 81: Useful Addresses
Changes may be made at regular intervals, for inclusion in subsequent editions. COPYRIGHT © 1999, Fresenius Vial S.A This technical manual may not be reproduced in whole or in part without the written consent of Fresenius Vial S.A. Fresenius Vial S.A. - head office: Le Grand Chemin - 38590 Brezins (FRANCE) With directory and supervisor board - capital 90128000 F - SIREN Grenoble B 408 720 282 NT 0928 Rev.A0... - Page 82 NT 0928 Rev.A0...
Need help?
Do you have a question about the INJECTOMAT 2000 Anästhesie and is the answer not in the manual?
Questions and answers