Table of Contents
Advertisement
Manufacturer:
Address:
Tel:
Fax:
Email:
Website:
Type of machine:
Instruction manual
CARIF 260 BSA
SEMI-AUTOMATIC HYDRAULIC MACHINE
CARIF SAWING MACHINES S.R.L.
Via Tre Salti, 1
20029 Turbigo (Ml), Italia
+39 0331 899015
+39 0331 898484
carif@carif.it
www.carif.it
SEMIAUTOMATIC HYDRAULIC BAND SAWING MACHINE
"CARIF 260 BSA"
WARNING:
Before starting the machine, please read these instructions completely.
Advertisement
Table of Contents

Summary of Contents for CARIF 260 BSA
- Page 1 Instruction manual CARIF 260 BSA SEMI-AUTOMATIC HYDRAULIC MACHINE Manufacturer: CARIF SAWING MACHINES S.R.L. Address: Via Tre Salti, 1 20029 Turbigo (Ml), Italia Tel: +39 0331 899015 Fax: +39 0331 898484 Email: carif@carif.it Website: www.carif.it SEMIAUTOMATIC HYDRAULIC BAND SAWING MACHINE Type of machine: “CARIF 260 BSA”...
- Page 2 260 BSA...
-
Page 3: Table Of Contents
260 BSA Index Machine specifications Introduction General safety and mandatory instruction Safety gevice Safety symbols Machine Description Main Carachteristics Technical Data Installation Storage and transportation Installation Plan Assembly devices Electrical connection Coolant filing Operation Cutting operation Hydraulic Pump Saw Blades... -
Page 4: Machine Specifications
THE IMPORTANCE TO CHOOSE A FULLY HYDRAULIC BAND SAW All CARIF models 260/320/450 are completely Hydraulic: closure of the vice, bow feed and pressure. The Carif hydraulic patented system has been designed with 2 commands: BOW FEED and CUTTING PRESSURE. -
Page 5: Introduction
CARIF reserves itself from eventual bad It is kindly suggested to familiarize with situations caused to people or damages the main functions reading carefully this caused to the machine without following manual. - Page 6 260 BSA In spite of all safety devices all the machines are potentially dangerous. Further dangers must be carefully controlled. • The clamping may cause serious injuries if obstructed on their way • The saw blade may cause serious injuries if obstructed during the cutting • The saw frame may cause serious injuries during its down stroke...
-
Page 7: Safety Symbols
260 BSA Safety symbols The machine is equipped with the following cleaned and to be substituted when safety symbols. These must be always detached: SYMBOL MEANING DANGER Wear gloves mandatory The saw band may cause injuries during replacement Wear protection glasses mandatory... -
Page 8: Machine Description
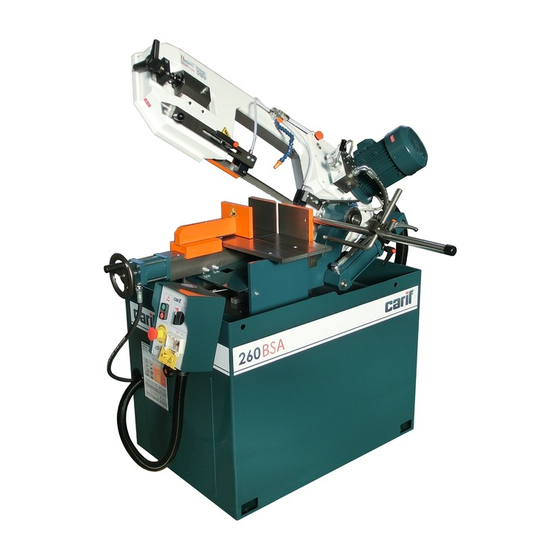
260 BSA Machine Description Main Carachteristics... - Page 9 The support is assembled on the basement shaft with n.2 conical bearings for an easy Frame turning of the frame (+60°/-45°). Carif frame made in aluminum casting with hardening process. Frame Cyclinder The frame cylinder is connected to hydraulic Frame cover pump and permits the hydraulic feed to Frame cover is fixed on the frame by knobs.
-
Page 10: Technical Data
260 BSA Technical Data CARIF 260 BSA Weight Ca. 320 Kg Dimensions 1200 x 700 x 1300h mm Sawband Dimensions 2450 x 27 x 0,9 mm Cutting speed 33÷66 m/min Working Height 830 mm Electrical data Blade motor 1,4 Kw... -
Page 11: Installation
260 BSA Installation Storage and transportation machine must transported of shackles (not standard equipment), in horizontally. order to make the grip safer. In case you have to store the machine, take the following cares: • Place the machine in a close environment;... -
Page 12: Installation Plan
260 BSA Installation Plan • Please be sure that power supply tension is conformed to the characteristics of the machine. • Environment Temperature between -10°C and + 50°C. • Humidity not more than 90%. • Ensure to have a working space sufficient to allow the entire safety of the machine. -
Page 13: Electrical Connection
260 BSA 3.4 Electrical connection The Electrical connection must be carried out only by qualified personnel or Electricians. Check if main voltage corresponds to the motor or frame). If rotating in the wrong main voltage on the name plate. direction, exchange connection L1 and L2. -
Page 14: Operation
260 BSA 4. Operation Cutting Operation Before starting the machine, verify that installation has been performed correctly. To start and perform a cut follow these e) The bow feed can be set through the points: handle “A” (BOW FEED) on the Hydraulic pump. -
Page 15: Hydraulic Pump
On CARIF models 260/320/450 BSA is also 1mm (.04”). mounted a patented hydraulic gear pump • “CUTTING PRESSURE” (B) for cutting of... -
Page 16: Saw Blades
260 BSA 4.3 Saw Blades The table below can advise to choose the right blade tpi (teeth per inch) to use for different material sections: Teeth per Inch Tubes or Profiles Full Material (variable) (thickness) 6/10 tpi 2 ÷ 4 mm 5 ÷... -
Page 17: How To Position The Material In The Vice
260 BSA 4.4 How to Position the material in the vice For a better holding of the material in the different material sections as pictures the vice, thus an much better blade life below: and cutting quality, it is suggested to fix... -
Page 18: Malfuctioning, Causes And Actions
260 BSA Malfuctioning, causes and actions TYPE OF ERROR REASONS ACTIONS The machine is new and needs some days of running in. Then, the problem disappears by itself. • Bow descends irregularly. Air in the hydraulic • Bow delays to system. - Page 19 260 BSA IMPORTANT: Gear pump substitution and oil replacement. Before to start the machine: • Remove the screw (716) and verify that the oil leaks out (to avoid gear pump seizure). • Close the screw (716) and lock it (to avoid air suction).
- Page 20 260 BSA TYPE OF ERROR REASONS ACTIONS Check their setting as it follows: loosen the grub screw (M6), push by a tool on the pin (P), in order to eliminate every clearance between the blade and the tips. Lock the Condition grub screw.
-
Page 21: Maintenance
260 BSA Maintenance Blade replacement While you are replacing the blade, wear protective gloves and glasses. • Switch off the machine. • Turn the fixing screws out and remove the casing and the blade guard. While the casing has been removed, a microswitch forbids the machine to start. -
Page 22: Blade Tension
260 BSA 6.1.1 Blade Tension Before fitting a new blade, clean pulleys Turn the bolt “1” (or the handle for 260 and blade ways, then, repeat the said BSA) until the sign reaches the centre of operations, in the opposite order, and the white area “2”... -
Page 23: Scheduled Maintenance
260 BSA 6.2 Scheduled maintenance Before performing any maintenance activity on the machine remove tension and verify that on the machine thare are no pieces from cutting operations. For a optimum performance of angle reading and to prevent any risk of not functioning, please always clean the magnetic tape and sensor positioned on the graduated scale. -
Page 24: Spare Parts
260 BSA 6.3 Spare Parts To order spare parts it is necessary to indicate: • Machine Serial Number • Item code and / or position of the part on the drawing (Pos.) • Quantity Pos. Pezzo Cod. Avail. Piastra basamento Basement plate 0027 Platte fuer grundsestell Plate du bâti Cuscinetto a rulli conici 32008... -
Page 25: Optional
260 BSA Optional Roller Units On request are available some roller units type “A” or type “B” used separately from the machine. It’s possible to connect the roller units to the machine also by the connecting plan “C”. See picture below. -
Page 26: Air/Oil Lubrication System
How to proceed for setting the Air/Oil Air output otherwise the Oil will not come distribution on the blade: out. CARIF suggest to use the air/oil Lubrication System only for cutting profiles, tubes and solid bars of small dimensions (=< Ø 50 mm). -
Page 27: Digital Angle (Elgo Iz16E)
260 BSA Digital angle (ELGO IZ16E) 7.3.1 Technical data 7 decades (digit height14mm). LCD-Display With sign, battery status and measurement units. Power supply 1.5 V or 3.0 V (+24V on request) Battery life 1…3 years (depending on the battery-type) Operating temperature 0 °C …... -
Page 28: Laser Device
260 BSA Laser device The machine is equipped with a laser device (Z-laser Z5 M18 B-635-lg90) installed on the top of the bow with a bracket. The laser line is shipped not mounted. To mount it correctly align the two red arrows as indicated on the device and the bracket.