Table of Contents
Advertisement
Quick Links
We strive to ensure that our products are of the highest quality
and free of manufacturing defects or missing parts. However, if
you have any problems with your new product,
FAX: 1-866-873-3531
gameroom@escaladesports.com
Please have your date code when inquiring about parts.
When contacting Escalade Sports please provide your model number, date code (if
applicable), and part number if requesting a replacement part. These numbers are
located on the product, packaging, and in this owners manual.
Your Model Number:
2-G05214W-
Date Code:
Purchase Date:
PLEASE RETAIN THIS INSTRUCTION MANUAL FOR FUTURE REFERENCE
All Right Reserved.
© 2013 Escalade Sports
DO NOT RETURN IT TO THE
please contact us toll free @:
1-888-996-2729
Customer Service Department
Evansville, IN 47706
G05214W
Or write to:
Escalade Sports
P.O. Box 889
-WJ
1
STORE,
For Customer Service Call
1-886-996-2729
Advertisement
Table of Contents

Related Manuals for Atomic G05214W


Summary of Contents for Atomic G05214W
- Page 1 When contacting Escalade Sports please provide your model number, date code (if applicable), and part number if requesting a replacement part. These numbers are located on the product, packaging, and in this owners manual. G05214W Your Model Number: 2-G05214W- Date Code:...
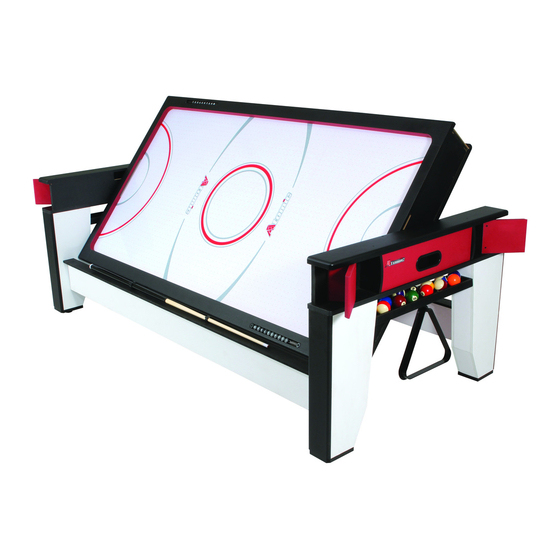
- Page 2 IMPORTANT! READ EACH STEP IN THIS MANUAL BEFORE YOU BEGIN THE ASSEMBLY. THREE ADULTS ARE REQUIRED TO ASSEMBLE THIS ATOMIC 7FT 2-IN-1 FLIP TOP GAME TABLE Tools Required: Wrench T1 included with the table Phillips Screwdriver Furniture Polish and Cloth An electric screwdriver is helpful in assembly.
- Page 3 HARDWARE IDENTIFIER (To Scale) H1 - 4 x 44mm Phillips H2 - 4 x 38mm Phillips H3 - 3.5 x 32mm Phillips Flat Head Screw (34) Washer Head Screw (8) Flat Head Screw (20) (Not to Scale) T1 - Wrench (1) H4 - 8 x 28mm H5 - 8 x 19mm H7-Barrel Nut (8)
- Page 4 PARTS IDENTIFIER (Not to Scale) P7 - Goal Box Support P8 - Goal Box Support P6 - Left Leg Panel (2) Frame with Curved (4) Frame (4) P5 - Right Leg Panel (2) P9 - End Frame Panel (2) P11 - Frame Bottom P10 - Goal Box Panel (2) P12 - End Top Rail Board (2)
- Page 5 IMPORTANT NOTE: CAREFULLY LIFT UP THE AIR HOCKEY PLAYFIELD AND REMOVE ALL ASSEMBLY PARTS, BEING SURE TO CHECK ALL INNER TABLE COMPARTMENTS FOR PARTS. FIND A CLEAN LEVEL PLACE TO BEGIN ASSEMBLY. WE RECOMMEND BUILDING THE TABLE IN THE BOX TOP TO PROTECT PARTS DURING ASSEMBLY.
- Page 6 PARTS REQUIRED 8 pcs - H5 Flat Washer 8 pcs - H16 Phillips Round Head Screw 2 pcs - P19L Large 8 pcs - H6 Hex Head Bolt 4 pcs - H18 Phillips Washer Head Screw Cue Clip 8 pcs - H7 Barrel Nut 2 pcs - P19S Small Cue Clip 1 pc - T1 Wrench STEP 3:...
- Page 7 PARTS REQUIRED 6 pcs - H9 Phillips Flat Head Screw 2 pcs - H13 Hex Nut 2 pcs - H10 Male Pivot Assembly 1 pc - P1 Pool Table 2 pcs - H12 Flat Washer 1 pc - T1 Wrench STEP 5: Attach H10 Male Pivot Assembly to each end apron using H9 Screws as shown in FIGURE 5 and DETAIL A.
- Page 8 PARTS REQUIRED 1 pc - P17 Outer Apron with Cord Hole 1 pc - P18 Outer Apron without Cord Hole STEP 7: To install P17 Outer Apron with Cord Hole, please feed the cord plug end back inside the hole in side apron. Carefully insert and sleave P17 Outer Apron with Cord Hole and P18 Outer Apron without Cord Hole as shown in FIGURE 7.
- Page 9 STEP 9: WARNING: With the help of another adult, carefully lift the assembly from STEP 8 (FIGURE 8B) to the assembly from STEP 4 (FIGURE 4) THIS STEP REQUIRES THREE OR MORE ADULTS. as shown in FIGURE 9. Assembly from STEP 8.
- Page 10 ROTATE TABLE ONLY WITH ADULT SUPERVISION P8 Pilot hole on this side. Groove face Groove face inside. inside. FIGURE 11A Atomic Jelly logo on this side. FIGURE 11B All Right Reserved. © 2013 Escalade Sports For Customer Service Call 1-886-996-2729...
- Page 11 PARTS REQUIRED 12 pcs - H5 Flat Washer 12 pcs - H17 Phillips Flat Head Screw 4 pcs - P13 L-Frame Lock 4 pcs - H8 Hex Head Bolt 2 pcs - P12 End Top Rail 1 pc - T1 Wrench STEP 12: With the help of another adult, hold the table in this position to install P13 L-Frame Locks to each (2) leg assembly.
- Page 12 PARTS REQUIRED 24 pcs - H19 Phillips Flat Head Screw 2 pcs - P6 Left Leg Panel 2 pcs - P5 Right Leg Panel 24 pcs - P22 Screw Covers 8 pcs - P23 Barrel Nut Covers STEP 13: Place all L-Frame Locks into closed position to lock table as shown in FIGURE 13A. Install P5 Right Leg Panel and P6 Left Leg Panel using H19 Screws as shown in FIGURE 13A.
- Page 13 PARTS REQUIRED 8 pcs - H3 Phillips Washer Head Screw 2 pcs - P16 Ball Storage Tray 2 pcs - H15 Phillipls Round Head Screw 1 pc - P20 Triangle Holder STEP 14: Attach P16 Ball Storage Trays at each table end using H3 Screws as shown in FIGURE 14. Important Note: Please install P16 Ball Storage Trays so the bottom pre-drilled holes for P20 Triangle Holder face the inside of the tableas shown in DETAIL B.
- Page 14 WARNING: LIFTING POINTS: FOR FINAL PLACEMENT OF FLIP TABLE PLEASE MAKE SURE ALL FOUR (4) P13 L-FRAME LOCKS ARE IN LOCK POSITION , THEN FOUR (4) ADULTS LIFT THE TABLE. ADULTS SHOULD LIFT TABLE BY PLACING HANDS ON EACH SIDE OF THE LEG AS SHOWN IN FIGURE 15.
- Page 15 CAUTION: ROTATING YOUR TABLE DO NOT ALLOW CHILDREN TO ROTATE THIS TABLE This table should be rotated by ADULTS only. To release the table bed, open the frame locks at each corner. Be sure no one is in the way, then SLOWLY rotate the bed.
- Page 16 PRODUCT PARTS LIST FOR MODEL # G05214W Key# Part# Description Qty. 05214WJH1 4 x 44 mm Phillips Flat Head Screw 05214WJH2 4 x 38 mm Phillips Flat Head Screw 05214WJH3 3.5 x 32 mm Phillips Washer Head Screw 05214WJH4 8 x 28 mm Hex Head Bolt...
-
Page 17: Day Limited Warranty
90 DAY LIMITED WARRANTY This consumer warranty extends to the original consumer purchase of any ESCALADESPORTS Product (hereinafter referred as the "Product"). WARRANTY DURATION: This Product is warranted to the original consumer purchase of a pe- riod of 90 days from the original purchase. WARRANTY COVERAGE: ESCALADE SPORTS warrants to the original Consumer Purchaser that any Product of its manufacture is free from defects in material and workmanship when used for the intended purpose under normal use and conditions.
Need help?
Do you have a question about the G05214W and is the answer not in the manual?
Questions and answers