Table of Contents
Advertisement
Quick Links
http://waterheatertimer.org/Should-you-buy-solar-water-heater.html
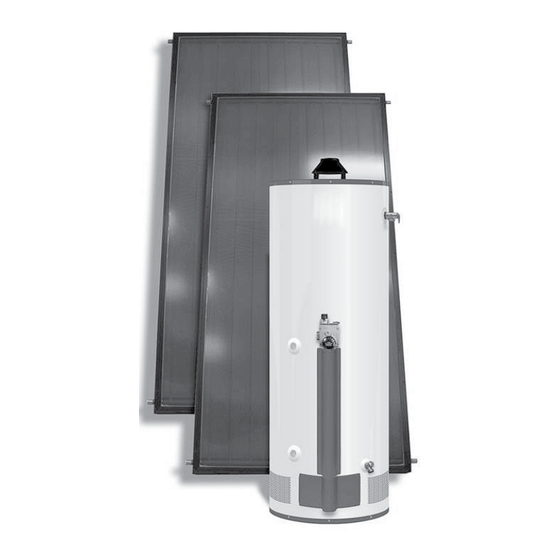
Pumped Solar Water
Heating Systems
Use & Care Manual
With Installation Instructions for the Installer
®
The purpose of this manual is twofold: one, to
provide the installer with the basic directions and
recommendations for the proper installation and
adjustment of the water heater; and two, for the owner–
operator, to explain the features, operation, safety
precautions, maintenance and troubleshooting of the
water heater. This manual also includes a parts list.
It is very important that all persons who are expected
to install, operate or adjust this water heater read the
instructions carefully so they may understand how to
perform these operations. If you do not understand these
instructions or any terms within it, seek professional
advice.
Any questions regarding the operation, maintenance,
service or warranty of this water heater should be
directed to the seller from whom it was purchased. If
additional information is required, refer to the section on
"If you need service."
Do not destroy this manual. Please read carefully and
keep in a safe place for future reference.
!
Recognize this symbol as an indication of
Important Safety Information!
!
California Proposition 65 Warning: This
product contains chemicals known to the State of
California to cause cancer, birth defects or other
reproductive harm.
AP15326-1 (04/11)
Advertisement
Table of Contents

Related Manuals for Rheem RSG75-48BP

Summary of Contents for Rheem RSG75-48BP
- Page 1 http://waterheatertimer.org/Should-you-buy-solar-water-heater.html Use & Care Manual With Installation Instructions for the Installer Pumped Solar Water Heating Systems The purpose of this manual is twofold: one, to provide the installer with the basic directions and recommendations for the proper installation and adjustment of the water heater; and two, for the owner– operator, to explain the features, operation, safety precautions, maintenance and troubleshooting of the water heater.
-
Page 2: System Model Numbers
PLEASE VISIT OUR WEB SITE FOR NEW PRODUCT UPDATES, ANSWERS TO FREQUENTLY ASKED QUESTIONS (FAQ) AND USEFUL INFORMATION ABOUT SOLAR WATER HEATING SYSTEMS. www.rheem.com This Solar Water Heating system is for the models listed below: RSG75-48BP RUSG75-40BP RUSG75-48BP RSG75-40BP RMSG75-40BP... -
Page 3: Table Of Contents
FOR YOUR RECORDS Safety Information Write the model and serial numbers here: System Model Numbers ..2 Model Number of Solar System Tank: ____________________________________ For Your Records ..3 Serial Number of Solar System Tank: _____________________________________ Introduction . -
Page 4: Introduction
Introduction Thank you for purchasing a solar water heating system. It is certification does not imply endorsement or warranty of this one of the most effective and trouble-free systems available product by the Florida Solar Energy Center or the state of today. -
Page 5: Important Safety Information
IMPORTANT SAFETY INFORMATION. READ ALL INSTRUCTIONS BEFORE USING. DANGER! WATER TEMPERATURE SETTING Safety and energy conservation are factors to be considered when selecting the water temperature setting of a water heater’s gas control. Water temperatures above 125°F can cause severe burns or death from scalding. Be sure to read and follow the warnings outlined on the label pictured below. - Page 6 IMPORTANT SAFETY INFORMATION. READ ALL INSTRUCTIONS BEFORE USING. DANGER! LIQUEFIED PETROLEUM (LP PROPANE OR BUTANE) AND NATURAL GAS MODELS LP and Natural gas have an odorant added to aid in detecting a gas leak. Some people may not physically be able to smell or recognize this odorant. If you are unsure or unfamiliar with the smell of LP or natural gas, ask the gas supplier.
-
Page 7: Safety Precautions
WARNING! For your safety, the information in this manual must be followed to minimize the risk of fire or explosion, electric shock, or to prevent property damage, personal injury, or loss of life. FOR INSTALLATIONS IN THE STATE OF CALIFORNIA California Law requires that residential water heaters must be braced, anchored or strapped to resist falling or horizontal displacement due to earthquake motions. -
Page 8: Installing The System
Installing the System Preface Let us first offer two words of grateful Your solar water heating system has been appreciation.Thank You! We sincerely designed to meet exacting SRCC OG-300 appreciate your business. We also wish to certification requirements. The components say thank you for "going solar". -
Page 9: System Description And Operational Principle
System Decription and Operational Principle The key components in the solar water heating back-up water heater, or (3) bypass the solar system include the solar collector, solar collector and run 100% on utility power. storage tank with integral heat exchanger, Section Six provides instructions for setting circulation pump, differential thermostat, the system for automatic operation in each of... -
Page 10: Installation Requirements - Specific
Installing the System Installation Requirements - Specific The homeowner and contractor shall confirm the location of all roof and ground mounted components in advance of the installation. Collector Orientation The performance of solar water heating systems in the Northern Hemisphere is optimized when the collector is mounted facing True South. - Page 11 Basic Mounting Procedures The collector must be raised from the roof surface to allow for rainwater and debris The solar collector in your solar system can to pass under the collectors and for proper be mounted in either a vertical or horizontal ventilation of the roofing material.
- Page 12 Installing the System Figures 5-10 Figure 5- Composition Shingle Mounting SOLAR COLLECTOR SIDE VIEW MOUNTING GROOVE SOLAR COLLECTOR MOUNTING 3/8" ST STL BOLT CLIP MOUNTING W/ LOCKWASHER & CLIP FLATWASHER ST STL SLIDING ROOFING SEALANT ANODIZED ALUM 12" X 12" LEAD SOLAR STRUT FLASHING ST STL NUTS &...
- Page 13 SIDE VIEW MOUNTING SIDE VIEW MOUNTING SOLAR COLLECTOR GROOVE GROOVE SOLAR COLLECTOR MOUNTING CLIP MOUNTING CLIP MOUNTING ST STL SLIDING NUT CLIP ST STL SLIDING NUT MOUNTING CLIP ANODIZED ALUM ANODIZED ALUM SOLAR STRUT 3/8" ST STL BOLT SOLAR STRUT W/ LOCKWASHER 3/8"...
- Page 14 Installing the System Figures 5-10 Figure 9 - Flush Mounting...
- Page 15 Detail "D" Figure 10 - Universal Tilt Mount...
- Page 16 Installing the System Installation Requirements - Specific - continued Collector Loop Pipe Insulation Notice: Use of 50/50 lead solder is expressly prohibited. The collector loop cold supply and hot return Notice: Use of galvanized steel, CPVC, lines must be well insulated with a high quality PVC, or any other type of plastic pipe is flexible closed cell insulation to minimize prohibited.
-
Page 17: Low Voltage Wiring
portion of the sensor to the collector header pipe tank make sure that all the components are with a stainless steel hose clamp. Wire nuts used accessible and easy to reach. Provide for clear to connect the sensor and low voltage wiring shall access to the storage tank, pump, expansion tank, be all plastic, sealed with silicone and thoroughly mixing valve, and other key components. - Page 18 Installing the System The circulation pump shall be the Grundfos he 3/4" cold water supply line to the solar model UPS15-58FC/LC, 115 volt or equivalent. storage tank must be insulated with minimum The pump shall be pre-wired with a 6’ line 7/8"...
- Page 19 Charging the System Proceed as follows: • Begin by filling the solar tank with water. Do WARNING: Under no circumstances can any fluid other than Dowfrost HD be used, this by opening the cold water isolation ball alternate fluids could be hazardous to your valve to the solar tank (No.
- Page 20 Installing the System charging process also will require a low flow significant drop in collector loop pressure, diaphragm pump (Flojet or equal) to fill and contact your installation contractor pressurize the collector loop. immediately for service. The glycol HTF provides the freeze protection for your Connect the discharge side of the pressure system and must be properly maintained.
-
Page 21: Operating The System
Operating the System System Start - Up Procedures Throughout the installation procedures outlined in the pressure is around 25 psi (check the pressure Installation Requirements- Specific, emphasis has gauge,(No. 10), set the differential controller to been placed on the correct procedures for plumbing the "Automatic"... -
Page 22: Three Modes Of System Operation
Operating the System Three Modes of System Operation Both single and double tank systems are turn off the circulation pump. To turn the designed to accommodate three separate pump off open the controller and change modes of operation. Your solar water the operational setting from automatic to heating system can, (1) provide 100% solar off. - Page 23 Figure 22b - Solar Preheat Operation Figure 22a - 100% Solar Operation Figure 22c - 100% Utility Power Operation Hot Outlet Cold Inlet See Handle Above Figure 22d - Valve Position Diagram - Two Tank System...
-
Page 24: Use And Care Of The System
Use and Care of the System Isolating the Major Components and System Shut Down Procedures Your solar water heating system is designed so contact your installation contractor. Turn the that the key components can be easily isolated circulating pump off by setting the controller to for emergency repairs or routine maintenance. -
Page 25: Maintenance And Troubleshooting
Maintenance and Troubleshooting The following simple procedures are intended Open the flush valve on the bottom of the to optimize the performance of your solar water storage tank (No. 18) and drain a sufficient heating system and also to extend the life of the volume of water to eliminate the sediment. -
Page 26: System Component Parts
When closed in conjunction with No. 7 will isolate the circulation 1) Solar Collector(s) (Rheem RS Series): pump for repair or replacement. Used Absorbs the sun’s heat energy and to charge the collector loop with glycol,... - Page 27 System Component Parts continued 10) Pressure Gauge (Winters PFQ804): Indicates heater from the pressurized city cold pressure in the collector loop. (Provided) water supply line. (Not Provided) 11) Expansion Tank (Arrow 12-A101): 20) Check Valve: This valve is installed to Pre-charged with air to allow for the stop or minimize convective evening heat expansion and contraction of the glycol...
-
Page 28: System Schematics
System Schematics SINGLE TANK SYSTEM SCHEMATIC* Pipe Insulation Note: When two collectors are required, plumb in parallel. Hot Water Supply Outlet to Fixtures Cold Water Supply Inlet Optional 23 - Time Switch Figure 16 SINGLE TANK SYSTEM SCHEMATIC Figure 16 * Installation as shown does not reflect SRCC approval or certification. - Page 29 DOUBLE TANK SYSTEM SCHEMATIC with Gas or Electric Back up Tank * Pipe Insulation Note: When two collectors are required, plumb in parallel. Roof Jacks Cold Water Supply Cold Inlet Hot Water Supply Outlet to Fixtures Optional 23 - Time Switch Gas or Electric Back up Tank DOUBLE TANK SYSTEM SCHEMATIC Figure 17...
- Page 30 System Schematics DOUBLE TANK SYSTEM SCHEMATIC with HEAT PUMP BACK UP TANK* Pipe Insulation Note: When two collectors are required, plumb in parallel. Roof Jacks Cold Water Supply Inlet Hot Water Supply Outlet to Fixtures Optional 23 - Time Switch Heat Pump Back-up Tank Figure 18 Figure 18...
- Page 31 DOUBLE TANK SYSTEM SCHEMATIC with TANKLESS BACKUP* Pipe Insulation Note: When two collectors are required, plumb in parallel. Roof Jacks Cold Water Supply Inlet Hot Water Supply Outlet to Fixtures Tankless Back-up Figure 19 DOUBLE TANK SYSTEM SCHEMATIC with Tankless Back up Figure 19 * Installation as shown does not reflect SRCC approval or certification.
-
Page 32: If You Need Service
IF YOU NEED SERVICE 1. Should you have any questions about your new water heater, or if it requires adjustment, repair, or routine maintenance, it is suggested that you first contact your installer, plumbing contractor or previously agreed upon service agency. In the event the firm has moved, or is unavailable, refer to the telephone directory, commercial listings or local utility for qualified service assistance.
Need help?
Do you have a question about the RSG75-48BP and is the answer not in the manual?
Questions and answers