Table of Contents
Advertisement
Advertisement
Table of Contents

Subscribe to Our Youtube Channel
Related Manuals for Bush CMC1113DABBT


Summary of Contents for Bush CMC1113DABBT
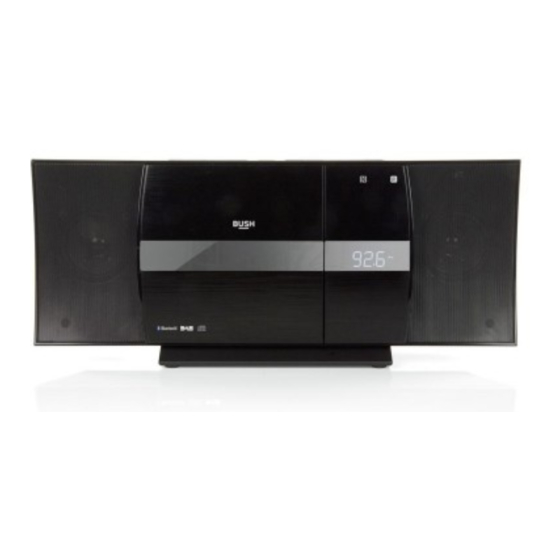
- Page 1 Instruction manual CMC1113DABBT...
- Page 2 You’ll soon be enjoying your new Micro System. It all begins here, with your instructions. Don’t worry, there’s nothing too technical coming up. Just simple, step-by-step guidance to get you up and running quickly. Sound good? Then let’s get started. Help and Guidance We’re here to help you get the most from your Micro System.
-
Page 3: Table Of Contents
Contents Safety information Safety information Getting to know your Micro System Ready? Let’s begin Accessories Features Removable stand Installing the batteries in the remote control Connecting the mains power cable Audio-in input connection Standby mode Switching input modes Volume function Mute function Bass / Treble adjustment X-Bass function... - Page 4 Contents Using your Micro System Programmed playback CD/ MP3CD Repeat playback CD/ MP3CD Numeric buttons Random playback Intro playback/ MP3CD Tuning an FM station FM scan modes Storing station presets Recalling station presets Stereo/ Mono mode FM display modes Getting started with DAB Listening to the stored DAB stations DAB display modes Performing a DAB station scan...
- Page 5 Contents Using your Micro System Numeric buttons Random playback (USB) Intro playback (USB) Connecting a Bluetooth device Using NFC to connect a bluetooth device Controlling a connected device Bluetooth notes factory reset Standby backlight Setting the time manually Other information UK mains plug information Care &...
- Page 6 This page is left intentionally blank...
- Page 7 Safety information...
-
Page 8: Safety Information
Safety information Important - Please read these instructions fully before installing or operating Power source • This symbol means that this unit is double insulated. An earth connection is not required. • The appliance must be connected to a 100-240 volt 50/60Hz AC supply by means of a three pin socket. - Page 9 Safety information Important - Please read these instructions fully before installing or operating Heat sources and flames • Batteries shall not be exposed to excessive heat such as sun, fire or the like • To prevent risk of fire or electric shock, avoid overloading wall outlets, extension cords, or integral convenience receptacles.
- Page 10 This page is left intentionally blank...
-
Page 11: Getting To Know Your Micro System
Getting to know your Micro System... -
Page 12: Ready? Let's Begin
Getting to know your Micro System You’ll be up and running in no time Ready? Let’s begin... Please read these instructions carefully. They contain important information which will help you get the best from your product and ensure safe and correct installation and operation. -
Page 13: Features
Getting to know your Micro System You’ll be up and running in no time 6 7 8 9 MENU SOURCE INFO SCAN UNPAIR/ENTER OPEN 1. STANDBY/SOURCE button 8. VOLUME - button 2. MENU/INFO button 9. VOLUME + button 10. DISC COMPARTMENT OPEN button PLAY/PAUSE/SCAN button STOP/UNPAIR/ENTER button 11. - Page 14 Getting to know your Micro System You’ll be up and running in no time AUDIO IN 15. KEYHOLE hanging slots 17. AUX IN SOCKET (3.5mm) 16. PIGTAIL ANTENNA 18. MAINS CABLE Getting to know your Micro System...
- Page 15 Getting to know your Micro System You’ll be up and running in no time AUDIO IN: Press to enable the Standby: Standby mode ON/ OFF audio in mode button FM/DAB: Press to switch between OPEN/CLOSE: Press to eject or FM & DAB radio close the disc compartment BLUETOOTH: Press to enable USB: Press to enable USB mode...
-
Page 16: Removable Stand
Getting to know your Micro System You’ll be up and running in no time Removable stand The stand is removable should you wish to wall mount the micro system. Removing the stand Fig 1. Fig 2. 1. Disconnect the micro system from the mains power. 2. - Page 17 Getting to know your Micro System You’ll be up and running in no time Removable stand Replacing the stand Fig 3. Fig 4. 1. Disconnect the micro system from the mains power. 2. Turn the unit upside down with the disc compartment facing you. 3.
-
Page 18: Installing The Batteries In The Remote Control
Getting to know your Micro System You’ll be up and running in no time Installing the batteries in the remote control Fig 5. Fig 6. 1. Press the small tab at the bottom of the battery compartment upwards as shown. And remove the battery compartment cover (Fig 5) 2. -
Page 19: Audio-In Input Connection
Getting to know your Micro System You’ll be up and running in no time Audio-in input connection Follow the steps below to connect an external audio source (such as an mp3 player) for playback through the speakers. You will need a 3.5mm audio cable (not supplied) to connect a device to the AUX IN socket (17). -
Page 20: Standby Mode
Getting to know your Micro System You’ll be up and running in no time Standby mode This unit is designed to enter STANDBY mode automatically after 20 MINUTES (approximately) of inactivity. Press the STANDBY button to wake the unit. 1. Press the STANDBY button on the unit (1) or press the STANDBY button on the remote to put the system into standby mode. -
Page 21: Bass / Treble Adjustment
Getting to know your Micro System You’ll be up and running in no time Bass / Treble adjustment Use tone adjustments to tailor the sound output to your taste. 1. Press the TREBLE button on the remote control. 2. The first adjustment is TREBLE. Use the VOLUME +/- buttons to adjust the level. 3. - Page 22 This page is left intentionally blank...
-
Page 23: Using Your Micro System
Using your Micro System... -
Page 24: Inserting A Cd/ Mp3Cd
Using your Micro System Let’s get started Inserting a CD/ MP3CD Switch the input mode to CD (refer to page 20) & follow the instructions below to load a CD/ MP3CD. Fig 8. 1. Press the OPEN/CLOSE button (10) on the micro system or remote, when the disc compartment cover slides fully to the left;... -
Page 25: Skipping Tracks On A Cd/ Mp3Cd
Using your Micro System Let’s get started Skipping tracks on a CD/ MP3CD 1. Skip to the next track on a disc by pressing on the micro system (7) or the remote control. 2. Skip to the previous track by pressing on the micro system (6) or the remote control. -
Page 26: Repeat Playback Cd/ Mp3Cd
Using your Micro System Let’s get started Repeat playback CD/ MP3CD Follow the below instructions to repeat tracks on a CD. 1. During playback press the REPEAT button on the remote control to repeat the current track. (Fig 10) REP.ONE T--01 03:33 Fig 10. -
Page 27: Random Playback
Using your Micro System Let’s get started Random playback/ MP3CD Follow the below insructions to playback all tracks on a CD in a random order. 1. During playback pess the RANDOM button on the remote control to begin random playback. (Fig 12) RANDOM T--01 03:33... -
Page 28: Tuning An Fm Station
Using your Micro System Let’s get started Tuning an FM station Before attempting to tune a radio station the antenna needs to be extended fully & the input mode switched to FM (refer to page 20). 1. To scan for radio stations press and hold either of the TUNE or TUNE buttons on the remote or buttons on the micro system for two seconds to scan down or up the frequency band. -
Page 29: Storing Station Presets
Using your Micro System Let’s get started Storing station presets Follow the below steps to store a tuned station to one of 10 preset locations to allow quick access. 1. Tune to the station you wish to store as a preset and follow the below instructions. 2. -
Page 30: Stereo/ Mono Mode
Using your Micro System Let’s get started Stereo/ Mono mode Sometimes Stereo radio stations can suffer from interference (static & crackles) to reduce this problem you can enable MONO mode. 1. Press the MONO/ST. button on the remote control to switch between STEREO & MONO modes. -
Page 31: Getting Started With Dab
Using your Micro System Let’s get started Getting started with DAB Before switching to the DAB input mode (refer to page 20) the antenna needs to be extended fully to allow stations to be located during the initial scan. When the DAB mode is activated for the first time the unit will perform a scan for available stations. -
Page 32: Dab Display Modes
Using your Micro System Let’s get started DAB Display modes Every time you press the “INFO” button on the remote control, the display will cycle through the following display modes. DLS (scrolling text) Signal Error Signal Strength Mode Programme Type Time Ensemble Name Date... -
Page 33: Performing A Dab Station Scan
Using your Micro System Let’s get started Performing a DAB station scan Should you need to perform a fresh station scan for example you relocate the unit or a new station comes online follow the below steps. • Quick scan: searches the UK DAB band III •... -
Page 34: Pruning Dab Stations
Using your Micro System Let’s get started Pruning DAB stations When the radio has performed a Scan in several locations you may find there are stored stations that you can no longer receive. This function automatically removes them from the stored station list. 1. -
Page 35: Playing Mp3'S From A Usb Source
Using your Micro System Let’s get started Playing MP3’s from a USB source 1. Insert a compatible USB flash drive into the USB port (5) on the top of the micro system and switch to USB input mode (refer to page 20). (Fig 16) Fig 16. -
Page 36: Skipping Mp3 Tracks On A Usb Flash Drive
Using your Micro System Let’s get started Skipping MP3 tracks on a USB flash drive 1. Skip to the next track by pressing on the micro system (7) or remote control. 2. Skip to the previous track by pressing on the micro system (6) or remote control. Fast searching MP3 tracks on a USB flash drive 1. -
Page 37: Repeat Playback (Usb)
Using your Micro System Let’s get started Repeat playback (USB) Follow the below instructions to repeat MP3 tracks on a USB flash drive. 1. During playback press the REPEAT button on the remote control to repeat the current track. (Fig 18) REP.ONE F-001 001 03:33 Fig 18. -
Page 38: Random Playback (Usb)
Using your Micro System Let’s get started Random playback (USB) Follow the below insructions to playback all tracks on a USB flash drive in a random order. 1. During playback pess the RANDOM button on the remote control to begin random playback. -
Page 39: Connecting A Bluetooth Device
3. Enable the Bluetooth function on your audio device and search for a device labelled ‘CMC1113DABBT’ in the available list. 4. Select and enable pairing for the ‘CMC1113DABBT’ device. If prompted for a password enter ‘0000’ . 5. If pairing is successful the micro system will play a melody and the ‘BT LINK’ text will stop flashing. -
Page 40: Using Nfc To Connect A Bluetooth Device
Using your Micro System Let’s get started Using NFC to connect a bluetooth device NFC (Near Field Communication) enables short range wireless communications between compatible devices such as mobile phones. When enabled on the transmitting audio device; all that is required is for you to touch the NFC logo on the front of the micro system with the NFC hotspot on your compatible audio device. -
Page 41: Controlling A Connected Device
Using your Micro System Let’s get started Controlling a connected device Once connected you can either use the controls on the audio device to begin playback, skip tracks etc. Or you can use the control buttons on the unit/remote control. 1. -
Page 42: Factory Reset
Using your Micro System Let’s get started Factory reset There may be times when you need to reset the unit back to its original factory setting. The factory reset function can ONLY be activated from DAB or FM mode. 1. Press the MENU button on the remote or press and hold the MENU/INFO button on the micro system. -
Page 43: Setting The Time Manually
Using your Micro System Let’s get started Setting the time manually The factory reset function can ONLY be activated from DAB or FM mode. You can set the time manually if the radio signal is not strong enough to set automatically. 1. - Page 44 Using your Micro System Let’s get started AUTO UPDATE This setting specifies the automatic clock setting. 1. Use the TUNE / TUNE buttons on the remote or buttons on the micro system to select from:- ANY (sets the clock from any mode possible), DAB (sets the clock only from DAB mode), FM (sets the clock only from FM mode), NONE (does not set the clock automatically and uses the manual time as described above).
-
Page 45: Other Information
Other information... -
Page 46: Uk Mains Plug Information
Other information Helpful technical information UK mains plug information For your convenience a mains plug with a fuse (3 Amp) has been fitted to this appliance. For your safety please observe the following information. The unit is designed to operate on AC mains supply 230 •... -
Page 47: Technical Specification
Other information Helpful technical information Technical specification Specification Rating Supply voltage 220-240V~50Hz Max. power consumption Speaker power 2 x 10W (RMS) 87.5-108 MHz 174-240 MHz Frequency response 20Hz - 20KHz (± 3 dB) Disc compatibility CD-DA, CD-R, CD-RW Bluetooth compatibility EDR, A2DP, AVRCP Bluetooth version V2.1... - Page 48 This page is left intentionally blank...
-
Page 49: Product Support
Product support... -
Page 50: Troubleshooting
Product support Help is always at hand Troubleshooting Problem Reason(s) Solution(s) No power Power cable not connected Make sure the plug is to wall socket. connected. Power socket is not Switch the power on. switched on. No Sound Volume is too low. Increase the volume. - Page 51 Product support Help is always at hand Troubleshooting Problem Reason(s) Solution(s) No USB playback No compatible files Add compatible files (MP3 present.. only). USB device is formatted Format the device in FAT16 incorrectly. /32 format only. USB device damaged. Replace the USB device. Bluetooth sound is The unit is near to a Relocate the unit away...
-
Page 52: Help And Assistance
Product support Help is always at hand Help and assistance If you require any technical guidance or find that your Micro System is not operating as intended, a simple solution can often be found in the Troubleshooting section of these instructions or online at www.argos-support.co.uk If you still require further assistance, call one of our experts on 0345 600 3021*. -
Page 53: Disposal
Product support Help is always at hand Disposal • Disposal of your old product. Your product is designed and manufactured with high quality materials and components, which can be recycled and reused • When this crossed out wheeled bin symbol is attached to a product it means the product is covered by the European Directive 2002/96/EC. -
Page 54: Guarantee
Call us now and activate your 12 month guarantee Thank you for choosing Bush. Your new product is guaranteed against faults and breakdowns for 12 months. Don’t forget to register it with us today so we can provide you with our best possible after-sales service and useful updates. - Page 56 Contact: www.argos-support.co.uk Helpline: 0345 600 3021...
Need help?
Do you have a question about the CMC1113DABBT and is the answer not in the manual?
Questions and answers