Table of Contents
Advertisement
Quick Links
Advertisement
Table of Contents

Summary of Contents for Commax CVN-0830F
-
Page 2: Safety Precautions
Safety Precautions Explanation of Graphical Symbols This symbol indicates the presence of important operating and maintenance (servicing) instructions in the literature accompanying the product. This symbol indicates the presence of Uninsulated ”dangerous voltage” within the product’s enclosure that may be of sufficient magnitude to constitute a risk of electric shock to persons. - Page 3 These precautions must be followed for safety reasons. Warning Do not uses if the unit emits smoke, strange sounds are heard, or odor is emitted. Make sure the power cable is not damaged. Make sure there is no dust accumulation on the power plug or the outlet. Disassembly prohibited Do not place any foreign objects inside the unit.
-
Page 4: Product Components
Product Components The package contains the main unit and its components as specified below. When you purchase the unit, Please check to ensure the components specified below are included. NVR Unit Remocon Battery1.5V (AAA x 2EA) Quick User Guide Mouse Software &... - Page 5 Mounting the HARD DISK 1. Assemble HDD & bracket with screws. Set the hole of bracket and case base then assemble with screws. Connect data cable and power cable. Basic function of the MOUSE ① Left button: SELECT function ② Wheel: MOVEMENT function on a drop-down menu...
- Page 6 Compatible HDD Models Company Company Models Models Size Size Type Type BUFFER BUFFER Company Company Models Models Size Size Type Type BUFFER BUFFER ST4000VM000-1F3168 [fw: SC25] 4 TB SATA 3 5900 RPM 64 MB ST3000VX000-1CU166 3 TB SATA 3 7200 RPM 64 MB ST3000VM002-1F316N [fw: SC25] 3 TB...
- Page 7 HDS723020BLA642 2 TB SATA 3 7200 RPM 64 MB HDS722020ALA330 2 TB SATA 2 7200 RPM 32 MB HDS721010DLE630 1 TB SATA 3 7200 RPM 32 MB HDS721010KLA330 1 TB SATA 2 7200 RPM 32 MB HDT721010SLA360 1 TB SATA 2 7200 RPM 16 MB HDS721010CLA332...
- Page 8 WD5000AAKX-221CA1 500 GB SATA 2 7200 RPM 16 MB WD5000AAKX-001CA0 500 GB SATA 3 7200 RPM 16 MB WD5000AVCS 500 GB SATA 2 16 MB WD5000AACS 500 GB SATA 2 5400 RPM 16 MB WD2500AVVS-63L2B0 250 GB SATA 3 WD2500AAKX 250 GB SATA 3 7200 RPM...
-
Page 9: Specifications
Specifications Please note that specifications and unit exterior design are subject to change without notification MODEL CVN-0430F CVN-0830F CVN-1630F IP Camera 4 (20Mbps) 8 (40Mbps) 16 (40Mbps) Input Resolution Max. 1920x1080 Video Main Monitor VGA and HDMI Output Sub Monitor... - Page 10 Internal HDDs e-SATA Front Rear User I/F Input Method IR, Mouse, Keyboard Controller Dynamic DNS Digital Zoom DLS (Day Light Saving) NTP (Network Time Protocol) Features S.M.A.R.T Internal Beep Multi-Language e-mail Notification Mobile iPad / iPhone / Android Web Viewer Windows IE Network Access...
-
Page 11: Table Of Contents
Table of Contents Main Features ..........................14 Front and Rear Panels ........................ 15 2-1 . Front Panel ......................... 15 2-2 . Rear Panel .......................... 16 2-3 . Remote Control ........................17 Initial Boot-up Process ......................... 18 3-1 . Initial Boot up and Basic Time Setup ................... 18 3-2... - Page 12 4-9-3. Commax DDNS ........................49 4-9-4. Run Commax DDNS ......................50 If user is not applied at ddns.commax.com, check the DDNS host name from icommax.net... 50 4-10. Setup - CONFIG Mode ......................50 4-10-1. Firmware Upgrade ......................51 Live, Search and Playback ......................54 5-1.
- Page 13 8-6-4. OSD ......................... 78 8-6-5. About (version information) ................78 8-7. Remote Setup .......................... 79 8-7-1. DISPLAY Settings ................... 79 8-7-2. RECORD Settings................... 79 8-7-3. DEVICE Settings ..................... 80 8-7-4. STORAGE Settings ..................80 8-7-5. SYSTEM Settings ................... 81 8-7-6. SECURITY Settings ..................81 8-7-7.
-
Page 14: Main Features
1. Main Features Automatic IP Camera Detection and connection (Plug & Play) Easy Record, Copy and Setup Easy Search by Thumbnail Preview Easy Copy Easy Network Easy IP Camera Setup NOTE: Under federal law, The Fourth Amendment to the U.S. Constitution, Title III of the Omnibus Crime Control and Safe Streets Act of 1968, as amended by the Electronic Communications Privacy Act of 1986 (18 Individual Channel Operation U.S.C. -
Page 15: Front And Rear Panels
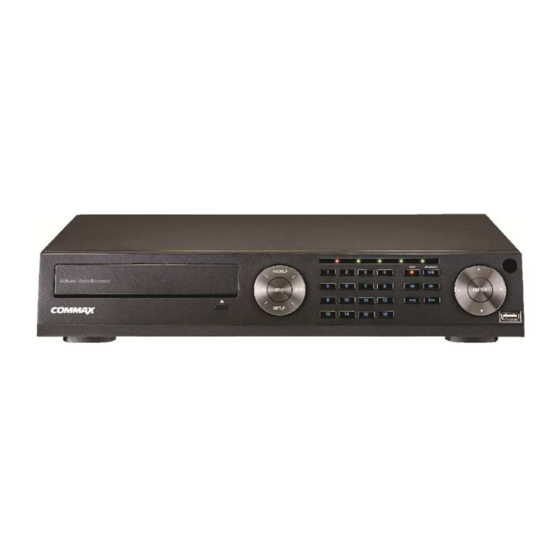
2. Front and Rear Panels 2 2 2 2 -1 1 1 1 . Front Panel Fig. 2.1.1 Front panel Table 2.1.1 Front panel LED Name Description POWER Power indicating LED HDD LED on while in use ALARM Alarm LED when alarm in progress NETWORK LED on when connected to network BACKUP... -
Page 16: Rear Panel
⑥ 1x, 2x, 4x, and 8x backward speed search ⑦ Audio output settings MUTE SINGLE – Audio output only from an activated channel MIX – 4 channel audio simultaneous output In search mode, playback position skips by 60 seconds backward ⑧... -
Page 17: Remote Control
⑤ AUDIO IN/OUT: 4 Connectors for Audio Input / 1 Connector for Audio Output ⑥ CVBS OUT: MAIN – Composite Video Output ⑦ HDMI OUT: HDMI output port, Connector to the HDMI Monitor, (1280x720, and 1920x1080). ⑧ VGA OUT: Connector for VGA Monitor. Main Video Output ⑨... -
Page 18: Initial Boot-Up Process
1. During the first boot up, the following logo will be displayed. “The background color on COMMAX while booting a system should be displayed differently with some Monitor” 2. After the logo, select the language and set date and time as specified below. - Page 19 2. Go to SETUP > SYSTEM > DATE & TIME SETUP 3. Select ON from the DAYLIGHT SAVING dropdown menu.
-
Page 20: Setting Ntp (Network Time Protocol)
3-3. Setting NTP (Network Time Protocol) 1. SETUP > SYSTEM > NTP SETUP > ON 2. Select the proper TIME ZONE time. Table 3.3.1. GMT Time Zone State Standard Time Daylight-Saving Time Alabama GMT-6 GMT-5 Alaska GMT-9 GMT-8 Alaska (Aleutian Islands) GMT-10 Arizona GMT-7... - Page 21 Florida (W) GMT-6 GMT-5 Georgia GMT-5 GMT-4 Hawaii GMT-10 Idaho (N) GMT-8 GMT-7 Idaho (S) GMT-7 GMT-6 Illinois GMT-6 GMT-5 Indiana GMT-5 GMT-4 Indiana (SW / NW) GMT-6 GMT-5 Iowa GMT-6 GMT-5 Kansas GMT-6 GMT-5 Kansas (W) GMT-7 GMT-6 Kentucky (E) GMT-5 GMT-4 Kentucky (W)
-
Page 22: Quick Installation
South Dakota (E) GMT-6 GMT-5 South Dakota (W) GMT-7 GMT-6 Tennessee (E) GMT-5 GMT-4 Tennessee (W) GMT-6 GMT-5 Texas GMT-6 GMT-5 Texas (W) GMT-7 GMT-6 Utah GMT-7 GMT-6 Vermont GMT-5 GMT-4 Virginia GMT-5 GMT-4 Washington GMT-8 GMT-7 West Virginia GMT-5 GMT-4 Wisconsin GMT-6... - Page 23 Figure 3.4.1. Quick NETWORK Setup Procedure ① Select YES in case of setting the network using an internet connection ② Select Auto Configuration(DHCP) or Manual Configuration(STATIC) and then click TEST Button. It will automatically setup the network for the system(NVR) ③...
-
Page 24: Poe Port Setup
Figure 3.4.2. IP CAMERA Setup Procedure ① Select the Channel to configure. ② Select the Camera Manufacturer and then click on the scan button; this will scan the networks for any cameras from the particular manufacturer. ③ Select on the desired Camera from the list, and then check on register. ④... - Page 25 Figure 3.5.1. PoE Port...
- Page 26 The following IP Camera settings are recommended for optimal connection with the NVRs Setup Items Default Description Network Type DHCP The IP Camera must act as a DHCP client for the “Plug and Play”. Encoding Type The “CBR” is recommended because of the internal buffer strategy of the NVR. Dual Streaming General Sub Stream must be turned on.
-
Page 27: Ip Camera Setup(Through Web Viewer Page)
Figure 3.5.2. Incorrect connection with the PoE Ports With the NVR-LP Models, it is prohibited to connect a router to the POE Ports to connect the IP Camera, the NVR-LP will not be able to find and connect to the camera. The LAN Port can be connected to a router, but not the PoE Ports. -
Page 28: Dual Streaming
3-7. Dual Streaming High Quality (Main Profile) Video Stream is used for both Recording and Live Display. High Quality (Main Profile) Video Stream can be viewed through the network, when selected. Normal (Secondary) Quality Video Stream is used by default when viewing through the network. Monitoring 4. -
Page 29: Setup - Menu Tree
When the NVR prompts the LOG-IN window, enter the PASSWORD using the virtual keyboard, or the front panel, or the remote control. The factory default password is 1234. It is highly recommended to assign a new password to protect the system. User can assign a new password in SECURITY setup menu. 4-1-1. - Page 30 – REMOTE CONTROLLER ID STORAGE – OVERWRITE – DISK FORMAT – DISK INFO – RECORDING LIMIT RECORDING LIMIT DAYS SYSTEM – NVR-ID – DESCRIPTION – LANGUAGE – DATE FORMAT – SET DATE & TIME TIME DISPLAY FORMAT TIME ZONE DAYLIGHT SAVING SET DATE &...
-
Page 31: Setup - Ip Camera
DDNS SERVER 1 DDNS SERVER 2 DDNS SERVER 3 CONFIG – SAVE SETUP TO A USB – LOAD SETUP FROM A USB – LOAD DEFAULT – LOAD FACTORY DEFAULT – SOFTWARE UPGRADE 4-2. Setup – IP CAMERA Press the SETUP button and enter the password. The setup menu is displayed as picture below. Figure 4.2. -
Page 32: Scan Menu
TYPE: Under the column labeled Type, Select IP Camera Manufacturer SCAN: Double click the empty box to search IP camera on the local network IP: Enter the address of IP camera to connect, or select from scanned list PORT: Enter the port number of IP camera to connect WEB PORT: Enter the web port number of IP camera to connect OTHERS: Change the IP camera setting. - Page 33 Figure 4.2.1.1 IP CAMERA Setup Screen (Vendor) ① Select the specific manufacturer of IP Camera and then on click the scan button ② Select the camera on the list and then click the register button. ③ After the registration is completed, the basic information is to be displayed. Figure 4.2.1.2 IP CAMERA Setup Screen (ONVIF) The NVR Series can search for IP Cameras that are conformant to ONVIF (Open Network Video Interface Forum).
-
Page 34: Onvif Setup Menu
Figure 4.2.1.3 ONVIF SCAN Figure 4.2.1.4 ONVIF Profile SCAN Window ① Select ONVIF for Vendor and click the SCAN button. ② Select the camera on the list and then click the register button. ③ Then, PROFILE and ONVIF setting button will be displayed on the menu. Click PROFILE button and then the detail information of ONVIF will be searched and listed. -
Page 35: Setup - Dispaly
Device information can be viewed, passwords can be changed. Factory reset and SYSTEM the rebooting the camera are also available through ONVIF System setup. 4-3. Setup – DISPALY In the SETUP menu, select the DISPLAY tab. Then, the DISPLAY menu is displayed as pictured below. Navigate through the menu items using the mouse or the control button on the remote control and change the value of the menu item. -
Page 36: Setup - Record Mode
Set the visibility level of the On Screen Display (OSD) (50~100) OSD CONTRAST Enable/disable sequential display of video in full screen mode. SEQUENCE Set the dwell time of each, SEQUENCE DWELL TIME single channel display in sequential display mode (3~60seconds) CHANNEL Select a channel to apply the name and covert settings change using the mouse or control button on the remote control. -
Page 37: Recording Schedules
Table 4.4.1. Menu Items in RECORD Setup Screen Menu Item Description CHANNEL Select a channel for applying the following settings using the mouse or the control button on the remote control. To change the values of all channels, take the following steps. -
Page 38: Setup - Device Mode
Figure 4.4.1.1. Schedule Recording Setup Screen • NONE: Disable recording during selected timeframe (Highlighted in White) • CONTINUE: CONTINUOUS recording (Highlighted in Green) • MOTION: MOTION recording (Highlighted in Yellow) • SENSOR: SENSOR recording (Highlighted in Red) • CLEAR: All of the selected channel recording setting is initialized. •... -
Page 39: Setup - Storage Mode
Figure 4.5.1. DEVICE Setup Screen Table 4.5.1. Menu Items in DEVICE Setup Screen Item Description CHANNEL Select specified channel audio source setup.. AUDIO SOURCE Select IP CAM Audio or Local Audio. Enable/disable key tone from front panel usage. KEY TONE Set the remote control ID. - Page 40 Figure 4.6.1. STORAGE Setup Screen Table 4.6.1. Menu Items in STORAGE Setup Screen Item Description OVERWRITE When enabled, the NVR will continue recording and overwrite the oldest existing recorded data once the hard drive is full. When disabled, recording will stop once the hard drive is full.
-
Page 41: Setup - System Mode
LIMIT Set the recording limit days. (1- 90 days) RECORDING LIMIT DAYS If the RECORDING LIMIT DAYS are set to 1, the data will be overwritten after 24 hours. 4-7. Setup – SYSTEM Mode In the SETUP menu, select the SYSTEM tab. Then, the SYSTEM menu is displayed as pictured below. Navigate through the menu items using the mouse or the remote control and change the value of the menu. - Page 42 Select the date display format using the mouse or the control button on the remote DATE FORMAT control. Options are: MM/DD/YYYY, YYYY/MM/DD, DD/MM/YYYY, YYYY-MM-DD, MM- DD-YYYY, DD-MM-YYYY Select the display date and time using the mouse or the control button on the remote DATE&TIME control and press OK button to set the present date and time.
- Page 43 geography; user must select time difference from GMT. CONNECTON MODE: Select the NTP time-server connection mode from TIME, INTERVAL, and ONCE. CONNECTION PERIOD TIME – Refresh the time at the designated time (e.g. 1AM) INTERVAL – Every 1 hour ~ 24 hours ONCE –...
-
Page 44: Setup - Security Mode
SYSTEM EVENT NOTIFICATION HEALTH CHECK – OFF, ON (Allows the user to set MAIL STATUS periodically) : DAILY or WEELY or MONTHLY EVENT AND NOTIFICATION – OFF, ON (Allows the user to set EVENT NOFICIATION ON or OFF) HEALTH CHECK / RESTART / SHUTDOWN / PANIC RECORD Enable Email Notification in the event a problem occurs with the NVR. - Page 45 Figure 4.8.1. SECURITY Setup Screen Table 4.8.1. Menu Items in SECURITY Setup Screen Item Description USER Only the Admin will have access to the menu. AUTHENTICATION PASSWORD CHECK: Select the Checkbox to enable the functions or leave the Checkbox blank to disable the functions. •...
- Page 46 Change the name of USER1, USER2 and USER3. USER NAME Click “ENTER” after naming. USER Options are ADMIN, USER1, USER2 and USER3. PASSWORD Select USER PASSWORD using the mouse or the control button on the remote control and press SEL button. Select user type and enter the current password. And, enter a new password, enter the same password again to confirm and select OK.
-
Page 47: Setup - Network Mode
◀ ▲ ▶ ▼ (ADMIN, USER1, USER2, USER3) using the mouse or the control button ( ) on the remote control. Then password input screen will be displayed. User can select a password using the mouse or the ◀ ▲ ▶ ▼ control button ( ) on the remote control. -
Page 48: Network Port And Web Port
Enter Secondary DNS address that is assigned for the NVR DNS (SECONDARY) Dynamic Domain Name System (DDNS) allows a DNS name to be DDNS constantly synchronized with a dynamic IP address. In other words, it allows using a dynamic IP address to be associated with a static domain name so others can connect to it by the static name. -
Page 49: Commax Ddns
- Select DDNS service registration server -> COMMAX: Exclusively for COMMAX DDNS server registration * If CCMS (COMMAX Viewer Program) is to be connected to DVR, “COMMAX” must be selected in the DDNS service section. Select “COMMAX” DDNS and click button. -
Page 50: Run Commax Ddns
(ddns.commax.com) Check before click on “OK” whether the user ID and password are same as the ones pre-registered at COMMAX DDNS SERVER. Click “OK” to complete DDNS service settings CAUTION) if the DVR already has DDNS registered and it needs to be changed, First, set DDNS as “OFF”. -
Page 51: Firmware Upgrade
Figure 4.10.1. CONFIG Setup Screen Table 4.10.1. CONFIG Setup Item Description SAVE SETUP User can save the current configuration (Setting values) of the NVR to the TO A USB USB flash drive. Plug in the USB flash on the front panel and press the button to start the saving process. - Page 52 “xxxxxx.bin” into the “upgrade” folder. NOTICE A format of the USB Drive has to be set to FAT32. The folder on the USB memory drive must be named “upgrade”. After the firmware upgrade file is copied into the USB memory drive, connect the USB memory drive to the USB port on the front or rear panel and do the followings: 1.
- Page 53 2. Press the password for admin. Just admin is possible to connect to the remote setup menu. 3. Go to the Remote Upgrade menu. Then, you can see the current F/W version as follows. To upgrade a new F/W, insert the F/W in your PC and press the UPGRADE button. 4.
-
Page 54: Live, Search And Playback
5. When finishing the upgrade, the network streaming would be connected again automatically and you can see the following screen. Please check the current F/W version if the upgrade is succeeded. 5. Live, Search and Playback 5-1. Live View In the Live screen, video inputs from the cameras are displayed as they are configured in the Display Setup screen. - Page 55 The following status bar hides automatically and appears again when putting a mouse pointer to the bar. Table 5.1.1. Status Indicator Icons in Live Viewing Screen Icon Description Power On/Off button LOCK/UNLOCK setup button: This is enabled for ADMIN only. SETTINGS button: Settings menu button Audio button: In playback mode, select all 4ch audio’s simultaneous output or a single channel audio output or disable audio.
- Page 56 ALARM OUTPUT Settings indication Click on Alarm button to On/Off the alarm output and if enabled, the icon is activated. This icon indicates the alarm output is in progress. Audio output is set to mute. Applied only on the channels with audio input. The channels with audio input will have the audio output.
-
Page 57: Digital Zoom In Live And Playback Screen
Table 5.1.2. Menu Items in Quick Operation Window Icon Description QUICK Get into Quick Installation mode. INSTALLATION DISCONNECT Select this option to disconnect/connect from IP Camera. SETUP Setup button. Click this button to go to a setup menu. AUDIO MUTE Select this option to mute audio on all channels. -
Page 58: Search Screen
5-3. SEARCH Screen To enter the search screen menu, select SEARCH menu on the screen using the mouse or press SEARCH icon on live screen. Figure 5.3.1. Search Screen There are 7 ways of search menu such as Quick SEARCH, TIME LINE (Calendar), EVENT, GO TO FIRST TIME, GO TO LAST TIME, GO TO SPECIFIC TIME, ARCHIVE LIST, and LOG LIST on the screen. - Page 59 Figure 5.3.1.1. Quick Search screen 1. When the Quick Search menu is selected, the user can see a calendar, which displays recorded dates with highlights. Select a specific date on a calendar. 2. Select a channel from Channel Selection Screen. Then, 24 Hourly Thumbnail Search screen displays. 3.
-
Page 60: Time Line Search
6. Select the thumbnail of minutes that you want to playback. 5-3-2. Time Line Search The CALENDAR Search window is used to find the stored video by using the time line bar. Figure 5.3.2.1 Time-Line Search Screen When the Timeline menu is selected, the user can see a calendar, which displays recorded dates with highlights. -
Page 61: Go To First Time
Figure 5.3.3.1. Event Search Screen When the Event menu is selected, the user can see a calendar, which has recorded data. Select a specific date and the event log will be displayed. Press the PLAY button to playback the data or the SAVE button to save the data after selecting the specific data. -
Page 62: Go To Last Time
5-3-5. Go To Last Time You can access from the last minute recorded data on the NVR hard drive by selecting GO TO LAST TME on the SEARCH window. Press the PREV to return to the SEARCH window. 5-3-6. Go To Specific Time User can search for video data from a specific instance by setting the date and time in the GO TO SPECIFIC TIME menu. -
Page 63: Play Mode
Figure 5.3.8. Log List Screen When the Log menu is selected, the user can see a calendar, which has a log data. Select a specific date and press NEXT button, and then the log data will be displayed. Press the SAVE button to save the data and then the data is saved as a text file format. -
Page 64: Back Up
6. Back Up 6-1. Still Image backup onto USB flash Drive A still image backup is enabled both in live display and playback mode. Insert USB memory stick into the USB port on the front panel. In live display mode, click “ ”... -
Page 65: Transferring Still Images Or Video From The Archive List
Fig. 6.2.1. Video Backup Menu screenshot To cancel press “ESC” button. In “ARCHIVE” of SEARCH Mode, the backup is enabled. 6-3. Transferring still images or video from the ARCHIVE list The stored data onto hard drive will be found in the ARCHIVE list in SEARCH window. User can back up still images or video into the storage device from the ARCHIVE list. -
Page 66: Playback Of Backup Video
Figure 6.3.1. Archive Search Screen 6-4. Playback of Backup Video NSF format: NSF format video can be played back by the player (the HD player) that the NVR copies on USB flash drive with video. Two folders are copied on USB flash drive - BACKUP DATA: NSF format video file and INDEX file for a title file of date and time - HD PLAYER: Exclusive video viewer. -
Page 67: Upgrading Firmware
AVI format: It can be played back by Window Media Player™ or other media player that is compatible with AVI format video. EXE format: It can be played back without any player. HD player is embedded to the EXE file. Timestamp On AVI. - Page 68 1. First, install CCMS Single and start the program to connect to the corresponding site. 2. After connected, click right mouse button to display the menu. 3. Select “Remote setup”. 4. A message window is displayed as shown below. Enter the default password, “1234” and click “LOGIN”. 5.
-
Page 69: Firmware Upgrade At The Dvr
6. Click “Browse” to find the firmware file and then, click “UPGRADE” to proceed with the firmware upgrade (it takes about 150 seconds or longer depending network bandwidth). 7. As the upgrade completed, the initial display of WEB SETUP screen. Re-connect to the site to verify the firmware version. -
Page 70: Ccms Multi Client (Multi Sites Monitoring Software)
6. As completed successfully, the message “upgrade is completed” is displayed. 7. Click “Rebooting” message to reboot the system. Before rebooting the system, please remove the USB memory stick. CCMS Multi Client (Multi Sites Monitoring Software) 8-1. Overview CCMS Multi-Client provides remote monitoring of multiple DVRs via network. Video and audio monitoring, alarm, and sensor video can be viewed remotely. -
Page 71: Live Monitoring
3. Select the folder name and click “Next” button. 4. Installation proceeds. 5. As the installation completed, “CCMS Multi Client” icon is created on the Desktop of PC. 8-4. Live monitoring Double click “CCMS Multi Client” icon to display the below main screen. 8-4-1. - Page 72 To playback video stored in a remotely connected DVR via network. Remote playback Thumbnail refresh: To refresh current video of connected site. Add site: To add a new site. Delete site: To delete selected site(s). Net finder: To find devices on the same network and to change site. Connect a selected site.
-
Page 73: Remote Connection
DDNS ID: User account registered at COMMAX DDNS Server (email type) DDNS Password : The password registered at COMMAX DDNS Search: Entering the above DDNS URL, DDNS ID, and DDNS Password to connect to COMMAX DDNS Server displays the registered “Site Address and Port Number”. -
Page 74: Remote Search And Playback
8-5. Remote Search and Playback 8-5-1. Main Search Screen Click Search icon to display the search screen. Dates with recorded data are displayed in different color. Select the date to search and click “PLAY” button to playback the video. 8-5-2. Main Buttons and Description Button Description To playback video stored in local PC. - Page 75 Display of the sites to search Connect a selected site. Conncect Disconnect network connection. Disconnect Enter setup menu of CCMS MULTI CLIENT. Setup Still image capture Capture Log display of CCMS MULTI CLIENT connection and disconnection. Event log To set a start point of backup process of the data stored at the connected site Start To set an end point of backup process of the data stored at the connected site...
-
Page 76: Ccms Multi Client Settings Menu
By hour Scale of 24 hours Playback buttons 8-6. CCMS Multi Client Settings Menu Click button to enter CCMS Settings Menu. 8-6-1. GENERAL Settings Security Option: To set password for selected function. Save Path: Browse to set the save path for data backup. Miscellaneous Options Automatic reconnection: To automatically reconnect when network disconnected. -
Page 77: Record
8-6-2-2. EVENT Search: To search the event by date period 8-6-3. RECORD 8-6-3-1. Record Condition: To set a local backup conditions and options of the recorded data at the site by event and channels. 8-6-3-2. DISK: To select a local drive to store the stored data at the site and to set storing size. -
Page 78: Osd
8-6-4. OSD To set the site information and event indication options. 8-6-5. About (version information) Software version information is displayed. -
Page 79: Remote Setup
8-7. Remote Setup Place a mouse pointer on top of the site that you wish to change settings and click right mouse button to display the below menu, “Remote Setup”. By selecting “Remote setup”, below menu is displayed. (CAUTION: some of the functions settings are not enabled depending on the device at the site and its firmware version) Change the settings in the menu displayed. -
Page 80: Device Settings
8-7-3. DEVICE Settings Change setups for the (PTZ) camera control and the controller. 8-7-4. STORAGE Settings Change setup values for STORAGE. -
Page 81: System Settings
8-7-5. SYSTEM Settings Change setup values for SYSTEM. 8-7-6. SECURITY Settings Change setup values for SECURITY. -
Page 82: Network Settings
8-7-7. NETWORK Settings Change setup values for NETWORK. -
Page 83: Upgrade Settings
8-7-8. UPGRADE Settings 8-7-9. INFORMATION General information of the DVR connected via network. 8-8. User Guide 8-8-1. Site Addition/Deletion and Modify 8-8-1-1. Site Addition 1. Click the icon located on upper left of the screen. The below menu is displayed. - Page 84 DDNS ID: Registered account at COMMAX DDNS Server (email type) DDNS Password : The password registered at COMMAX DDNS Search: Entering the above DDNS URL, DDNS ID, and DDNS Password to connect to COMMAX DDNS Server displays the registered “Site Address and Port Number”.
- Page 85 Click the Net Finder icon( ) to display the below menu. Select the site you wish to modify and click “EDIT(MODIFY)”. If registered as a member at ddns.commax.com: DDNS URL: ID registered by user at ddns.commax.com for COMMAC DDNS Service...
-
Page 86: Site Connection And Disconnection
DDNS ID: Registered account at COMMAX DDNS Server (email type) DDNS Password : The password registered at COMMAX DDNS Search: Entering the above DDNS URL, DDNS ID, and DDNS Password to connect to COMMAX DDNS Server displays the registered “Site Address and Port Number”. -
Page 87: Still Image Capture
8-8-2-2. Site Disconnection Select each site or check the box at the top to select all. Click button to disconnect the selected site(s). 8-8-3. Still Image Capture Double click on the channel that you wish to capture a still image of. Click capture button( ) and below window is displayed. -
Page 88: Live Display Record
C. Set the Save Path, File name and File Format and click “OK” to save. 8-8-4. Live Display Record Click the Setup button ( Select “Record” menu. Select options and click “OK” to save. -
Page 89: Local Playback And Remote Playback
Click button to start saving to local PC. Use Window Explorer to check the saved files as shown below, C:/Storage/NC1~16. 8-8-5. Local playback and Remote playback 8-8-5-1. Playback videos stored in local PC. Click “Local playback” icon ( Another local playback screen is displayed. As shown below, drag the time line bar to the time you wish to playback from and click playback button. - Page 90 8-8-5-2. Remote playback Click the Remote playback button ( Another remote playback screen is displayed. Select the site you wish to playback from and click “Connect” button. As shown below, drag the time line bar to the time you wish to playback from and click playback button. Remote playback screen.
-
Page 91: Avi Backup During Playback
8-8-6. AVI Backup during Playback It is possible to backup the video while playing back. First, select the date. Drag the time line bar to the time that you wish to backup from. Click the start point button to set the start time of backup. Drag the time line bar to the end point and click button to set the end time of backup. -
Page 92: Ccms Single Client
After the backup setup is completed, click “OK” to proceed. The backup files can be viewed via Window Media Player™ or other media players supporting AVI format. 9. CCMS Single Client Live remote monitoring function is enabled. First install the CCMS Single Client to PC. Ref.: Maximum 4 simultaneous connections are allowed if enough network bandwidth is provided. - Page 93 3. Click Next button. After installation is completed “CCMS Client” icon is placed on the Desktop of PC.
-
Page 94: User's Guide
9-3. User’s Guide 9-3-1. Live Display buttons and description Button Function Description DATE & TIME Displays the recording time of the data selected. CONNECT/DISCONNECT Connect/Disconnect the site. SEARCH After connection to the site is made, click on the icon to enter Search menu DISPLAY MODE Select channel The selected channel is displayed. -
Page 95: Site Addition
PLAY/PAUSE Live playback and pause button ALARM Alarm On/Off SETUP Network viewer setup button HDD USAGE HDD status NETWORK BANDWIDTH Network status of the connected site is displayed AUDIO Volume control LOG WINDOW Status of the connected site display Live Display still image capture The still image capture of live display is saved in “BMP”... - Page 96 DDNS ID: Registered account at COMMAX DDNS Server (email type) c. DDNS Password : The password registered at COMMAX DDNS d. Search: Entering the above DDNS URL, DDNS ID, and DDNS Password to connect to COMMAX DDNS Server displays the registered “Site Address and Port Number”.
-
Page 97: Site Connection
9-3-3. Site Connection Click “Connect” button to display the site registered and click “OK” to make connection. 9-3-4. Site Search Click “Search” button to enter Search menu. Search menu icons and description Button Function Description Search date and time are displayed. DATE &... -
Page 98: Site Data Backup
LIVE Enter Live Display mode CAPTURE Still image capture and save button MARK IN Data backup start time setting MARK OUT Data backup end time setting BACKUP Data backup button SEARCH Dates with recorded data are indicated in blue color.. CALENDAR TIMELINE BAR Recorded data time indication... -
Page 99: Setup Menu And Description
Mark in Mark out Mark in / Mark out After setting up the backup time period as above and click “Backup” icon to display below AVI Backup menu. Set the save path and click “OK” proceed with backup. The backup file can be played via general media players that support AVI format. 9-3-6. - Page 100 GENERAL Setup Security Option: To set password for selected function. Save Path: Browse to set the save path for data backup. Miscellaneous Options Display network status: To display the network status of the connected site. Automatic reconnection: To automatically reconnect when network disconnected. Time Format: Select date format (ex.
- Page 101 EVENT To select event to record LOG. EVENT Search Search recorded event.
- Page 102 RECORD Set options for local back up and save to local PC. Record Condition : To set a local backup conditions by Always/Event/Auto record options Event : To select backup option by Motion and Alarm. Channes: Select channels to backup. Record-Disk Set the Drive and space.
- Page 103 Disk Space: Select the HDD space of the local PC for backup. Disk Info: HDD information of the local PC. Disk full: Select overwrite option to be enabled/disabled when disk is full. Language Setup language the user wishes to use. About The version information of CCMS Single is displayed.
-
Page 104: Remote Setup Menu And Description
9-3-7. Remote Setup Menu and Description After connecting to the site, click right mouse button to display the menu shown below. Click “Remote setup” to display the below “WEB SETUP” screen. Enter the default password, “1234” 1. Remote setup for DISPLAY Settings... - Page 105 APPLY: Enter or modify the values and click “APPLY” to save and apply. RELOAD: Return to previous settings. 2. Remote setup for RECORD Settings 3. Remote setup for DEVICE Settings...
- Page 106 4. Remote setup for STORAGE Settings 5. Remote setup for SYSTEM Settings...
- Page 107 6. Remote setup forSECURITY Settings 7. Remote setup for NETWORK Settings...
-
Page 108: Network Connection Guide
8. Remote setup for UPGRADE Settings 9. INFORMATION 10. Network Connection Guide A. To open TCP port of the router or hub Connect DVR and network switch (or hub or router) with LAN cable (CAT.5). Press “SETUP” button on the front panel of DVR and check the IP address of the DVR located at SETUP>SYSTEM>SYSTEM INFO. - Page 109 Port). B. Network Connection B-1. Connection to DVR under the LAN environment Check the IP address of the DVR (SETUP>SYSTEM>SYSTEM INFO>IP ADDRESS). Execute the Network Client Program and click “Site Addition” button to register the site. Click “Connect” button to open the menu and enter Site Name, Site Address, Port Number, ID, and Password. Click “OK”...
- Page 110 Check the DVR whether the DDNS settings is set to COMMAX (SETUP>NETWORK>DDNS). Host method connection without registering as a member at ddns.commax.com Enter the DDNS Host name registered at Site Address + .icommax.net in the web browser. ex) Registered DDNS host name: 000269082d68 ->...
- Page 111 If registered as a member at ddns.commax.com: A. Connect to http://ddns.commax.com and enter the pre-registered ID and Password to login. * The ID and Password must match the ID and Password of the user registered in the DVR. B. Click “PreDDNS” in DDNS Service menu.
- Page 112 - The list of registered DVRs at COMMAX DDNS Server under the user’s ID is displayed. - Select the DVR to activate the DDNS Service from the list and click button. * If the registered DVR is not found in PreDDNS, ->...
-
Page 113: Web Client (Web Viewer)
1. First, check the DVR’s IP address in SETUP->SYSTEM->SYSTEM INFO. 2. Enter the DVR’s IP address or the registered COMMAX DDNS URL in the web browser. 3. If connected for the first time, below “ActiveX control” installation requirement message is displayed. - Page 114 6. Click ”CONNECT” button to open the below menu. 1) If registered as a member at ddns.commax.com: a. DDNS URL: ID registered by user at ddns.commax.com for COMMAC DDNS Service ex) http://ddns.commax.com/CVD-9616H_DVR -> ID registered by user: CVD-9616H_DVR b. DDNS ID: Registered account at COMMAX DDNS Server (email type) c.
-
Page 115: Connection Via Mobile Phone
(If invalid information entered, “Failed to connect” message is displayed). e. Site name: User defined settings. f. Site Address: IP address of the device or the IP address searched from COMMAX DDNS (ex. 172.161.1.78) g. Port Number: Default setting is 5445. - Page 116 7. icommax.net 을 이용한 호스방식 접속 7.Host method connection via icommax.net a. Site: Enter the Site name b. IP: Registered DVR Host c. Port: Enter Port Number name + .icommax.net (Default: 5445) ex) 000269082d68.icommax.net 8. If registered as a member at ddns.commax.com:...
- Page 117 13. Screenshot of CMVS view and touch “Connect”. [DDNS registration item description] a. URL : User defined ID that is registered at the Commax DDNS Server b. DDNS ID: User ID (in email type) registered at the COMMAX DDNS Server...
- Page 118 [Registration menu description] Site: Enter the user defined name (ex. My Shop) IP/DNS: IP address of the site to connect (*automatically entered if COMMAX DDNS Service used) Port: Enter the Port Number (default setting is “5445”). ID: The user account registered at the DVR for network access (ex. admin) Password: The above user password of the DVR (default setting is ”1234”)
- Page 119 Check the box next to Commax DDNS. b. Enter information registered at Commax DDNS Server. Device ID: ID registered by user at ddns.commax.com for Commax DDNS Service ex) http://ddns.commax.com/CVD-9616H_DVR -> User registered ID: CVD-9616H_DVR DDNS ID: Registered account at COMMAX DDNS Server (email type) DDNS Password: The password registered at COMMAX DDNS Server c.
- Page 120 12. View registered sites (Real time Monitoring) a. Select a registered site. b. In monitoring mode, select “Real time monitoring”. c. Select a channel you wish to view. d. Touch “Real time Monitoring”. e. Touch the right or left arrow to view either the previous or next channel.
- Page 121 13. View the registered sites (Playback) a. Select a site you wish to view. b. Select “Playback”. c. Select date and time and touch “OK”. d. Playback of the recorded video starts.
Need help?
Do you have a question about the CVN-0830F and is the answer not in the manual?
Questions and answers