Table of Contents
Advertisement
Quick Links
Advertisement
Table of Contents

Summary of Contents for Aurora AURORA-P717
- Page 1 AURORA-P717 7U 19” Rackmount TFT LCD Monitor User Manual Oct 2013...
- Page 2 AURORA-P717 User Manual Copyright Copyright 2006-2013, all rights reserved. This document is copyrighted and all rights are reserved. The information in this document is subject to change without prior notice to make improvements to the products. This document contains proprietary information protected by copyright.
-
Page 3: Packing List
AURORA-P717 User Manual Packing List: Please check the content: The AURORA-P717: AURORA-P717 LCD VGA cable;15 pin (male) to 15 (male) pin Power Cord USB cable (for Touchscreen version only) RS-232 cable (for Touchscreen version only) -
Page 4: Safety Instructions
AURORA-P717 User Manual Safety Instructions: 1. Please read these safety instructions carefully. 2. Please keep this user manual for later reference. 3. Please disconnect this equipment from AC outlet before cleaning. Don’t use liquid or sprayed detergent for cleaning. Use moisture sheet or clothe for cleaning. - Page 5 AURORA-P717 User Manual should only open the equipment. 15. If one of the following situations arises, get the equipment checked by service personnel. The Power Cord or plug is damaged. Liquid has penetrated into the equipment. The equipment has been exposed to moisture.
-
Page 6: Table Of Contents
AURORA-P717 User Manual Index Chapter 1 Product Introduction ..........7 1.1 Product Overview ............. 7 1.2 Product Specifications ............8 1.2.2 AURORA-P717 ............8 Chapter 2 Panel Control & OSD Function ......... 11 2.1 Brightness ..............11 2.2 Contrast .................12 2.3 Clock ................13 2.4 Phase ................14... -
Page 7: Chapter 1 Product Introduction
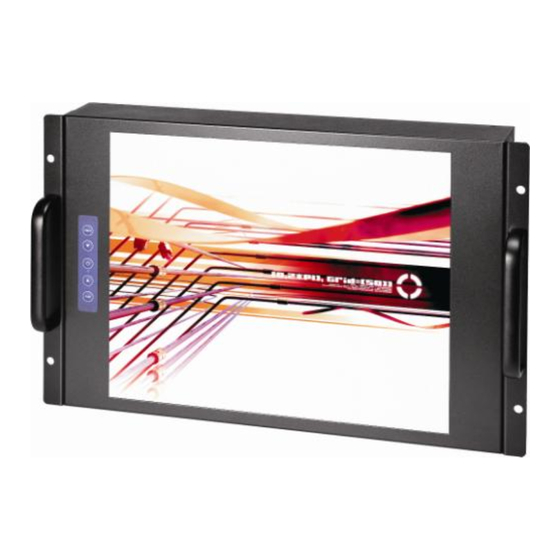
Chapter 1 Product Introduction 1.1 Product Overview The AURORA-P series is designed to provide users with friendly and clear visual monitoring device that can be easily fitted onto standard 19” rack. The series supports 17” bright active matrix TFT LCD display in elegantly designed heavy duty steel housing. -
Page 8: Product Specifications
AURORA-P717 User Manual 1.2 Product Specifications 1.2.2 AURORA-P717 Features Description LCD Display Size 17 inches Display Type Active Matrix TFT LCD Display Resolution 1280 x 1024 (SXGA) Pixel Pitch 0.264mm x 0.264mm Viewing Angle Right-Left view 70° ~ 80°(Typical) Up-Down View 70° ~ 80°(Typical) - Page 9 AURORA-P717 User Manual...
- Page 10 AURORA-P717 User Manual...
-
Page 11: Chapter 2 Panel Control & Osd Function
AURORA-P717 User Manual Chapter 2 Panel Control & OSD Function Controls Description Soft power on/off button. Adjacent LED is lit when Auto-synchronize and scale down display to any valid Auto factory preset timings. Press to scroll the function you want to adjust. -
Page 12: Contrast
AURORA-P717 User Manual 2.2 Contrast Press “▼” or “▲” to adjust the difference between the light and dark areas. -
Page 13: Clock
AURORA-P717 User Manual 2.3 Clock Adjust the video distortion. It will appear horizontal noise on the screen while adjust the Clock. -
Page 14: Phase
AURORA-P717 User Manual 2.4 Phase Adjust the video distortion. It will appear vertical noise on the screen while adjust the Phase. -
Page 15: Horizontal Position
AURORA-P717 User Manual 2.5 Horizontal Position Move the display area left or right. -
Page 16: Vertical Position
AURORA-P717 User Manual 2.6 Vertical Position Move the display picture up or down. -
Page 17: Osd Language
AURORA-P717 User Manual 2.7 OSD Language Change the OSD language, and press “Menu” to executing. -
Page 18: Osd H-Position
AURORA-P717 User Manual 2.8 OSD H-Position Adjust OSD position. Press “▼” to right, press “▲” to left. -
Page 19: Osd V-Position
AURORA-P717 User Manual 2.9 OSD V-Position Adjust the OSD position. Press “▼” to down, press “▲” to up. -
Page 20: Switch Color
AURORA-P717 User Manual 2.10 Switch Color Adjust color temperature. Press “▼” or “▲” to select a color mode. -
Page 21: Set User Color
AURORA-P717 User Manual 2.11 Set USER Color... -
Page 22: Reset
AURORA-P717 User Manual 2.12 Reset Restore the default value (factory mode). Press “Menu” to execute. 2.13 Exit Exit the OSD menu and save the values. Press “Menu” to execute. - Page 23 AURORA-P717 User Manual Chapter 3 Wallmount Installation Guide Install eight screws to mount panel into cabinet. Mounting arm installation steps: Install four screws through the mounting holes of the arm and fix the wallmount panel. Wallmount panel mounting holes dimension...
- Page 24 The Global Choice for Premium Industrial Computer Products www.aicsys.com...
Need help?
Do you have a question about the AURORA-P717 and is the answer not in the manual?
Questions and answers