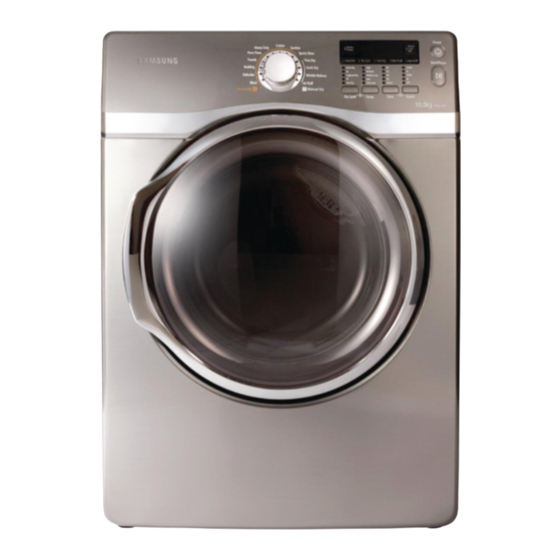
Samsung DV431AEP/XAA Service Manual
Clothes dryer
Hide thumbs
Also See for DV431AEP/XAA:
- Technical information (13 pages) ,
- User manual (120 pages) ,
- Service manual (49 pages)
Table of Contents
Advertisement
Advertisement
Table of Contents

Related Manuals for Samsung DV431AEP/XAA


Summary of Contents for Samsung DV431AEP/XAA
- Page 1 CLOTHES DRYER Basic Model : DV431AEP/XAA (YUKON-PROJECT) Model Name DV393ETPAWR (POTOMAC-PROJECT) Model Code : DV393ETPAWR/A1 SERVICE Manual CLOTHES DRYER CONTENTS 1. Safety Instructions 3. Disassembly and Reassembly 4. Troubleshooting 5. PCB diagram 6. Wiring diagram 7. Schematic diagram Refer to the service manual in the GSPN (see the rear cover) for the more information.
-
Page 2: Table Of Contents
CONTENTS 1. Safety Instructions ..............1 1-1. -
Page 3: Safety Instructions
1. SAFETY INSTRUCTIONS 1-1. CAUTION FOR SAFETY DURING SERVICING ✔ ✔ ✔ ✔ ✔ ✔ ✔ ✔ ✔ ✔ ✔ ✔ ✔ ✔ ✔ ✔ Safety Instructions _ 1... -
Page 4: Important Safety Information
1-2. IMPORTANT SAFETY INFORMATION you are a consumer. source. time. 2 _ Safety Instructions... - Page 5 ■ Electrical service information WARNING WARNING WARNING Safety Instructions _ 3...
- Page 6 ■ Gas dryer power supply ■ Proper grounding and polarization for 120 volts wall outlets Polarization - 115±15 Mispolarized - 115±12 Grounded - Ungrounded - prong WARNING WHAT TO DO IF YOU SMELL GAS WARNING 4 _ Safety Instructions...
-
Page 7: Features
2. FEA TURES AND SPECIFICATIONS 2-1. FEA TURES Features Description Extra Large Capacity Various Drying Cycles & Fuzzy Logic Algorithm Sanitize course Time Saving Energy Saving Easy Reversible Door Pedestal with Storage Drawers detergent Stacking Steam cycle Sanitize course 4-way Vent (Electric model only) Smart Care... - Page 8 2-2. SPECIFICA TIONS DV405*TPA** / DV395**/DV393** MODEL NAME TYPE A: HIGH B: WIDTH DIMENSION C: DEPTH WITH DOOR OPEN 90° D. DEPTH WEIGHT HEATER RATING WATER PRESSURE...
- Page 9 2-3. COMPARING SPECIFICATIONS WITH EXISTING MODELS Model Name DV431A* DV405*TPA** / DV395** / DV393** Image Capacity 7.4 cu.ft 7.4 cu.ft Dryer Type Matching Washer WF405 WF431 Cycle Selection Perm Press Time Dry Option Selection Control Type Drum Material Drum Light Door Type Reversible Door Vent Exhaust...
- Page 10 2-4. OPTIONS SPECIFICATIONS Item Remarks MANUAL-BOOK DC68-03021F DIE-RACK DRY DC61-02773A ASSY CONNECTOR - Outer Diameter : 24mm DC97-15103A - Pitch : 2.2mm ASSY HOSE WATER - Outer Diameter : 27.5mm DC97-15249A - Pitch : 2.2mm...
-
Page 11: Disassembly And Reassembly
3. DISASSEMBL Y AND REASSEMBLY 3-1. TOOLS FOR DISASSEMBLY AND REASSEMBLY Tool Type Remarks 14 mm 17 mm 8 mm Removal and Reassembly _ 9... - Page 12 3-2. STANDARD DISASSEMBLY DRAWINGS To avoid risk of electrical shock, personal injury or death, disconnect the power to the Clothes Dryer. To prevent scratches and cuts on hands, you should put on gloves on hands. Part Figure Description Top Cover Removal unit.
- Page 13 Part Figure Description Console Removal Removal and Reassembly _ 11...
- Page 14 Part Figure Description 1. Door Opening Door Removal 12 _ Removal and Reassembly...
- Page 15 Part Figure Description Frame Panel Removal Removal and Reassembly _ 13...
- Page 16 Part Figure Description Plate Removal 14 _ Removal and Reassembly...
- Page 17 Part Figure Description Front Bulkhead Removal Removal and Reassembly _ 15...
- Page 18 Part Figure Description Front Bulkhead Removal (Continued) 16 _ Removal and Reassembly...
- Page 19 Part Figure Description Drum Removal Sensor (Thermistor, Thermostat) Removal Removal and Reassembly _ 17...
- Page 20 Part Figure Description Heater Removal 18 _ Removal and Reassembly...
- Page 21 Part Figure Description Assy Motor Removal Drum Removal and Reassembly _ 19...
- Page 22 Part Figure Description Assy Motor Removal (Continued) 20 _ Removal and Reassembly...
- Page 23 Part Figure Description Assy Motor Removal (Continued) Removal and Reassembly _ 21...
- Page 24 Part Figure Description Drum Back Removal Drum 22 _ Removal and Reassembly...
- Page 25 Part Figure Description Drum Back Removal (Continued) Duct Exhaust Removal Removal and Reassembly _ 23...
- Page 26 MEMO 24 _ Removal and Reassembly...
-
Page 27: T Roubleshooting
4. TROUBLESHOOTING 4-1. ERROR ITEMS AND DIAGNOSTIC CODES Error Display Trigger Action Taken Sense circuit. Sense circuit. Troubleshooting _ 25... -
Page 28: Test Mode
4-2. TEST MODE ■ Service Mode(DV431,DV405 only) How to Enter: sound. ■ DR Ready Modem Wire Test(DV431AS* only) How to Enter: ■ Touch Sensor Data Display Mode How to Enter: ■ Cycle Count Mode How to Enter: ■ Software Revision Mode How to Enter: 26 _ Troubleshooting... - Page 29 ■ Continuous Run Mode Mixed Load Bell +Dry Level(DV431,DV405) Wrinkle Prevent + Time(DV231) 7 SEC How to Enter: sec in turns. ■ Data Display Mode (DV431, DV405 only) How to Enter: Troubleshooting _ 27...
- Page 30 4-3. TROUBLE DIAGNOSIS ■ Caution for the repair and replacement Please follow below instruction for the trouble diagnosis and parts replacement. Problem What to do and 5. turn stops 28 _ Troubleshooting...
- Page 31 Problem What to do dry time Troubleshooting _ 29...
-
Page 32: Symptoms, Diagnoses And Actions
4-4. SYMPTOMS, DIAGNOSES AND ACTIONS ■ The power does not work. 30 _ Troubleshooting... - Page 33 ■ The drum does not work. condition. operating. Troubleshooting _ 31...
- Page 34 ■ The clothes are not dried. 32 _ Troubleshooting...
- Page 35 ■ The lamp does not work. Troubleshooting _ 33...
- Page 36 ■ There is an abnormal noise in the dryer. movement. 34 _ Troubleshooting...
-
Page 37: Component Testing Procedures
4-5. COMPONENT TESTING PROCEDURES WARNING ■ Component electrical testing (with ohmmeter) Function Start Troubleshooting _ 35... - Page 38 ■ Centrifugal Switch (Motor) Pin# 3 and 4 Pin# 4 and 5 ■ GAS MODEL Radiant Sensor(10RS) Igniter(101D) Gas Valve(25M01A) Thermostat (60T21 Hi-Limit)230F-50F 36 _ Troubleshooting...
- Page 39 ■ Sensor Bars & temperature sensor check Sensor Bars Cycling Thermostat Troubleshooting _ 37...
-
Page 40: Pcb Diagram
5. PCB DIAGRAM 5-1. MAIN PCB Location Part No. Function Location Part No. Function 38 _ PCB Diagram... - Page 41 5-2. DETAILED DESCRIPTIONS OF CONTACT TERMINALS (MAIN PCB) 2. SO 3. SI 2. Empty Pin 4. Empty Pin 6. Empty Pin 8. Empty Pin 3. TEMP Sensor1 7. TEMP Sensor2 PCB Diagram _ 39...
- Page 42 5-3. SUB PCB Location Part No. Function Description Port 40 _ PCB Diagram...
- Page 43 5-4. DETAILED DESCRIPTIONS OF CONTACT TERMINALS (SUB PCB) PCB Diagram _ 41...
-
Page 44: Wiring Diagram
6. WIRING DIAGRAM 6-1. WIRING DIAGRAM (ELECTRIC DRYER) ■ Reference Information 42 _ Wiring Diagram... - Page 45 6-2. WIRING DIAGRAM (GAS DRYER) ■ Reference Information Wiring Diagram _ 43...
-
Page 46: Schematic Diagram
7. SCHEMA TIC DIAGRAM 7-1. MAIN CONTROL AGND AGND AGND AGND AGND AGND AGND AGND 44 _ Schematic Diagram... - Page 47 7-2. SUB CONTROL (DISPLAY) Schematic Diagram _ 45...
- Page 48 7-3. SUB CONTROL (GRAPHIC) SW14 180,J,5W D2SW-3D,250V,2A PURPLE_PJT,WHT SW13 SW10 SW11 SW12 KID65783AP PURPLE_PJT,WHT 150,J,2W PURPLE_PJT,WHT LED1 LED2 LED3 LED4 LED5 LED6 RED,3.1mm RED,3.1mm RED,3.1mm RED,3.1mm RED,3.1mm RED,3.1mm DSP1 PURPLE_PJT 300,J,1W 180,J,1W 300,J,1W 620,J,1W PURPLE_PJT,WHT 50V,100nF 46 _ Schematic Diagram...
- Page 49 GSPN (GLOBAL SERVICE PARTNER NETWORK) Area Web Site © 2012 Samsung Electronics Co.,Ltd. All rights reserved. Printed in Korea...
Need help?
Do you have a question about the DV431AEP/XAA and is the answer not in the manual?
Questions and answers
I replaced the motor and pulley for dryer Samsung drum still does spin what else can it be?
If the Samsung dryer model DV431AEP/XAA drum is not spinning after replacing the motor and pulley, possible causes include:
1. Belt not connected properly or is broken/damaged.
2. Idler tension spring is too weak or stretched.
3. Idler pulley is jammed or stuck.
4. Lint buildup around the drive motor.
5. Motor winding is not continuous (check resistance: 2.88 ohms between pins 3 and 4, 3.5 ohms between pins 4 and 5).
Check each of these components to identify and correct the issue.
This answer is automatically generated