Table of Contents
Advertisement
Advertisement
Table of Contents

Summary of Contents for Canyon 250
- Page 1 OWNER’S MANUAL CANYON250 Always wear a helmet; It could save your Life! Do not remove this operator’s manual from this vehicle. Please obtain, review, and follow provincial / municipal government acts and regulations pertaining to owning and operating an off-road vehicle.
- Page 3 Congratulations on your purchase of the Ricky Power Sports, LLC’s Canyon 250 ATV. The period of warranty for the vehicle shall be 90 days from the date of purchase and the warranty covers the manufacturer’s faulty workmanship and materials. During the warranty period Ricky Power Sports, LLC.
-
Page 4: Table Of Contents
Table of Contents IMPORTANT.......................3 NOTICE TO THE USER..................... 4 Ricky Power Sports Canyon250 ATV..............8 FUEL AND OIL......................9 LOCATION OF LABELS.................... 10 INDICATOR LIGHTS AND MAIN KEY SWITCH ASSEM.(W/ Speedometer)..11 LEFT HANDLEBAR....................12 RIGHT HANDLEBAR....................13 REAR FOOT BRAKE....................14 FUEL VALVE...................... - Page 5 Table of Contents VEHICLE WEIGHT LIMITS..................40 INSPECTION AND MAINTENANCE................41 VALVE CLEARANCE....................43 TOOLS........................44 SPARK PLUG......................44 BATTERY INSTALLATION..................46 FUSE REPLACEMENT....................50 HEADLIGHT/TAILLIGHT REPLACEMENT............... 50 FUSE REPLACEMENT....................50 THROTTLE LEVER ADJUSTMENT................51 IDLE SPEED ADJUSTMENT..................52 FUEL HOSE....................... 52 ENGINE OIL/OIL STRAINER/OIL FILTER..............
-
Page 6: Important
Important How to Read This MANUAL Please read this manual and follow all instructions carefully. To emphasize the special information, the symbol and the words WARNING or CAUTION have some special meanings. Pay great attention to the messages. NOTE: Indicating special information which is to make maintenance easier or instructions clearer. -
Page 7: Notice To The User
· Never operate an ATV without proper instruction. Take a training course. Beginner should receive training from a certified instructor. Contact an authorized ATV dealer or call Ricky Power Sports, LLC at 1-844-250-2199 to find out about the training courses nearest you. - Page 8 Category Y-10+ ATV. A Category Y-10+ ATV is a youth model ATV that is intended for use by children age 10 or older. Category Y-12+ ATV. A Category Y-12+ ATV is a youth model ATV that is intended for use by children age 12 or older. Category T (Transitional Model) ATV.
- Page 9 · Always follow proper procedures for climbing hills as described in this manual. Check the terrain carefully before you start up any hill. Never climb hills with excessively slipper or loose surfaces. Shift you weight forward. Never open the throttle suddenly or make sudden gear changes. Never go over the top of any hill at high speed.
- Page 10 187 lbs (85 kg). · Do not tow a trailer. This vehicle is not designed for such use. FOR MORE INFORMATION ABOUT ATV SAFETY, call Ricky Power Sports, LLC Safety 1- 844-250-2199 Hotline at...
-
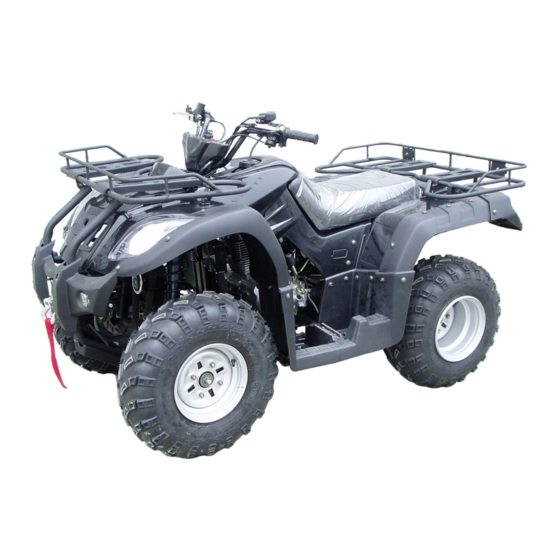
Page 11: Ricky Power Sports Canyon250 Atv
CANYON250 ATV... -
Page 12: Fuel And Oil
FUEL AND OIL FUEL Proper fuel is very important for the engine. Ensure there is no dust, dirt, or water which has mixed in the fuel. Use regular unleaded gasoline. ENGINE OIL Your 250cc ATV has a four-stroke engine. Please use oil as described in the chart below. -
Page 13: Location Of Warning Labels
LOCATION OF WARNING LABELS Read and follow all of the warnings labels on your ATV. Make sure you understand all the labels. Keep the labels on the ATV. Do not remove them for any reason. If a label comes off or becomes difficult to read, you should get a replacement by contacting Ricky Power Sports, LLC. -
Page 14: Indicator Lights And Main Key Switch Assem.(W/ Speedometer)
SPEEDOMETER, INDICATOR LIGHTS AND MAIN KEY SWITCH 1. Speedometer Indicates speed of ATV 2. Odometer Indicates total mileage driven. 3. Gear indicator Illuminates when ATV changes gear. 4. High beam indicator Illuminates when high beam is on. 5. Right turning light indicator Illuminates when right turning light is on. -
Page 15: Left Handlebar
LEFT HANDLEBAR SWITCHES: REAR BRAKE LEVER AND PARKING BRAKE LOCK 1 - Engine Stop Switch With the Engine stop switch in the “OFF” position the engine cannot be started. With the Engine stop in the “RUN” position the engine can be started. 2 - Rear brake lever Rear brake is applied by squeezing the rear brake lever towards the grip. -
Page 16: Right Handlebar
RIGHT HANDLEBAR: FRONT BRAKE LEVER AND THUMB THROTTLE 1 - Throttle lever Controls engine and ATV speed. Operate this lever with your thumb. Push it forward to increase engine and ATV speed. Release it to decrease engine and ATV speed. 2- Front brake lever Squeeze lever toward hand grip to apply front brakes. -
Page 17: Rear Foot Brake
REAR FOOT BRAKE Foot brake Located on the right hand side of the ATV. Foot brake stops the rear wheels. FUEL VALVE This vehicle has one manually operated fuel valve. There are 3 positions “ON” position In this position, fuel is allowed to flow into the carburetor when the engine is running or being started. -
Page 18: Seat Lock
SEAT LOCK To remove the seat, move the seat lock lever backward. Raise the rear end of the seat and slide it back. To lock the seat, slide the seat lever into its retainer and push the seat down firmly. -
Page 19: 12V Utility Socket
12V Utility Socket 12V Utility socket Use: 1. Remove 12V utility socket accessory cap. 2. Plug in accessory making sure plug is pushed all the way in socket. Note: Do not use accessory more than 10 minutes without engine running, doing so will drain battery. 3. -
Page 20: Riding Your Atv
RIDING YOUR ATV WHAT YOU SHOULD KNOW BEFORE RIDING Before riding, you should read all the following information carefully. If you are properly prepared, you will have a more enjoyable ride. Before riding, you should find a good place to practice the skills. Find a flat, open area with enough space to practice the new skills. -
Page 21: Inspection Before Riding
INSPECTION BEFORE RIDING... -
Page 22: Break-In
BREAK-IN The first month is the most important in the life of your vehicle. Proper operation during this break-in period will be helpful for assuring maximum life and performance of your new vehicle. The following guidelines explain proper break-in procedures. Maximum Throttle Opening Recommendation During the first 10 hours of operation, you should always use less than ½... -
Page 24: Safety Gear
SAFETY GEAR A DOT approved motorcycle helmet is the most important part of your safety gear. A DOT approved motorcycle helmet can help prevent a serious head injury. Choose a helmet that fits snugly. Motorcycle dealers can help in selecting a good quality helmet which fits properly. -
Page 27: Starting The Engine
STARTING THE ENGINE Before attempting to start the engine, make sure to follow these steps. 1. Turn the fuel valve to the “ON” position 2. Turn the key switch to the “ON” position. 3. Set the engine stop switch to the “ON”position. 4. - Page 28 When you are sure the engine is warm, release the parking brake. Release brake lever and open the throttle gradually to move forward.
-
Page 29: Shifting
SHIFTING: This ATV has a 5 speed transmission with a centrifugal automatic clutch. To shift vehicle in neutral while driving, repeatedly depress the gear shift lever. The green indicator light will illuminate when in neutral. To shift the vehicle through gears 1-5 1. -
Page 31: Braking
To stop the ATV, first release the throttle lever. And then apply the rear and front brakes smoothly. -
Page 32: Turning
TURNING To turn the ATV, the rider must use the proper technique. Because this vehicle has a solid rear axle, both rear wheels always turn at the same speed. This means that if the rear wheels are getting equal traction, the vehicle will tend to move straight ahead. -
Page 33: Operation On Hills
OPERATION ON HILLS Climbing a Hill... -
Page 34: Descending A Hill
To climb a hill with the ATV, follow the directions below. 1. Speed up and maintain a steady speed before reaching the top of the hill. Remember that you must ride at a steady speed all the way to the top of the hill. - Page 35 To ride down a hill with the ATV, follow the instructions below. 1. Check the terrain carefully for any obstacles before you go down the hill. 2. Point the ATV straight down the hill. 3. Transfer your body to the rear by sliding back on the seat. 4.
-
Page 36: Riding Over Obstacles
RIDING OVER OBSTACLES... -
Page 37: Skidding Or Sliding
If you come to an obstacle that you cannot avoid, you may be able to cross over it by using the following procedure. 1. If the obstacle is in front of you, approach at walking speed. 2. Rise up slightly on the footrests. 3. -
Page 38: Riding Through Water
RIDING THROUGH WATER You can ride the ATV through shallow water. Make sure it is not more than 10cm (4 inches) deep and is not moving fast. Choose a good place to cross before you ride through the water. Look for a spot where the banks are gently sloped on both sides and the bottom of the stream is hard. -
Page 39: Riding In Cold Weather
RIDING IN COLD WEATHER Pre-ride Inspection Check that the throttle and all control levers move freely. Make sure that the footrests are free of ice or snow. Move the ATV forward and backward to check that the wheels roll freely. If you cannot move the ATV, the tires may be frozen to the ground, or the brakes may be frozen to the wheels. -
Page 40: Dressing For Cold Weather Riding
Dressing for Cold Weather Riding Riding in cold weather can be hazardous. At a temperature of 10°F (-12°C), the wind chill created by going just 10 mph (16km/h) makes you as cold as if you were standing still at a temperature of -9°F (-23°C). At this temperature, exposed flesh will freeze in just a few minutes. -
Page 41: Riding On Snow Or Ice
Riding Your ATV on Snow and Ice Practice riding your ATV in an open snow- or ice-covered area, at slow speeds, before handling out on snow- or ice-covered trails. Learn how your ATV responds to steering and braking on the type of terrain you will encounter on your ride. -
Page 42: Accessory Use And Vehicle Loading
ACCESSORY USE AND VEHICLE LOADING There are many types of accessories for sale. However, we cannot have direct control over their quality or suitability. We cannot test each accessory that is available. If you add the wrong accessories or misuse the vehicle with some accessories installed, it can make the ATV less safe to ride. -
Page 43: Vehicle Weight Limits
CANYON250 WEIGHT LIMITS Never exceed the weight limits shown 1. Total weight limit is 85 Kg (187 lbs); this limit includes rider, accessories, vertical weight on trailer hitch and cargo. 2. Front rack - 30 Kg (66 lbs.) 3. Rear rack - 45 Kg (99 lbs.) 4. -
Page 44: Inspection And Maintenance
INSPECTION AND MAINTENANCE It is very important to inspect and maintain your ATV regularly. Follow the guidelines in the chart. The intervals between periodic services in months are shown. At the end of each interval be sure to perform the maintenance listed. MAINTENANCE SCHEDULE I=Inspect and clean, adjust, lubricate or replace, if necessary. -
Page 46: Valve Clearance
VALVE INSPECTION Refer to maintenance schedule in this owner’s manual for valve adjustment inspection intervals. Valve clearance should be: 0.05mm The engine will make excess noise if the gap is too large in air valve. If gap is too small valve operation will be hindered which could result in valve malfunction and failure. -
Page 47: Tools
TOOLS A tool kit is provided with your ATV. SPARK PLUG Your ATV is equipped with a TORCH D8RTC spark plug. To determine if the standard spark plug is in good condition, check the color of the plug’s center electrode insulator after vehicle operation. - Page 48 NOTE: This ATV uses resistor-type spark plug to avoid jamming electronic parts. Improper spark plug selection may cause electronic interference with your ATVs ignition system, resulting in the vehicle performance problems. Use recommended spark plugs. To install a spark plug turn it in as far as possible with your fingers, then tighten it with a wrench.
-
Page 49: Battery Installation
Battery Installation INITIAL SERVICE AND INSTALLATION OF BATTERY: Note: The following page is for vehicles with battery’s containing separate electrolyte pack. Most battery’s will come with the electrolyte already sealed into the battery. - Page 50 Preparing the battery: · Place battery on level surface. Remove sealing tape from top. (see figure 20) · Take the electrolyte container out of the plastic bag. · Place electrolyte container upside down with the sealed silver mouths of the electrolyte bottles in line with the six filler holes of the battery.
- Page 51 How to Initially Charge the battery: 1. Connect the red positive (+) cable to the red positive (+) pole of the battery. (see figure 23) 2. Connect the black negative (-) cable to the black negative (-) pole of the battery. (see figure 24) Note: The red positive (+) cable has a larger diameter than the black negative (-) cable.
-
Page 52: Battery Replacement
Battery Replacement: · Remove old battery from under seat. The battery bracket will need to be removed (see figure 28). Mark which cable is connected to the positive terminal (+) and which cable is connected to the negative (-) terminal. ·... -
Page 53: Fuse Replacement
FUSE REPLACEMENT Fuse may be bad if there is no spark while trying to start the ATV. The fuse box is located under the seat directly in front of the battery. To check fuse follow the instructions • Turn off main key switch •... -
Page 54: Throttle Lever Adjustment
• Remove fuse and check. If fuse is bad, replace with 15 Amp fuse. Moisture protector Bulb holder Bulb Taillight replacement • Turn off main key switch • Locate screw holes in rear lens • Remove lens • Remove bulb by pushing in and turning left (CCW). -
Page 55: Idle Speed Adjustment
IDLE SPEED ADJUSTMENT To adjust the idle speed properly, you need a tachometer. If you do not have this one, ask your authorized service center to perform this adjustment. To adjust the idle speed: 1. Start the engine and warm it up. 2. -
Page 56: Engine Oil/Oil Strainer/Oil Filter
ENGINE OIL To check oil level: 1. Park vehicle on level ground. 2. Remove dip stick and wipe off with a clean rag. Insert the dipstick in the filler hole. 3. Remove the dipstick and inspect the oil level. 4. Oil level should be in between the minimum and maximum marks on the dipstick. - Page 57 4. Remove oil filter cap 5. Remove oil filter 6. Clean oil strainer and oil filter with solvent. 7. Inspect rubber O-ring on the oil filter cap and replace if damaged. 8. Reinstall oil filter, O-ring and oil filter cover. 9.
-
Page 58: Air Filter
AIR FILTER The air filter element must be kept clean to provide good engine power. If you use your vehicle under normal, low-tension conditions, you should service the air filter at the intervals specified. If you ride in dusty, wet, or muddy conditions, you will need to inspect the air filter element much more frequently. -
Page 59: Air Filter Removal And Cleaning
AIR FILTER REMOVAL AND CLEANING 1. Locate Air Filter Box under seat and remove cover. 2. Remove air filter. 3. Remove foam cover from Air filter element. 4. Tap the Air filter element gently to remove most of the dust and dirt. Blow out remaining dust with compressed air. -
Page 60: Clutch Adjustment
CLUTCH ADJUSTMENT 1. Loosen lock nut 2. Slowly rotate adjusting bolt left until resistance is felt., then rotate 1/8 turn 45 deg. right. 3. Tighten the lock nut to the specified value 15Nm (10.8 ft.lb). -
Page 61: Rear Gear Case Lubrication
REAR GEAR CASE LUBRICATION To check rear gear case oil: 1. Place vehicle on level ground 2. Remove gear case fill cap. 3. Inspect oil level. Oil level should be up to the brim of the hole. 4. If oil is low, add specified oil (SAE 80 API G- 4 Hypoid gear oil). -
Page 62: Tires
TIRES The ATV is equipped with low pressure tubeless tires of the size and type listed below:... - Page 63 Tire Tread Condition Tire Air Pressure Check the air pressure in all tires before riding. Improper air pressure would effect handling, steering response, traction, tire life and rider comfort. Be sure that the tires are inflated to the pressures shown below. Tire pressure should only be measured or adjusted when the tires are cold.
- Page 64 Tire Replacement Your ATV has low-pressure tubeless tires. Air is sealed by the contact surfaces of the inner wheel rim and the tire bead. If the inner wheel rim or tire bead is damaged, air may leak. Be extremely careful not to damage these sections when replacing tires.
- Page 65 BRAKING The ATV has two front disc brakes and one rear drum brake.
-
Page 66: Brakes
FRONT HYDRAULIC DISK BRAKE INSPECTION 1. Inspect the front disk brake caliper and brake fluid reservoir for leakage. If brake fluid leaks, the safety of riding could be affected. 2. Inspect the brake hose for cracks, and the joint for leakage. 3. -
Page 67: Brake Adjustment
REAR HAND AND FOOT BRAKE ADJUSTMENT 1. Try to move the vehicle backward and forward when the rear hand brake is applied. If the rear wheels can turn, adjust the brake to lock the wheels securely. 2. Measure the amount of free play in the rear hand brake lever. -
Page 68: Muffler/ Spark Arrester Cleaning
MUFFLER/ SPARK ARRESTER CLEANING... -
Page 70: General Lubrication
GENERAL LUBRICATION Proper lubrication is important for safe, smooth operation and long life of your vehicle. Be sure that all lubrication is performed during periodic maintenance on the vehicle. Increase number of intervals when you use your ATV in severe conditions. -
Page 71: Troubleshooting
TROUBLESHOOTING This troubleshooting guide is provided to help you to find the cause of some common complaints. COMPLAINT: Engine is hard to start or does not start at all. Something is probably wrong with the fuel system or ignition system. Fuel Supplying Check 1. -
Page 72: Ignition System Check
Ignition System Check 1. Remove the spark plug and reattach it to the spark plug lead. 2. Apply the rear brake lever to make sure the rear wheels are locked. Turn ignition key to the “ON” position. Slide the engine stop switch to the “RUN”... -
Page 73: Transporting
TRANSPORTING It is best to transport the ATV in the normal position. Before transporting the ATV drain the fuel from the carburetor as follows: 1. Drain fuel from carburetor into an empty container by loosening the carburetor drain screw. 2. When the fuel has been drained, retighten the drain screw. -
Page 74: Cleaning Procedure
CLEANING PROCEDURE A thorough cleaning of your ATV is a necessary part of maintenance. It will help keep your ATV looking and performing best. Proper cleaning can also extend the life of your ATV. It is important to clean and inspect your ATV after every ride, especially if it is used in mud, brush, grass, water, salt water, or very dusty conditions The build-up of mud, brush, grass, etc. -
Page 75: Washing Your Atv
WASHING YOUR ATV With some care, your ATV can be washed in a similar manner to washing an automobile. NOTE: Avoid spraying or allowing water to flow over the following places: • Ignition switch • Spark plug • Fuel tank cap •... -
Page 76: Storage Procedure
STORAGE PROCEDURE If you do not use your ATV for a long time, it will need special service requiring appropriate materials, equipment and skill. For this reason, we recommend that you trust this maintenance work to your authorized service center. If you wish to service the machine for storage yourself, follow the general guidelines below: VEHICLE Place the vehicle on level ground and wash the entire vehicle. -
Page 77: Serial Number Location
SERIAL NUMBER LOCATION You need to know the frame and engine serial numbers to get title documents for your ATV. You also need these numbers to help your authorized service center or Ricky Power Sports, LLC order parts. The frame/VIN number is stamped on the front of the ATV frame as shown in the photograph. -
Page 78: Specifications
SPECIFICATIONS DIMENSIONS AND DRY MASS Overall length................1930mm Overall width................1020mm Overall height................1170mm Wheelbase.................1170mm Seat height .................820mm Dry weight .................222Kg ENGINE Type....................Four stroke, Cooling..................Air cooled Number of cylinders..............1 Bore X Stroke................67mm x 65mm Displacement................229 cm3 Compression ratio..............9.2:1 Carburetor.................Injection Type Air cleaner..................Foam TRANSMISSION Transmission Type..............Automatic clutch 5 - speed forward,1 - speed reverse... - Page 79 BRAKES Front brake type.................Hydraulic disc brake Operation..................Right hand operation Rear brake type................Drum brake Operation..................Right foot operation SUSPENSION Front....................2 Spring oil dampener shocks Rear.....................1 Spring oil dampener shock Front suspension travel............12.5mm (0.49 in) Rear suspension travel.............13.5mm (0.53 in) TIRES Size Front..................AT23x7-10 Size Rear..................AT22x10-10 FRAME Frame type..................Steel Tube...
-
Page 80: Circuit Diagram
CIRCUIT DIAGRAM... -
Page 81: Emission Control System Warranty
Ricky Power Sports, LLC. – EMISSION CONTROL SYSTEM WARRANTY YOUR WARRANTY RIGHTS AND OBLIGATIONS The emission control system warranty period for this vehicle begins on the date the vehicle is delivered to the first purchaser other than an authorized dealer, or the date it is first used as a demonstrator, lease, or company vehicle, whichever comes first and continues for 30 months after that date, or 5,000km, whichever comes first, provided there has been no abuse, neglect or improper maintenance of your vehicle. - Page 82 No dealer is authorized to modify this Emission Control System Warranty. If you have any questions regarding your warranty rights and responsibilities, you should contact Ricky Power Sports, LLC(+1 844-250-2199).
- Page 83 Ricky Power Sports, LLC. 2651&2653 Manana Drive, Dallas, TX75220 Toll Free: 844-250-2199...
Need help?
Do you have a question about the 250 and is the answer not in the manual?
Questions and answers