Table of Contents
Advertisement
Advertisement
Table of Contents

Related Manuals for Monoprice 15722


Summary of Contents for Monoprice 15722
-
Page 2: Table Of Contents
CONTENTS SAFETY WARNINGS AND GUIDELINES ............................3 INTRODUCTION ........................................ 4 CUSTOMER SERVICE ....................................4 PACKAGE CONTENTS ....................................4 RECOMMENDED TOOLS ..................................6 CONTROL PANEL OVERVIEW ................................6 ASSEMBLY ..........................................7 SYSTEM RESET ......................................... 11 OPERATION ........................................12 Movement ........................................12 Memory .......................................... -
Page 3: Safety Warnings And Guidelines
SAFETY WARNINGS AND GUIDELINES Please read this entire manual before using this device, paying extra attention to these safety warnings and guidelines. Please keep this manual in a safe place for future reference. This device is intended for indoor use only. Do not expose this device to water or moisture of any kind. -
Page 4: Introduction
If you have any problem with your order, please give us an opportunity to make it right. You can contact a Monoprice Customer Service representative through the Live Chat link on our website www.monoprice.com during normal business hours (Mon-Fri: 5am-7pm PT, Sat-Sun: 9am-... - Page 5 1x Control Unit (B) 2x Upper Supports (C) 2x Base Supports (D) 1x Lifting Column (E) 1x Lifting Column (F) 1x Control Panel (G) 1x Power Cord (H) 2x Extension Cords (I) 20x Screws (S-A) 8x Screws (S-B) 2x Screws (S-C) 1x Allen Key (S-D) 3x Cable Clips (S-E) 8x Rubber Pads (S-F)
-
Page 6: Recommended Tools
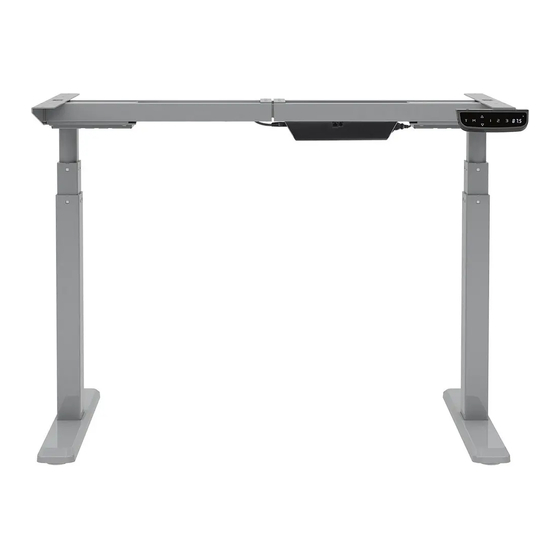
RECOMMENDED TOOLS The following common tools are recommended for assembly. These tools are not included. #2 Phillips Screwdriver Powered Screwdriver with Carpenter's Level #2 Phillips Screwdriver Bit CONTROL PANEL OVERVIEW... -
Page 7: Assembly
ASSEMBLY Perform the following steps to assemble the sit-stand desk. Note that a desktop is not included with this kit. This allows you to get a desktop of the appropriate size for your needs. Two people are required for some assembly steps. Do not over tighten screws. 1. - Page 8 7. Using the included Allen Key (S-D) and 4x Screws (S-A), attach the Upper Supports (C) to the ends of the Telescopic Frame (A), as shown in the images below. 8. Using the included Allen Key (S-D) and 8x Screws (S-A), attach the Lifting Columns (E and F) to the Telescopic Frame (A).
- Page 9 9. Attach the Base Supports (D) to the Lifting Columns (E and F) using the included Allen Key (S-D) and 8x Screws (S-A), as shown in the image below and to the left. 10. With the help of your assistant, flip the desk assembly over so that it rests on the Base Supports (B), as shown in the image above and to the right.
- Page 10 14. Remove the protective film from the Rubber Pads (S-F), then stick them to the Telescopic Frame (A). 15. With the help of your assistant, place your desktop on the Telescopic Frame (A) and Upper Supports (C). Ensure that the desktop is straight and evenly supported.
-
Page 11: System Reset
18. Using 2x Screws (S-C) and a #2 Phillips screwdriver (not included), attach the Control Panel (G) to the underside of your desktop. Do not overtighten the screws 19. Remove the protective film from 3x Cable Clips (S-E), then attach them to the underside of the desktop. -
Page 12: Operation
OPERATION Movement Press and hold the △ or ▽ button until the desktop reaches the desired height. Memory The system can remember three different desktop height settings. To store a position, press the M button. The Display will show S-. ... -
Page 13: Screensaver Mode
TECHNICAL SUPPORT Monoprice is pleased to provide free, live, online technical support to assist you with any questions you may have about installation, setup, troubleshooting, or product recommendations. If you ever need assistance with your new product, please come online to talk to one of our friendly and knowledgeable Tech Support Associates. -
Page 14: Troubleshooting
TROUBLESHOOTING Q1: When moving upwards, the desk stops moving then drops 1 cm. A1: Ensure that the total load on the desk (including the weight of the desktop itself) does not exceed 176 lbs. (80 kg). Remove the excess weight and ensure that there are no obstructions to upward movement. -
Page 15: Regulatory Compliance
Modifying the equipment without Monoprice’s authorization may result in the equipment no longer complying with FCC requirements for Class B digital devices. In that event, your right to use the equipment may be limited by FCC regulations, and you may be required to correct any interference to radio or television communications at your own expense.
Need help?
Do you have a question about the 15722 and is the answer not in the manual?
Questions and answers