Philips Fidelio B1 User Manual
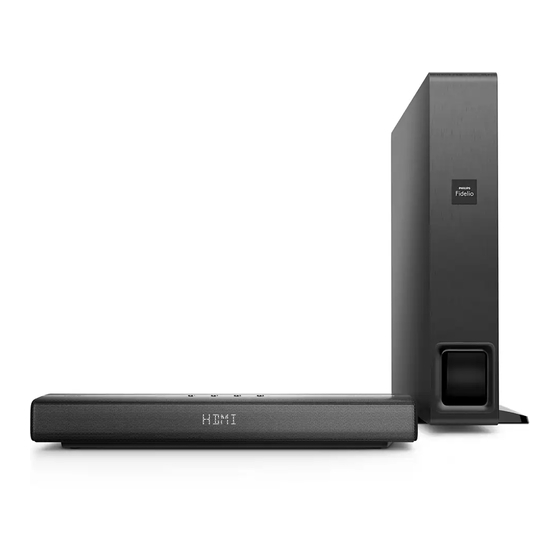
Nano cinema speaker
Hide thumbs
Also See for Fidelio B1:
- User manual (373 pages) ,
- Quick start manual (2 pages) ,
- User manual (21 pages)

Related Manuals for Philips Fidelio B1


Summary of Contents for Philips Fidelio B1
- Page 1 User manual Always there to help you Register your product and get support at www.philips.com/support...
-
Page 3: Table Of Contents
Contents 1 Important Safety Care for your product Care of the environment Compliance Help and support 2 Your product Main unit Remote control Connectors Wireless subwoofer 3 Connect Placement Pair up with the subwoofer Connect audio from TV Connect audio from other devices Connect digital devices through HDMI 4 Use your product Set clock... -
Page 4: Important
1 Important • Before you connect the product to the power outlet, ensure that the power voltage matches the value printed on the back or bottom of the product. Never Read and understand all instructions before you connect the product to the power outlet if use your product. -
Page 5: Care For Your Product
Help and support which can be recycled and reused. For extensive online support, visit www.philips.com/support to: • download the user manual and the quick This symbol on a product means that the start guide product is covered by European Directive •... -
Page 6: Your Product
Congratulations on your purchase, and Follow the instructions on the website to select welcome to Philips! To fully benefit from the your language, and then enter your product support that Philips offers(e.g. notification model number. -
Page 7: Remote Control
Remote control Skip to the previous or next track. This section includes an overview of the Start, pause or resume play. remote control. e BASS +/- Increase or decrease bass on the main unit. f Volume control +/-: Increase or decrease volume. •... -
Page 8: Wireless Subwoofer
c USB • During wireless pairing between the • Connect to a USB storage device for subwoofer and the main unit, the audio media play. indicator blinks white quickly. • When the pairing succeeds, the • Upgrade software of this product. indicator lights up white. -
Page 9: Connect
3 Connect This section helps you connect this product to a TV and other devices. For information about the basic connections of this product and accessories, see the quick start guide. Note • For identification and supply ratings, see the type plate at the back or bottom of the product. -
Page 10: Connect Audio From Tv
On your TV, turn on HDMI-CEC Note operations. • For HDMI-CEC issues on your TV, see • If the wireless dis-connection or pairing up lasts 1 minute, the subwoofer automatically switches to the TV user manual to make sure that standby and the LED on the subwoofer turns off. -
Page 11: Connect Audio From Other Devices
Using an optical cable, connect the Option 3: Connect to TV through OPTICAL IN connector on this product analog audio cables to the optical output on the external device. Basic quality audio • The digital optical output on the external device might be labeled AUDIO OUT OPTICAL OUT, SPDIF or SPDIF OUT. -
Page 12: Use Your Product
4 Use your • video is automatically displayed on your TV, and product • audio is automatically played on this product. Using a High Speed HDMI cable, connect the HDMI OUT connector on your digital This section helps you use this product to play device to the HDMI IN on this product. -
Page 13: Auto Standby
Press MOVIE to create a surround listening • View clock experience. Ideal for watching movie. • Press MUSIC to create two-channel or multi- In ECO standby or operation mode, press channel stereo. Ideal for listening to music. Press VOICE to create sound effect •... -
Page 14: Mp3 Player
What you need MP3 player • A Bluetooth device which supports Bluetooth profile A2DP, AVRCP and with Connect your MP3 player to play your audio Bluetooth version as 4.1. files or music. • The maximum operational range between this product and a Bluetooth device is What you need approximately 10 meters (30 feet). -
Page 15: Set Display Brightness
Apply factory settings Check the latest software version on In case of no response from this product , you www.philips.com/support. can reset this product to the default settings • Search for your model and click on programmed at the factory. -
Page 16: Product Specifications
Bluetooth • Bluetooth profiles: A2DP, AVRCP • Bluetooth version: 4.1 Main unit • Power supply: • Model (Philips branded AC power adapter): DYS602-210309W; AS650-210-AA309 • Input: 100-240 V~, 50/60 Hz 1.5 A • Output: 21V , 3.09A • Standby without clock display: ≤ 0.5 W... -
Page 17: Troubleshooting
• Power supply: 220-240 V~, 50-60 Hz If you still have a problem, get support at • Power consumption: 60 W www.philips.com/support. • Standby power consumption: ≤ 0.5 W • Impedance: 3 ohm Main unit •... - Page 18 Error message is displayed on the display panel. • When "ERROR" is displayed, it indicates that an input audio format is not supported. • When "ARC" blinks, it indicates that the connected TV is not HDMI ARC compliant or an unsupported audio format is detected.
- Page 19 Manufactured under license from Dolby Laboratories. Dolby and the double-D symbol are trademarks of Dolby Laboratories. For DTS patents, see http://patents.dts.com. Manufactured under license from DTS Licensing Limited. DTS, the Symbol, & DTS and the Symbol together are registered trademarks, and DTS Digital Surround is a trademark of DTS, Inc.
- Page 20 Specifications are subject to change without notice The Philips trademark and the Philips Shield Emblem are registered trademarks of Koninklijke Philips N.V. used under license. 2016 © Gibson Innovations Limited. All rights reserved. This product has been manufactured by, and is sold under the responsibility of Gibson Innovations Ltd., and Gibson Innovations Ltd. is the warrantor in relation to this product.
Need help?
Do you have a question about the Fidelio B1 and is the answer not in the manual?
Questions and answers