Table of Contents
Advertisement
Advertisement
Table of Contents

Related Manuals for SCANDINOVA FFA 253


Summary of Contents for SCANDINOVA FFA 253
-
Page 1: Operating Instructions
Operating Instructions FFA 253/286 FRIDGE FREEZERS... -
Page 2: Table Of Contents
Thank you for purchasing a model from the Before use Scandinova range. Please note that these Before operating this appliance, please instructions apply to all fridge-freezers in read the following instructions carefully, as the FFA family. Illustrations and fi ttings... -
Page 3: The Fridge-Freezer
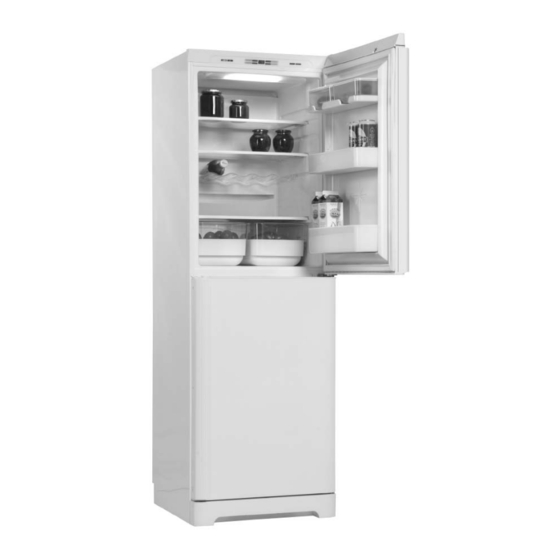
The fridge-freezer (Frost free) Control panel Internal light Storage box shelf Flexi-shelf Bottle shelf Safety glass shelf Rating plate Crisper bin Gasket Baskets Handle Front kick plate Adjustable feet fi g. 1... -
Page 4: Setting Up And Building In
Setting up and building in Positioning the cabinet For safety and operational reasons, do not position the cabinet outdoors. Your fridge freezer should be placed in a dry and well ventilated room. Never place the cabinet close to sources of heath such as ovens or radiators, and avoid placing it in direct sunlight. - Page 5 Positioning Ventilation When positioning the cabinet next to an It is important that the appliance is adjacent wall, ensure that there is suffi cient completely level and that there is adequate space for the door(s) to open in order to pull air circulation over, under and around it.
- Page 6 Levelling It is very important that the cabinet is absolutely level. Cabinets which are not level will become damaged over time. Any unevenness of the fl oor should be corrected prior to installation. Slight unevenness can be overcome by adjusting the two feet fi tted to the front edge of the cabinet base panel.
-
Page 7: Reversing The Door
Reversing the doors The doors can be changed from right-hinged to left-hinged or vice versa in the following way: 1. Lay the cabinet on its back with door(s) 2. Remove the upper hinge 5. Remove the door-closer. Refi t the door- uppermost 3. -
Page 8: Electrical Connection
Electrical connection The cabinet is intended for connection to Proceed as follows: alternating current. The required voltage (V) Connect the GREEN-AND-YELLOW wire to and frequency (Hz) are stated on the rating the plug terminal marked by “E” or an earth plate, located inside the cabinet. -
Page 9: Control Panel
Control panel Temperature refrigerator Super freeze Freeze symbol with 4 stars On/off switch Indicator lights Hidden door detector Display fi g. 12 Temperature freezer Alarm on/off Setting the controls The appliance is factory-set to maintain +5 On/off switch ˚C in the refrigerator section and -18 ˚C in the freezer section. -
Page 10: Super Freeze
Switching the cabinet on Super Freeze Connect the appliance to the power socket. Before freezing large quantities of fresh Press the on/off switch food, it is recommended that the Super Freeze function be activated. The actual temperature in the freezer section is shown on the display. -
Page 11: Refrigerator Section
Refrigerator Section Glass shelves Glass shelf with slide damper The slide damper above the crisper bin The safety glass shelves can be moved allows the temperature and the humidity in when the door is opened 90º. To move a the bins to be regulated. shelf, pull it forward and lower it. -
Page 12: Freezer Section
Freezer Section The freezer section is a four-star freezer, Note approved for freezing and storing foodstuffs. Do not put carbonated liquids (fi zzy drinks) in the freezer as they may explode when frozen. Freezing If water ices are consumed immediately To keep food at its best it should be frozen after removal from the freezer, freezer down to -18 ˚C in the shortest time possible. -
Page 13: Defrosting
Defrosting Cleaning Automatic defrost of the fridge Switch the appliance off when cleaning the inside of the cabinet. section Defrosting is carried out automatically every The cabinet is best cleaned with a weak time the compressor stops. The defrost soap solution (max. 85ºC) Never use water drains from the cabinet onto a tray cleaning agents that might cause scratches placed on the top of the compressor where... -
Page 14: Fault Fi Nding List
Fault fi nding list Fault Possible cause Remedy No control lamps are lit The appliance is switched off Press the on/off switch Power failure; the fuse is “off”; the appliance is not plugged in Check that power is connected. correctly. The fuse must be reset Items of food at the back of Move the rearmost items... -
Page 15: Useful Hints
Useful hints Door sticking: Sensor faults Opening and closing the door creates a If a sensor fault is detected, a fl ashing E small vacuum in the cabinet. If you need to followed by a number will be shown on open and close the door repeatedly within the display. - Page 16 Subject to modifi cation 912082X00000150 04/04...
Need help?
Do you have a question about the FFA 253 and is the answer not in the manual?
Questions and answers