Table of Contents
Advertisement
Advertisement
Table of Contents

Summary of Contents for GW Security GWSW1602G
- Page 1 PoE switch 16/24 Ports User Manual...
-
Page 2: Table Of Contents
Content P r e f a c e The user manual mainly introduces the product appearance, specification, hardware installation, Web management and 1 Product Introduction other related information. Overview Product Feature Board Diagram Specification Il l u s t r a t i o n 2 Installation (1 Format of Graphics Interface Shipping List... -
Page 3: Product Introduction
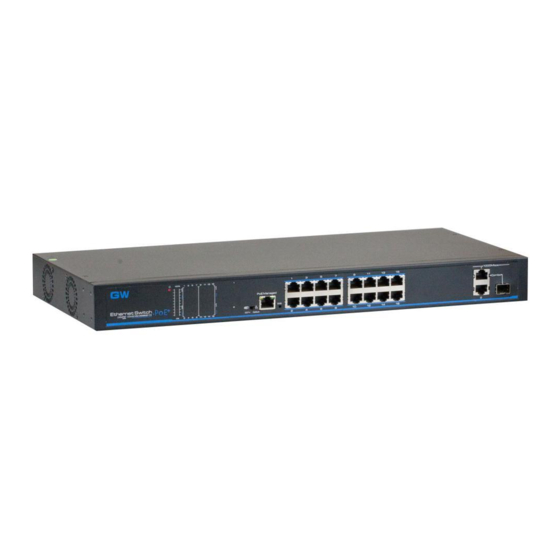
1 3 Board Diagram Product Introduction Front panel 1 1 Overview 24 Ports PoE switch The 16/24 ports PoE switch is an unmanaged PoE Ethernet switch along with 16/24 * 100Base-TX downlink PoE ports and 2 * 1000Base-TX uplink Ethernet ports featuring 30-watt 802.3at PoE+ as well as 1 additional Gigabit Combo PoE Output Uplink... -
Page 4: Specification
1.4 Specification 2 Installation Item Description Product Type Product Type 16ports 24ports Caution Downlink Ethernet Ports 16×RJ45,PoE+ 10/100Base-TX 24×RJ45,PoE+ 10/ 100Base-TX Uplink Ethernet Ports 2*10/100/1000Base-T+ 1* 1000Base-X( combo) Port Anti counterfeiting label is attached to the injector's cover, so product Description Power Input 1×AC Female Terminal... -
Page 5: Installation Requirements
2 3 . Installation Way Pull out the power plug before cleaning the switch. Do not use wet cloth nor liquid to wipe or wash the switch; There are 3 installation ways: rack, workbench and wall-hung installation. Do not leave the switch close to water or wet place so as to prevent water or dampness from entering into the switch;... -
Page 6: Workbench Installation
2 4 Cable Connection Instruction 2 4 1 Device Connection This product’s installation hangers are just to fix the switch rather than support it. Use brackets under the device (fixed to the rack) to support U s e c r o s s n e t w o r k c a b l e o r c r o s s - o v e r c a b l e t o c o n n e c t P C o r switch when install the switch to the rack. -
Page 7: Poe Web Management Page
(2) Click <property> button, enter "local 3 PoE Web Management Page connection property" window. This product has Web management function which allows users to control and manage PoE of each port by logging in on Web page. 3.1 Preparation Work Make sure the management PC has already been installed with Ethernet adapter;... -
Page 8: Confirm The Network Connection By Ping Command
3 2 2 Confirm the Network Connection by Ping Command (2) Select connection tabs in [Internet “ ” option] window, and click [LAN Setting] button. Operation Steps as below: Click <Start> button to enter [Start] menu, select [Run], pop out the dialog. Input "ping 192.168.1.200", click (3) Make sure the “Use proxy server for LAN”option is not selected. -
Page 9: Operating Instruction Of Web
3.3.2 Operating Instruction of Web Caution 3 3 2 1 Change Language . . . Please follow the steps to check if the injector is installed correctly: (1) Whether the physical connection of the equipment is correct? As shown in the picture below, press the drop-down list at the icon , choose The other end of the network line that is connected with computer “Chinese”... - Page 10 Caution Caution What to do when the password is forgotten? (1) When product IP address is changed, please ensure that the computer IP Please refer to 3.2.2.4 to restore IP address and password. address and the product IP address must be in the same network segment and the settings of subnet mask and gateway must be correct.
- Page 11 3.3.2.8 PoE Setting 3 3 2 5 Restore IP Address and Login Password . . . Start the product, unplug the network cable of console port, then press init key(3~5 seconds), till the RJ45 LED light of console port flash once, the IP address and login password will be restored to the initial setting.
- Page 12 (1) Actual output: total actual output power . (3) Priority: there are three port power supply priority levels: low, medium and high. when system overloads, the power supply of low priority port will be (2) Surplus: the power to be used for redistribute. Surplus=input-actual output- disconnected firstly.
-
Page 13: Typical Application
3.4 Typical Application Press <OK>, when all the port opens, popup “setting success”, the button turns status. Turn off all the ports: press title bar button, popup dialog box as shown below: d i s p l a PoE camera <...
Need help?
Do you have a question about the GWSW1602G and is the answer not in the manual?
Questions and answers