Table of Contents
Advertisement
Advertisement
Table of Contents

Summary of Contents for Accriva avoximeter 1000E
- Page 1 Operator’s Manual...
-
Page 2: Technical Support
Copyright© 2015 Accriva Diagnostics, Inc. All rights reserved. This material may not be reproduced or copied, in whole or in part, without the written permission of Accriva. Accriva and AVOXimeter are registered trademarks of Accriva Diagnostics, Inc. in the United States and other jurisdictions. -
Page 3: Table Of Contents
Table of Contents INTRODUCTION ...................... 1 Intended Use of the AVOXimeter 1000E ..............1 Summary and Explanation of the Test ..............1 Hemodynamic Calculations ................2 Saturation Step-Ups ..................3 Operating Precautions and Warnings ............... 5 Limitations ........................ 5 DESCRIPTION ......................6 Front Panel....................... - Page 4 OPERATION ......................27 Startup ........................27 Entering a User ID (Optional) ..................27 Entering a Patient ID (Optional) ................27 Sample Collection and Preparation .................28 Sample Collection ..................28 Sample Preparation ..................28 Running a Test .......................29 Using the Printer .....................30 Printing the Current Test Results ..............30 Specifying Automatic Printing of Results .............30 Changing the Serial Port Baud Rate and Parity ..........30 Data Management ....................31...
- Page 5 QUALITY CONTROL LOGS .................. 65 WARRANTY ......................68 Certification, Warranty and Service Warranty, and Service ........68 SAFETY STANDARDS ..................70 Guidance and Manufacturer’s Declaration – Electromagnetic Emissions ....70 Guidance and Manufacturer’s Declaration – Electromagnetic Immunity ....72 INDEX ......................
- Page 6 Important Labels and Symbols Before using the AVOXimeter 1000E, it is essential that the contents of this Operator’s Manual, any labels on the instrument or its packaging, and instructions accompanying AVOXimeter 1000E cuvettes are read and understood by the operator. These materials make reference to...
-
Page 7: Introduction
In addition, up to three liquid control lot numbers for each level of liquid QC can be stored in the AVOXimeter 1000E and can be tagged to the stored or printed liquid QC records. The instruments can also be configured so that only authorized operators can operate the system and that patient IDs are required for each test run. -
Page 8: Hemodynamic Calculations
1.39 is the ml of oxygen assumed to be carried by one gram of oxygenated hemoglobin (Hϋfner’s Number). Depending on your facility protocols, the Hϋfner’s Number stored in the AVOXimeter 1000E can be set at any value in the range of 1.30 to 1.39 (see page 25). Note:... -
Page 9: Saturation Step-Ups
Saturation Step-Ups Saturation step-ups are the differences in oxyhemoglobin saturation [%Hb02] between adjacent anatomical sites. These values are used as an aid in diagnosing intracardiac and great vessel shunts. The AVOXimeter 1000E calculates saturation step-ups between the following anatomical sites: ●... - Page 10 ● Left ventricle and aorta When calculating saturation step-ups, the AVOXimeter 1000E searches the database for all results for each main oximetry site for that patient (sub-sites are ignored), averages the results for each site, and then calculates the saturation step-ups from the average result for each main site.
-
Page 11: Operating Precautions And Warnings
(above 35°C, 95°F). Such exposure could affect the performance of any type of electronic instrumentation. ● DO NOT drop the AVOXimeter 1000E instrument, and do not use the results if the instrument is dropped during a test. ● Only properly qualified personnel should attempt to open and perform work on the AVOXimeter 1000E instrument as identified in this manual. -
Page 12: Description
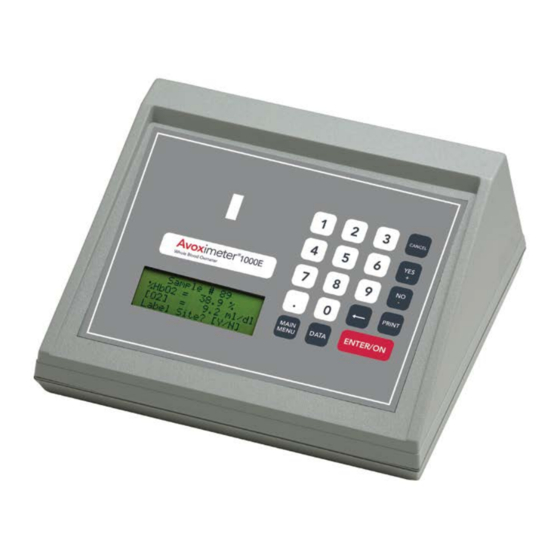
AVOXimeter 1000E Operator’s Manual 2 Description The AVOXimeter 1000E is a Point of Care device for use at the bedside. It contains a test chamber which performs all operations to measure the oxyhemoglobin saturation (%Hb0 ), total hemoglobin (THb), and oxygen content (O ) of a whole blood sample after the operator inserts a test cuvette containing the sample into the test chamber. -
Page 13: Keypad
AVOXimeter 1000E Operator’s Manual Figure 2. Front Panel Keypad The routine analysis of blood samples does not require the use of menus or the numeric keypad. However, these enable the user to take advantage of many useful features. The purpose of each key is summarized below: Purpose Switch the instrument on. -
Page 14: Menus
AVOXimeter 1000E Operator’s Manual Menus The principal menus, their commands, and the procedure to access each menu are summarized below: Note: Press the button at any time to return to the previous menu. Menu Commands Access Main Menu Press the key when a test is not running or another menu is not active. -
Page 15: Test Cuvettes
Federal, state and local laws and regulations require that hazardous waste be disposed of in a specific manner. Waste material from the AVOXimeter 1000E which may be classified as biohazardous include used cuvettes. It is important that steps be taken to dispose of these materials in accordance with the prevailing regulations in your location. -
Page 16: Connections
Figure 4. Power and Printer Connections Automatic Standby and Shutdown The AVOXimeter 1000E enters a low-power standby mode after the instrument has been idle for a specified period of time (the standby delay). The instrument is factory preset for a standby delay time of 60 minutes, but a time of 10 to 180 minutes can be specified (see page 17). -
Page 17: Instrument Specifications
Nickel Cadmium (NiCad) Approximately 8 hours (constant run at medium brightness). Operating Time On Battery Tests may also be run while the AVOXimeter 1000E is plugged into the AC/DC power module. Anticipated Battery Life Approximately 500 charge / discharge cycles... -
Page 18: Calibration
The AVOXimeter 1000E is factory-calibrated and employs highly stable state-of-the-art light sources. Factory tests indicate that, when used in accordance with this Operator’s Manual and other instructions, the AVOXimeter 1000E is capable of maintaining its calibration for at least two years. -
Page 19: Getting Started
IEC 320 connection at the power supply AC inlet and any other local requirements. Materials Required But Not Provided Item Quantity AVOXimeter 1000E Cuvettes (Part No. C100B) As Needed Liquid Controls (RNA) As Needed See page 34 for additional information. -
Page 20: Optional Materials
This eliminates the risk of the instrument powering down during a test. Fully charged batteries will allow the AVOXimeter 1000E to analyze blood samples continuously for up to 8 hours when the display is set at medium brightness. -
Page 21: Setting Up The Instrument
AVOXimeter 1000E Operator’s Manual Press to display the time, date, and battery menu again. Press to return to the previous menu, if desired. Setting Up the Instrument The user can specify the display brightness, specify the units that are used for reporting total hemoglobin (THb), change the date and time, and specify the length of time that the instrument is idle before it enters the standby mode. -
Page 22: Changing The Date And Time
AVOXimeter 1000E Operator’s Manual Changing the Date and Time Changing the Time: Important: The User ID for the “QA User” must be entered in order to change the time. See page 21 for details. Display the “Time, Date, and Battery” menu (a submenu of , see page 8). -
Page 23: Setting The Standby Delay
AVOXimeter 1000E Operator’s Manual Press followed by to change the date: Use the number keys to enter the new date, then press . The new date is displayed. Press followed by . The “Time, Date, and Battery” menu is again displayed. -
Page 24: Specifying Mandatory Entry Of User Id And/Or Patient Id
AVOXimeter 1000E Operator’s Manual Specifying Mandatory Entry of User ID and/or Patient ID A User ID and/or Patient ID can be entered for any test. The User ID and/or Patient ID will be included in the results record for tests that are run. - Page 25 AVOXimeter 1000E Operator’s Manual Press to return to the previous menu, if desired. Note: The current User ID and/or Patient ID must be re-entered if the instrument is idle for longer than 15 minutes or is turned off. Adding a User ID: Display the “User and Patient ID”...
- Page 26 AVOXimeter 1000E Operator’s Manual Press followed by to display the “User ID” menu: Press followed by to display the first User ID in the list: Press to scroll through the list of users. To delete a user, display that user, press...
-
Page 27: Changing The Qa User Id
AVOXimeter 1000E Operator’s Manual Changing the QA User ID The default QA User ID is 123456. The default QA User ID can be changed so that only a user with access to the new QA user ID can change the time and date or change User ID and Patient requirements. -
Page 28: Requiring Entry Of A Patient Id
AVOXimeter 1000E Operator’s Manual Requiring Entry of a Patient ID The instrument can be configured so that a Patient ID must be entered before a test can be run. Important: The User ID for the “QA User” must be entered in order to enable the requirement to enter a Patient ID. -
Page 29: Specifying Oximetry Site Prompts
AVOXimeter 1000E Operator’s Manual Specifying Oximetry Site Prompts The results from each test can be tagged with the anatomical site from which the blood sample was drawn. There are 15 main oximetry sites, some of which are divided into optional subsites:... -
Page 30: Specifying Use Of Oximetry Sites
Note: If the Patient ID is also entered when testing, the AVOXimeter 1000E can calculate Saturation Step-Ups for a patient using the average oxyhemoglobin saturation (%Hb0 values that were obtained at each site during the catheterization. -
Page 31: Entering A Different Value For Hüfner's Number
(see page 1). Although Hüfner’s number is generally assumed to be 1.39 mL/g of Hb, facilities may use a different value and may wish to set the AVOXimeter 1000E to match other instruments in the facility. Display the “Calibration” menu (a submenu of , see page 8). - Page 32 AVOXimeter 1000E Operator’s Manual This page was left intentionally blank.
-
Page 33: Operation
AVOXimeter 1000E Operator’s Manual 4 Operation Startup Press . The instrument starts and performs a series of self-tests. “READY” and “Insert Cuvette” are displayed when a test can be run: Run the quality control test(s) for the day (see page 31). -
Page 34: Sample Collection And Preparation
AVOXimeter 1000E Operator’s Manual Sample Collection and Preparation Sample Collection Collect freshly-drawn whole blood samples in a heparin- or EDTA-anticoagulated syringe. Do not use samples that contain excessive volumes of anticoagulant or are diluted with saline. Note: Refer to CLSI document H18-A3, entitled “Procedures for the Handling and Processing of Blood Specimens –... -
Page 35: Running A Test
AVOXimeter 1000E Operator’s Manual Running a Test Enter the User ID and/or Patient ID, if desired (see page 27). Verify that the instrument is ready to run a test and that the “READY” - “Insert Cuvette” screen is displayed: Holding the cuvette by the finger grip on the black cap, insert the cuvette (with the syringe still attached) into the test chamber, as shown below. -
Page 36: Using The Printer
Changing the Serial Port Baud Rate and Parity If a computer is being connected to the AVOXimeter 1000E, the baud rate and parity of the serial port on the instrument may need to be changed to optimize communication. -
Page 37: Data Management
AVOXimeter 1000E Operator’s Manual Data Management Stored results can be reviewed, printed, and purged (if desired). Printing all Stored Data (If needed) Turn on the printer. Display the “Printer Mode” menu (a submenu of , see page 8). Press followed by . -
Page 38: Reviewing And/Or Printing The Last Sample
AVOXimeter 1000E Operator’s Manual Reviewing and/or Printing the Last Sample (If needed) Turn on the printer. Display the “Stored Data” menu (a submenu of , see page 8). Press followed by . The last test record is displayed: Press to view additional information, if desired. -
Page 39: Aborting Printing Of Results
AVOXimeter 1000E Operator’s Manual Aborting Printing of Results Press while results are printing to discontinue printing of additional results. A confirmation prompt is displayed, indicating that all samples were not printed. Press to return to the previous menu. Purging all Test Records Display the “Stored Data”... -
Page 40: Quality Control
Daily optical quality control. ● Weekly testing of one level of liquid controls. In addition, the AVOXimeter 1000E performs a “self-check” to verify that the light source is operating properly every time it is turned on. Note: If quality control results are out of range, refer to the Troubleshooting section for instructions. -
Page 41: Running Liquid Controls
AVOXimeter 1000E Operator’s Manual Running Liquid Controls It is recommended to use the following liquid controls. ● RNA Medical CO-Oximeter controls, available from RNA Medical, Devens, MA., phone 978 772-9070 or toll-free 800-533-6162. Fill a test cuvette with a liquid control (see page 28). -
Page 42: Entering Liquid Control Lot Numbers
AVOXimeter 1000E Operator’s Manual Entering Liquid Control Lot Numbers Three lot numbers for each of three levels of liquid control can be entered into the instrument for later reference. Note: Lot numbers of liquid controls can be manually tagged to each liquid QC test as it is run (see page 37). -
Page 43: Tagging A Liquid Control Test With A Lot Number
AVOXimeter 1000E Operator’s Manual Tagging a Liquid Control Test with a Lot Number The lot number of the control being tested can be included in the results for the test. Note: Lot numbers of liquid controls must be entered before they can be tagged to a liquid QC test (see page 36). -
Page 44: Enabling Qc Lockout
AVOXimeter 1000E Operator’s Manual Enabling QC Lockout If QC Lockout is enabled, the operator cannot run a test if optical quality control is not successfully run at the specified intervals. Note: The User ID for the “QA User” must be entered in order to enable QC Lockout and specify the interval for running optical quality control. -
Page 45: Calibration
Re-Calibration If the AVOXimeter 1000E results are out of range with either blood samples or controls and troubleshooting does not resolve the issue, re-calibration may be necessary. Please contact Technical Support for more information on re-calibration. -
Page 46: Shutdown
AVOXimeter 1000E Operator’s Manual Shutdown Press (see page 8). Press followed by . The instrument will shut down. Simultaneously press . The instrument will shut down. -
Page 47: Hemodynamic Calculations
AVOXimeter 1000E Operator’s Manual Hemodynamic Calculations The AVOXimeter 1000E can calculate ten hemodynamic variables (such as body surface area, estimated oxygen consumption rate, and cardiac output using the Fick principle) from data that is entered by the operator or measured by the instrument. It can also calculate differences in oxygen saturation between adjacent anatomical sites (Saturation Step-Ups) from which blood samples were taken, to aid in diagnosing intracardiac and great vessel shunts. - Page 48 AVOXimeter 1000E Operator’s Manual Check that the height is correctly displayed, then press to confirm. The screen for selecting the units for patent’s weight is displayed: Select (for pounds) or (for kg), then press . The screen for entering the patent’s weight is displayed:...
-
Page 49: Oxygen Uptake Rate
AVOXimeter 1000E Operator’s Manual Oxygen Uptake Rate The patient’s rate of oxygen consumption (oxygen uptake rate) is calculated from the patient’s age, height, weight, and sex (see page 41). Alternately, a measured value can be entered. Display page 1 of the “Hemodynamics” menu (a submenu of , see page 8). -
Page 50: Body Surface Area
AVOXimeter 1000E Operator’s Manual Body Surface Area The patient’s body surface area is calculated from the patient’s age, height, weight, and sex (see page 41). Alternately, a measured value can be entered. Display page 1 of the “Hemodynamics” menu (a submenu of , see page 8). -
Page 51: Saturation Step-Ups
Patient ID (see page 27) and the anatomical site from which the sample was obtained (see page 23). The AVOXimeter 1000E uses all measurements stored in the system for a patient when calculating oxyhemoglobin saturation step-ups. The system searches the database for all results for each main oximetry site for that patient, averages the results for each site, and calculates the oxyhemoglobin saturation step-ups from the average result for each main site. -
Page 52: Flow Calculations
AVOXimeter 1000E Operator’s Manual Flow Calculations Flow calculations are used to calculate cardiac output, pulmonary flow, and other blood flow values. Calculating Cardiac Output: Display page 2 of the “Hemodynamics” menu (a submenu of , see page 8). Press followed by . - Page 53 AVOXimeter 1000E Operator’s Manual Calculating Pulmonary Flow: Display page 2 of the “Hemodynamics” menu (a submenu of , see page 8). Press followed by . A menu of flow calculations is displayed: Press followed by . The screen for entering oxygen uptake, pulmonary...
- Page 54 AVOXimeter 1000E Operator’s Manual Press followed by . The screen for entering arterial and venous oxygen contents is displayed: Enter the arterial oxygen uptake, mixed venous oxygen content, pulmonary venous oxygen content, and pulmonary arterial oxygen content, using the number keys.
- Page 55 AVOXimeter 1000E Operator’s Manual If needed, enter the pulmonary flow and systemic flow, using the number keys. After each value is entered, check that the value is correct and press move the cursor to the next line. Note: If pulmonary flow and systemic flow were already calculated, the values will be displayed.
-
Page 56: Systemic And Pulmonary Resistances
AVOXimeter 1000E Operator’s Manual After all values have been entered, press to confirm. The calculated cardiac index is displayed: Press when done. The menu of flow calculations is again displayed. Press to return to the previous menu, if desired. Systemic and Pulmonary Resistances Cardiac output and blood pressure readings are used to calculate systemic resistance and pulmonary resistance. - Page 57 AVOXimeter 1000E Operator’s Manual Calculating Pulmonary Resistance: Display page 2 of the “Hemodynamics” menu (a submenu of , see page 8). Press followed by . A menu of resistance calculations is displayed: Press followed by . A screen for entering cardiac output (if not already...
-
Page 58: Stroke Volume And Stroke Index
AVOXimeter 1000E Operator’s Manual Stroke Volume and Stroke Index Cardiac output and heart rate measurements are used to calculate the stroke volume (the volume of blood ejected from a ventricle at each beat of the heart). Stroke Index is the stroke volume normalized for body mass. - Page 59 AVOXimeter 1000E Operator’s Manual Calculating Stroke Index: Display page 2 of the “Hemodynamics” menu (a submenu of , see page 8) Press followed by . A menu of stroke calculations is displayed: Press followed by . A screen for stroke volume and body surface area (if not already calculated) is displayed: If needed, enter the stroke volume and body surface area, using the number keys.
-
Page 60: Printing Hemodynamic Values
AVOXimeter 1000E Operator’s Manual Printing Hemodynamic Values The values that were entered for each calculation and the calculated values can be printed. (If needed) Turn on the printer. Display page 2 of the “Hemodynamics” menu (a submenu of , see page 8). -
Page 61: Troubleshooting
AVOXimeter 1000E Operator’s Manual Troubleshooting Symptom Possible Cause Action Required The instrument does 1. The AC Adapter is not 1. Connect the AC Adapter to an not turn on. connected to an AC outlet AC outlet and the AVOXimeter and/or the instrument, and 1000E. - Page 62 AVOXimeter 1000E Operator’s Manual Symptom Possible Cause Action Required Measurements of 1. The optical detector may be 1. Run optical quality control. If %HbO are not contaminated by blood or needed, clean the optical accurate foreign material. detector (see page 59).
- Page 63 AVOXimeter 1000E Operator’s Manual Symptom Possible Cause Action Required THb and/or %HbO 1. The optical detector may be 1. Clean the optical detector (see readings for yellow or contaminated by blood or page 59). orange filter are out of foreign material.
- Page 64 AVOXimeter 1000E Operator’s Manual This page was left intentionally blank.
-
Page 65: Maintenance
AVOXimeter 1000E Operator’s Manual 5 Maintenance Periodic maintenance procedures must be performed on the AVOXimeter 1000E in order to assure consistent efficient performance or to repair/replace user-serviceable components. Inspect and clean the exterior of the instrument as required. Remove residual dried blood or other foreign matter using a water-dampened cloth. - Page 66 AVOXimeter 1000E Operator’s Manual Tilt the upper cover backward to fully expose the main circuit board and small circuit board on the lower part of the instrument. Locate the flat keypad cable that runs from the keypad to the main circuit board.
- Page 67 AVOXimeter 1000E Operator’s Manual Using the 1/4" nutdriver, remove the four screws and four nuts that secure the two halves of the black optical unit. Take care when separating the two halves of the optical unit. Do not lose the small torsion spring or the shutter door. Set them aside in a safe place for reassembly.
- Page 68 AVOXimeter 1000E Operator’s Manual Place the optical unit back on the front panel. Using the 5mm nutdriver, secure the black optical unit to the front panel with the four nuts (and washers, if applicable). Optical Unit Position the upper cover (containing the black optical unit) in an upright position over the lower part of the instrument, with the keypad to the right.
-
Page 69: Replacing The Battery
AVOXimeter 1000E Operator’s Manual Replacing the Battery Materials Needed: 1. # 0 Phillips screwdriver 2. Diagonal cutting pliers 3. Replacement battery with cable (E4-BATP-2) 4. Securing cording (packaged with replacement battery) Steps 1 through 11 of the Cleaning the Optical Detector procedure on page 59 Must be performed before moving to step 2 of “Replacing the Battery”,... - Page 70 Thread the blue and white battery cable of the new battery under the main circuit board. Re-connect the cables, replace the upper cover of the AVOXimeter 1000E, connect the AC adapter, and turn on the instrument as outlined in Steps 17 through 25 of the Cleaning the Optical Detector procedure on page 59.
-
Page 71: Quality Control Logs
AVOXimeter 1000E Operator’s Manual 6 Quality Control Logs Quality control logs for the yellow and orange filters and liquid control levels 1, 2, and 3 are shown on the following pages. - Page 72 AVOXimeter 1000E Operator’s Manual...
- Page 73 AVOXimeter 1000E Operator’s Manual...
-
Page 74: Warranty
Certification, Warranty and Service Warranty, and Service Accriva, declares to the original purchaser that each instrument manufactured and sold by Accriva, or sold by an authorized dealer, shall be free from defects in material and workmanship and, under normal and proper use conditions, warrants it for a period of one year from installation and no more than 13 months from the shipping date, except as otherwise provided in writing. - Page 75 OTHER REMEDIES OR WARRANTIES, EXPRESS OR IMPLIED, WHICH EXTEND BEYOND THE CONTENTS OF THIS AGREEMENT. No agent or employee of Accriva is authorized to extend any other warranty or to assume for Accriva any liability except as above set forth.
-
Page 76: Safety Standards
Operating Room (OR) environment. Rather, it is intended to indicate that the instrument is not suitable for use in the direct presence of a flammable anesthetic mixture with air, oxygen or nitrous oxide. All relevant documentation is kept on file at Accriva Diagnostics, Inc., San Diego, CA. -
Page 77: Guidance And Manufacturer's Declaration - Electromagnetic Emissions
Guidance and Manufacturer’s Declaration – Electromagnetic Emissions The AVOXimeter 1000E is intended for use in the electromagnetic environment specified below. The customer or the user of the AVOXimeter 1000E should assure that it is used in such an environment. Emissions Test... -
Page 78: Guidance And Manufacturer's Declaration - Electromagnetic Immunity
AVOXimeter 1000E Operator’s Manual Guidance and Manufacturer’s Declaration – Electromagnetic Immunity The AVOXimeter 1000E is intended for use in the electromagnetic environment specified below. The customer or the user of the AVOXimeter System should assure that it is used in such an environment. -
Page 79: Index
AVOXimeter 1000E Operator’s Manual Index backlighting ............15 limitations ............5 batteries liquid controls ..........35 charging ............14 entering lot numbers ........36 checking ............14 tagging a test with lot number ...... 37 calculations ..........1, 2, 41 lockout ............. 10 calibration .......... - Page 80 AVOXimeter Operator’s Manual deleting ............19 requiring ............18 entering ............27 warnings ............5 printing list ............ 20 warranty ............68...
- Page 81 AVOXimeter 1000E Operator’s Manual This page was left intentionally blank.
- Page 82 AVOXimeter Operator’s Manual This page was left intentionally blank.
- Page 83 AVOXimeter 1000E Operator’s Manual This page was left intentionally blank.
- Page 84 AVOXimeter Operator’s Manual AP1001EN 0515...
Need help?
Do you have a question about the avoximeter 1000E and is the answer not in the manual?
Questions and answers
cleaning of the avox
To clean the Accriva AVOXimeter 1000E Optical Detector, follow these steps:
1. Disconnect the AVOXimeter 1000E from the AC adapter.
2. Use a #0 Phillips screwdriver to remove the four screws from the bottom of the instrument.
3. Hold the upper and lower covers together and place the instrument upright with the keypad to the right.
4. Carefully lift the upper cover while keeping it parallel to the lower part until it is free of the rear panel.
5. Locate and disconnect the battery cable from the J302 connector on the main circuit board.
6. Tilt the upper cover backward to fully expose the main circuit board and small circuit board.
Ensure that these steps are performed only after the AC adapter is completely disconnected from both the instrument and the power source.
This answer is automatically generated