Table of Contents
Advertisement
Quick Links
!
Please observe the following instructions:
Quality of wood pellets:
Depending on the manufacturer there are light, dark, shorter and longer pellets. And the quality of one delivery may
differ from another even from the same supplier. The standards for wood pellets are becoming more and more strict
but wood is wood and has its own characteristics regarding ash and clinker.
Cleaning requirements:
As soon as you find ash and clinker deposits in the cold combustion pot, it must be cleaned. See operating
instructions! If this is not done, there will be more and more clinker. Then the device will no longer be able to ignite
properly. Pellets may pile up in the combustion pot. In extreme cases, this can reach all the way back to the pellet
chute. Backfire in the pellet container and smouldering in the pellet tank might possibly result. This will destroy
your device and is not covered by the guarantee.
For maximum working life:
Arrange for commissioning by your trained stove supplier.
Observe the daily check as described and more frequently if you have received new pellet deliveries or when
the device is brought back into use after the summer.
Carefully read through all the operating instructions and retain them.
Type number:
Installation and operating instructions
Important manufacturer's instructions
Art. no. 0571207009036
V15 J05
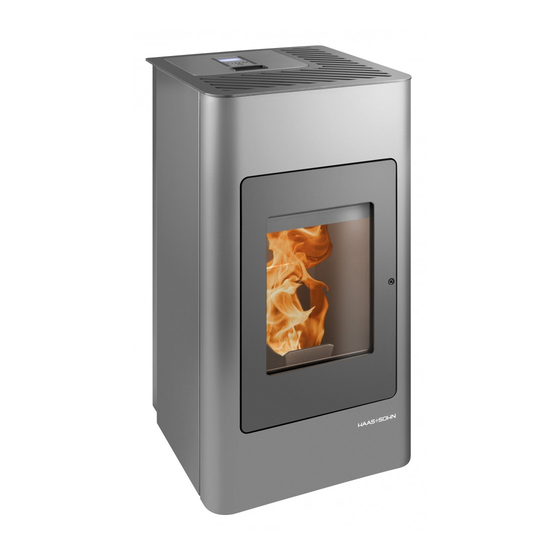
Pellett Stove
HSP 1.17
!
Advertisement
Table of Contents

Summary of Contents for Haas+Sohn HSP 1.17
- Page 1 Art. no. 0571207009036 V15 J05 Pellett Stove HSP 1.17 Installation and operating instructions Important manufacturer’s instructions Please observe the following instructions: Quality of wood pellets: Depending on the manufacturer there are light, dark, shorter and longer pellets. And the quality of one delivery may differ from another even from the same supplier.
-
Page 2: Table Of Contents
Index of contents 9.6..1 Backlighting 9.6..2 Activating the backlighting Description 9.7. Induced draught fan with rotation speed feedback 17 General instructions, safety instructions 9.8. Flame or combustion chamber temperature sensor (combustion chamber thermosensor) Installation of the pellet stove and connection to the chimney 9.9. -
Page 3: Description
The supply pressure must HAAS+SOHN pellet stove is set up to operate in fully be at least 6 Pa and should be 15 Pa as a automatic mode, with a choice of 2 operating modes maximum. -
Page 4: Installation Of The Pellet Stove And Connection To
3. Installation of the pellet stove and connection to the chimney The pellet stove may not be installed in the open air! The packaging on your new pellet stove gives it optimum protection against damage. Nevertheless, damage may Attention! The mains cable plug must remain freely have occurred to the stove or to accessories in transit. - Page 5 Floor protection The floor is to be protected from the radiant heat from Since excess pressure may build up at the smoke outlet the area of the viewing window (combustion chamber). because of the way that the pellet stove works with an In addition, for practical reasons associated with induced draught fan, all fume outlet pipes as far as the cleaning it is recommended that you install your pellet...
-
Page 6: The Pellet Stove's Functional Characteristics
5. The pellet stove’s operating statuses: The operation of the pellet stove is characterised by 8 operating statuses: The ignition phase begins the current room temperature falls below the set target temperature by 1ºC and the stove has cooled down to a temperature of below 70C°. -
Page 7: Burner Test / Cleaning
shutdown will be initiated and an error message is Attention! shown on the operator console display. The device starts by itself in “Standby mode”. During the “Heating mode” operating status, the Because of the heat generated on the panel, you maximum and minimum heat output are each controlled must ensure that there is no-one who is unfamiliar by safety limits (maximum and minimum flue gas... -
Page 8: Switching Off - Operating Status Off
6.2. Description of the symbols Switching off – operating status OFF 5.8. Procedure: Press the left key. OFF mode is displayed in icon on the display.The stove Time initiates the Cooling down operating status and can no longer switch to Heating mode by itself, even if the room Room temperature-target temperature falls below the set room temperature. -
Page 9: Standard Screen /Welcome Page
6.3. Standard screen /welcome page 6.3..3 Setting target room temperature This page will always be displayed when the power plug Procedure: is connected to the power outlet. By pressing the middle button you adjust the room temperature. By pressing 16:18 ✔... -
Page 10: Setting The Date And Time
6.4..1 Setting the date and time Desription – Heating profile 6.4..3 Date/time Heating profile h003 Heating profile Fr, 13.09.2013 Setting range 14:39:28 ( 2 ) O.K. Procedure: Setting range from 1 to 4 ✔ Factory setting: 2 Set the Courser on "Date/Time" and press OK The value to be set depends on the size of the room that is to be heated. -
Page 11: Desription - Display Brightness - Contrast Setting
This fuel is standardised (e.g. DINplus, ÖNorm M 7135, 6.4..7 Fault screen (top field in the display) ENplus-A1.). Important: Your HAAS+SOHN Pelletto pellet stove may +++ Disturbance +++ only be operated with standardised wood pellets with a 6 mm diameter. -
Page 12: Commissioning Your Pellet Stove
A simple quality test: Put a few wood pellets in a glass of Tip!! Only when commissioning, place about 30 water: Good quality: Pellets sink pellets in the burner. This will speed up the Lower quality: Pellets float. ignition process. General: The use of lower-quality or unauthorised fuel adversely If the ignition phase could not be successfully... -
Page 13: Cleaning The Surface
8.4. Cleaning the combustion pot -weekly During operation, deposits may form in the combustion 8.1. Cleaning the surface pot. How quickly the combustion pot becomes dirty depends solely on fuel quality. The deposits or Dirt on the upper surface of the stove may be cleaned off with a damp cloth or if necessary with mild soapy encrustations must be removed from time to time water. -
Page 14: Cleaning The Pellet Container - Annual Maintenance
8.5. Cleaning the pellet container - annual maintenance Heat the pellet stove until the storage tank is completely empty. Then the protective grille (1) in the pellet tank may be removed. Then clean the tank and the intake of the screw conveyor housing with a vacuum cleaner. After cleaning, it is essential to put back the protective grille. -
Page 15: Cleaning The Induced Draught Housing And Fan
Undo the screws and remove both the covers of the openings. Now you can clean the exposed insides of the flue gas passes. (See Figure 8 d+e). After completion of the cleaning make sure that when putting back the covers, the seals are seated in the right positions. -
Page 16: Description Of The Components
9. Description of the components 9.3. Combustion pot with tray: 9.1. Storage container (pellet tank) The combustion pot is made of high-grade cast iron. 17 kg of wood pellets can be stored in the storage The special design of the combustion pot guarantees container. -
Page 17: Control Unit
9.6. Operator console Figure 13: Stainless steel ignition 9.5. Control unit microprocessor control unit ensures safe, Figure 15: Operator console automatic operation of the pellet stove. The control unit controls the interaction of the components e.g. induced 9.6..1 Backlighting draught fan, screw conveyor motor, flame temperature The backlighting of the display is switched off 5 sensor, room temperature sensor etc.. -
Page 18: Flue Gas Thermosensor
the air volume required for the combustion of the energy level located in the grate. Here the ACTUAL flame temperature is compared with the TARGET in combination with the processor- regulated control unit and the appropriate combustion air volume required for the combustion of the energy level in the grate is supplied by means of the induced draught fan. -
Page 19: Oc - Overheat Cutout
9.11. OC – Overheat cutout 9.13. Flue tube connection The overheat cutout sensor is located on the The diameter of the flue elbow is 80 mm. The flue screw conveyor tube. When a certain temperature tube must be connected to the fireplace in is reached, the OC is triggered independently of the accordance with official regulations. -
Page 20: Technical Data
400 W Electric ignition (for max. 15 minutes on ignition): Electronics fuses: (F3) T 0.315 A, 250 V Fuses for the ignition, screw conveyor motor, induced T 3,15 A, 250 V draught, (F1,) (F2 reserve) Figure 19: Dimensions of HSP 1.17... -
Page 21: Faults, Causes, Correction
11. Faults, causes, correction You can correct simple faults yourself with the following guide. For further information please consult your specialist dealer. Attention! All devices are equipped with a large number of safety devices. If a fault occurs, you will be shown this on the display. In the event of a fault, leave the mains plug in so that the internal safety functions can continue to operate fully. - Page 22 Error number 6 or 9 Error number 15 Cause: Cause: The induced draught fan is not The door is open for longer than 1 minute running at the correct rotation during operation speed The damper at the bottom of the door is not in the right position The following circumstances might lead to this: ...
- Page 23 The required combustion air cannot be Error number 24 supplied to the stove e.g. via a vapour extractor hood that is located in the Cause: vicinity of the installation site and is Bottom flame temperature sensor switched on. defective or not connected ...
-
Page 24: General Faults
11.2. General faults Fault: Cause: Correction: Stove will not ignite 1. The set target room Increase the target temperature. temperature is lower than the current room temperature (actual temperature); the “STANDBY” symbol appears on the display 2. Storage container is empty Refill storage container. -
Page 25: Type Plate: Symbol
12. Type plate: Symbol HAAS + SOHN OFENTECHNIK GMBH Urstein Nord 67, A-5412 Puch Pellet-Kaminofen Typenbezeichnung: 712.07 Variante: HSP 1.17 Wärmeleistungsbereich: 1,8 - 8,2 kW Nennwärmeleistung 8,0 kW Holzpellets Ø 6mm (DINplus, ÖNorm M 7135, ENplus-A1), Zugelassener Brennstoff: Prüfstellenkennziffer: 1625 Registrier Nr. - Page 26 Figures 21: Replacement parts HSP 1.17 Figures 22: Replacement parts HSP 1.17...
-
Page 27: Replacement Parts List
13. Replacement parts list HSP 1.17 Front plate cast iron grey 0571207015200 Complete combustion chamber door black 0571207005300 Door hinge cast black 0571207005034 Glass panel 0571207005301 Sealing strip, glass panel 10x4 0040210040005 Sealing strip, combustion chamber door 0040300110005 Tank cover cast iron grey... -
Page 28: Circuit Diagram
14. Circuit diagram... - Page 29 No.: Description Cable harness Mains plug / mains filter Electric ignition Screw conveyor motor Induced draught 35/36 Flue gas temperature sensor 37/38 Flame temperature sensor 39/40 Room temperature sensor 41/42 Bottom flame temperature sensor 43/44 Door contact switch 48-50 Flue gas fan rotation speed Fuse T 3,15A ignition, induced draught fan, screw conveyor motor Fuse T 3,15A reserve Fuse T 0,315A operator console...
-
Page 30: Guarantee
15. Guarantee Errors in the installation and connection of the device, insufficient or too-strong chimney draught, General incorrectly carried out repair work or other, in HAAS + SOHN gives the purchaser a guarantee particular subsequent, changes to the heating within the context of the legislation. The two-year appliance or flue gas pipework (stove pipe and guarantee period commences on the date of the chimney),... - Page 31 Slow combustion stoves and auxiliary ranges for wood, coal and oil Fireplace inserts for wood Accessories for stoves and fireplaces Accessories for central oil supply HAAS+SOHN Sales in Germany OFENTECHNIK GMBH HAAS+SOHN Ofentechnik GmbH Urstein Nord 67 Zur Dornheck 8 A-5412 Puch D-35764 Sinn - Fleisbach Email: office@haassohn.com Email: info@haassohn.com...
Need help?
Do you have a question about the HSP 1.17 and is the answer not in the manual?
Questions and answers