
Summary of Contents for IRA3D POETRY4
-
Page 1: User Manual
USER MANUAL Professional 3D printer with FLD technology Model: POETRY4 ENGLISH TRANSLATION OF THE ORIGINAL INSTRUCTIONS... -
Page 2: Table Of Contents
INTRODUCTION ..........................5 Manufacturer identification data ..................6 Service policies ........................7 GENERAL DESCRIPTION ......................8 Technical characteristics ..................... 8 Poetry4 ..........................9 SAFETY INFORMATION ......................11 General safety warnings....................11 General accident prevention requirements ..............11 3.2.1 Safe use of materials ....................12 Residual risks ........................ - Page 3 Status bar ......................... 52 11.3.2 Motor movement parameters ................53 11.3.3 Print parameters ..................... 55 11.4 Managing processes remotely ..................56 11.4.1 Starting a print job remotely .................. 57 11.4.2 Uploading a file on the SD card ................58 IRA3D User Manual: POETRY4...
- Page 4 Tensioning the belts of the X and Y axes ............... 71 13.7 Adjustment of the Z axis and Z end stop................. 72 14 IMPORTANT INFORMATION ....................73 14.1 Disposal of waste electrical and electronic equipment (WEEE)........73 14.2 Compliance with European directives ................73 User Manual: POETRY4 IRA3D...
-
Page 5: Introduction
Manual on the date of issue thereof, shown on this page; on the other hand, the appliance may in future be subject to technical modifications, even important ones, without the manual being updated. Thus, please consult Ira3D to be informed about any variants implemented. REV. 4 DATE: 22/12/2016... -
Page 6: Manufacturer Identification Data
Manufacturer identification data IRA3D SRL VAT No.: 02435070038 Registered office: Viale Marazza 30 28021 Borgomanero (NO) – Italy Tel: +39 0322 862029 E-mail: info@ira3d.com support@ira3d.com (technical support) Web: http://ira3d.com User Manual: POETRY4 IRA3D... -
Page 7: Service Policies
Ira3D, in the latter case they will provide the customer with a quote to request consent to repair. -
Page 8: General Description
PLA, ABSuper, Poetry Filaments, and many others External dimensions 41x50x75 cm / 41x55x75 cm (with spool holder) Weight 40 kg Consumption 320 W (max power) Display Touchscreen 3.4'' (~73x49 mm) Printed circuit board ARM Cortex - 1/32 step Firmware Piranha Firmware User Manual: POETRY4 IRA3D... -
Page 9: Poetry4
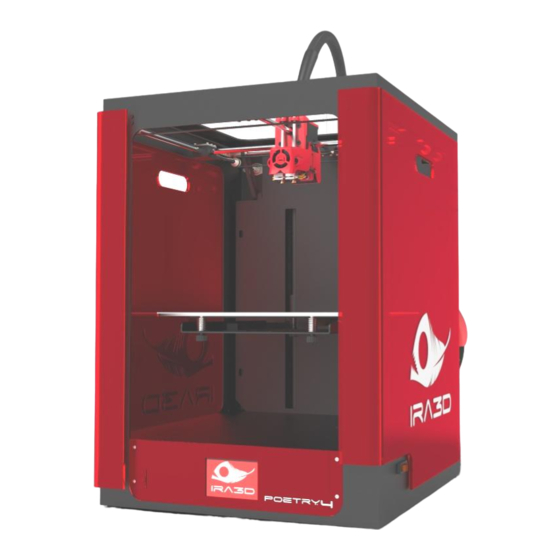
Poetry4 The 3D professional printer Poetry4 is a precision device, designed, developed and assembled in Italy by qualified personnel. Before leaving the factory, it was subjected to a quality control with suitable prints to check for correct accuracy and calibration, in addition to a test to ensure operation. Before attempting to operate, it is important to learn the terminology used in this manual and recognise the various parts that compose Poetry4. - Page 10 13. Tubes for filament supply 14. Hot-end 15. Radiator 16. Nozzles 17. Material cooling fan 18. Resistor 19. Sensor The EC marking and the information necessary for identification of the appliance are positioned at the rear of the printer. User Manual: POETRY4 IRA3D...
-
Page 11: Safety Information
The printer must be used exclusively to carry out the operations indicated in the technical specifications; it is strictly forbidden to use materials which are not envisaged by the same. IRA3D assumes no liability for damage resulting from improper use of the printer and its components. -
Page 12: Safe Use Of Materials
Do not put your hands or other parts of the body in the printing area during the printing process and/or for the minutes after the end thereof. The current temperature of the extruder is indicated with precision on the LCD display. User Manual: POETRY4 IRA3D... -
Page 13: Crushing
The use of certain materials or processes at high temperatures can cause the emission of toxic fumes. Be sure to follow the filament supplier’s indications. Do not use the printer in areas with no air exchange. IRA3D User Manual: POETRY4... -
Page 14: Electrocution
Do not use the appliance in the presence of condensing humidity or conductive dust. Disconnect the printer from the 220V mains power supply grid before accessing the internal parts. In the event of any malfunction stop using immediately and promptly report the failure to the production manager. User Manual: POETRY4 IRA3D... -
Page 15: Removal From The Box
Use the packaging in the event of moving or shipping the appliance. The printer Poetry4 is provided with a set of accessories and tools that make it immediately operational; including an SD card containing the manual and other useful files to start printing. -
Page 16: Positioning The Appliance
The on / off switch, the USB socket, the power socket and touch screen display must be easily accessible for the operator: keep an accessible space laterally and to the rear of at least 35 cm from walls or other objects. User Manual: POETRY4 IRA3D... -
Page 17: Recovery Of All Parts
In the event of returning the appliance for assistance, it is only necessary to send the printer and its printing plate packed in the original packaging. It is not necessary to send the TOOLS BOX and its contents. IRA3D User Manual: POETRY4... -
Page 18: Assembly
Take the power cable from the TOOLS BOX, plug it into the back of the appliance and turn on the printer using the power button on the side. Wait for the software to start until the Ira3D logo appears. Touch the display and wait for the following screen:... -
Page 19: Plate Assembly
Under BED the temperature detected (left column) is indicated with a Bordeaux colour on a grey background. In case the temperature is indicated in the colour red, turn the printer off and then on again. IRA3D User Manual: POETRY4... -
Page 20: Install The Lateral Bulkheads
NOTE: In case the spool holders are not available, only screw the screws in their housings on the back. User Manual: POETRY4 IRA3D... - Page 21 Then push the large lever (A) slightly to unlock the mechanism. From the printer display, set the nozzle loaded to the correct extrusion temperature and check that the filament comes out. IRA3D User Manual: POETRY4...
-
Page 22: Operator Panel
OPERATOR PANEL Poetry4 is equipped with a touchscreen LCD control panel installed on the front side in the lower area. Poetry4 is a printer that supports both autonomous operation and remote operation from a computer (Windows, MacOS or Linux) and mobile devices with browsers. -
Page 23: Desktop Screen
For the acceleration, speed, flow and ventilation parameters, the default value (100%) corresponds to the one set in the G-code file via the slicing software. Changing this value will result in a variation in the percentage of the selected option. IRA3D User Manual: POETRY4... -
Page 24: Machine Stop
We recommend not removing the object from the plate to continue later. The processing is resumed from the point where it was interrupted. It is useful for replacing the material. User Manual: POETRY4 IRA3D... -
Page 25: Main Menu
CONTROL: checking the processing parameters Para. 6.3.2 SD: navigation window SD card content Para. 6.3.3 INFO: information about the appliance Para. 6.3.4 WI-FI: Wi-Fi settings management Para. 6.3.5 DESKTOP: returns to the Desktop screen Para. 6.2 IRA3D User Manual: POETRY4... -
Page 26: Prepare Screen
CHANGE FILAMENT: Function for the replacement of the filament with a different colour or material MOVE: It opens a submenu that enables manual movement of the axes BED LEVEL: Function for plate calibration BACK: Returns to the upper level screen User Manual: POETRY4 IRA3D... -
Page 27: Control Screen
CAUTION! We strongly recommend not changing these parameters without the supervision of an Ira3D technical support expert. Ira3D does not take responsibility for failures or malfunctions due to changes that have not been approved by its technicians in charge. IRA3D... -
Page 28: Sd Card Screen
The files are readable in the *.gcode format and contain the interface code between the PC slicing software and the printer software. Use the arrows to scroll between one item and another Press the key to select an item and to prepare it for printing User Manual: POETRY4 IRA3D... -
Page 29: Info Screen
RESTORE DEFAULT PARAMETER: this allows for restoring the initial configuration of the printer to the factory settings. NOTE: In the event of restoring factory settings, we recommend contacting the Ira3D technical support (support@ira3d.com) to obtain the best basic appliance configuration. IRA3D... -
Page 30: Wi-Fi Screen
The last line shows the wi-fi configuration status and indicates the name of the Access Point or the IP of the printer according to the active connection mode. Follow the procedure in Chapter 11 to configure the printer wi-fi connection. User Manual: POETRY4 IRA3D... -
Page 31: Software And G-Code
If you have purchased a license for professional software from Ira3D, follow the instructions of the manual dedicated in order to know how to use it, or request a digital copy to the Ira3D technical support (support@ira3d.com). For more information or to purchase a license, write to sales@ira3d.com. -
Page 32: Speed And Temperature
G-Code generation. FILAMENT DIAMETER: this indicates the diameter of the filament used. This value is very important and must be verified before G-Code generation. For printing with Poetry4 the correct value is 1.75 mm. -
Page 33: Supports
It is possible create an ad hoc setting and follow a personalised course on the use of the professional slicing software based on customer needs (productivity, shapes of the models, dimensional requirements, quality standards). Contact Ira3D for more information. IRA3D User Manual: POETRY4... -
Page 34: First Use
SD Card The SD card is used for loading/unloading G-Code files from/to the printer. Ira3D provides the SD card pre-loaded with ready-to-use sample files, to allow for carrying out the first print with parameters already optimised for the best result. -
Page 35: Stop Printing
(and therefore must be printed more slowly) or a model that can be made more quickly. Acceleration: it is possible to increase or decrease the percentage overall acceleration set by the software in the G-Code. IRA3D User Manual: POETRY4... -
Page 36: Removing The Printed Object
The Poetry4 plate and its surface are optimised to increase the adherence and prevent the object from being detached from the surface, avoiding these unpleasant inconveniences. - Page 37 The warranty does not cover repairs or replacements of the plate and its mat due to damage or malfunction caused by the user through improper use of the appliance or due to non-compliance with the instructions provided. The user can still replace damaged parts by contacting the Ira3D technical support. IRA3D User Manual: POETRY4...
-
Page 38: Printing Surface And Materials
If adhesion is lost during solidification, it is very likely that printing can be damaged due to detachment from the plate before the object is completed. The Poetry4 plate is designed to solve this problem, but each strand may react differently once printed. -
Page 39: Printing In Pla
45°C. Other materials The behaviour of other materials can be compared to that of PLA and ABS. 9.3.1 H-Limofy® Extrusion temperature: 245° Plate temperature: 100° 9.3.2 Nylon Extrusion temperature: 240-265° Plate temperature: 100° IRA3D User Manual: POETRY4... -
Page 40: Model Preparation
By sectioning the model in two or three parts instead, it can be placed in the print volume of almost all printers and with sufficiently large mesh structures to be printed with precision. At the User Manual: POETRY4 IRA3D... -
Page 41: Supports
If, at the same height, the number of layers increases because they are thinner, the space between an edge of the layer and the next one is reduced so that the shape is IRA3D User Manual: POETRY4... - Page 42 Finally, we should consider that the recommended minimum thickness of the vertical walls is 0.8 mm which consists of 2 perimeters completed by the extruder with 0.4 mm nozzle. User Manual: POETRY4 IRA3D...
-
Page 43: Wi-Fi And Remote Control
WI-FI AND REMOTE CONTROL Poetry4 can be controlled via wi-fi in two modes: ACCESS POINT: in this mode, the printer can be reached immediately thanks to the wi-fi signal launched, which represents a network in itself. From the device, it is sufficient to connect to the network to control the appliance. -
Page 44: Connecting To The Printer Via Wi-Fi (Access Point)
The third line (AP SSID) is the name of the Wi-Fi network to connect to check the printer from the device (computer, smartphone, tablet). Activate the wi-fi on the device and connect it to the network whose name matches the SSID shown by the printer (in these examples: IRA3D 0001df). User Manual: POETRY4 IRA3D... - Page 45 At the request of the security key or connection password, from the printer display go to the MAIN MENU and select : the item Serial Number indicates the default password to connect to the printer. Once connected, the following page will automatically be loaded in the browser: IRA3D User Manual: POETRY4...
- Page 46 MOVES: this is the control panel to be used to adjust the printer parameters SD: this allows for viewing the contents of the SD inserted in the printer and to upload or launch new print jobs. User Manual: POETRY4 IRA3D...
-
Page 47: Changing The Access Point Configuration
Once all the required settings have been changed, confirm by clicking APPLY and wait for the connection to restart and then reconnect with the new parameters. IRA3D User Manual: POETRY4... -
Page 48: Connecting The Printer To An Existing Wi-Fi Network (Station Mode)
DNS #1: Preferred DNS server DNS #2: Alternative DNS Server Before proceeding with the configuration, it is necessary to connect to the printer in Access Point mode. Follow the procedure in Chapter 11.1 to access the WI-FI PAGE. User Manual: POETRY4 IRA3D... - Page 49 4. Confirm all the changes with the button APPLY at the bottom of the page and then wait for the connection to restart with the new parameters. 5. Close the window, and connect the device to the same wi-fi network to which the printer is connected. IRA3D User Manual: POETRY4...
- Page 50 6. From the printer display, open the MAIN MENU and press the key to display the wi-fi screen: 7. On the device (computer, tablet, smartphones…), type the IP that appears on the display (STA IP) in the browser address bar and press Enter: 8. The page loads automatically: User Manual: POETRY4 IRA3D...
-
Page 51: Printer Remote Control
11.3 Printer remote control From the MOVES PAGE, the printer can be checked remotely, intervening on some parameters depending on the state it is in. IRA3D User Manual: POETRY4... -
Page 52: Status Bar
Finally, the presence or otherwise of an SD card in the printer is indicated. When an SD card has been inserted, the icon colour is black with the words “detected”. If the icon is grey, it indicates that the SD card is not present or is not detected. User Manual: POETRY4 IRA3D... -
Page 53: Motor Movement Parameters
XY: this controls the speed of movement of the printhead along the X and Y axes ● Z: this controls the speed of movement of the plate along the vertical Z axis ● E: this controls the speed of extrusion of the filament ● IRA3D User Manual: POETRY4... - Page 54 HOME XYZ: the printhead and the plate are positioned at the initial coordinates on the ● XYZ axes (home position). Conversely, this row of buttons controls the extruders, releasing or retracting the filament for the selected intervals. User Manual: POETRY4 IRA3D...
-
Page 55: Print Parameters
SPEED: printer speed in relation to the one set in the G-Code (%) ● ACC: overall acceleration used by the printer (mm/s ● FLOW: material flow at the outlet of the nozzle (%) ● FAN: power of ventilation (max. 255) ● IRA3D User Manual: POETRY4... -
Page 56: Managing Processes Remotely
From this page, it is possible to upload a new file, start a print or delete one of the files on the SD card. NOTE: The system can display the entire contents of the SD card, but only the *.gcode files can be launched in print. User Manual: POETRY4 IRA3D... -
Page 57: Starting A Print Job Remotely
This operation is possible only when the printer is stopped and ready to print. During a print in progress, or paused, the functions of the SD page are disabled and it is not possible to operate on the SD card. IRA3D User Manual: POETRY4... -
Page 58: 11.4.2 Uploading A File On The Sd Card
In the list of files on the SD card, select the dustbin icon next to the file that you want to delete and then press the DELETE FILE key displayed in the left column to confirm the deletion. User Manual: POETRY4 IRA3D... -
Page 59: Printer Adjustment
PRINTER ADJUSTMENT The printer Poetry4 is a carefully designed and assembled mechanical device. In order to function properly and to comply with processing quality standards, it is necessary to compensate periodically for some normal settlement processes due, for example, to repeated thermal cycles of the extruder motor and heated printing plate. -
Page 60: Printing Bed
(chapter 12.2.2). CAUTION! If the nozzles are too close to the plate, they can ruin the sheet and compromise the correct deposition of the filament and/or the success of the print. User Manual: POETRY4 IRA3D... -
Page 61: 12.2.2 Bed Calibration
Z axis returning to Home, its position of 0. 3. The display is a box that represents the printing plate: press the corner where the sheet was placed to adjust the plate-nozzle distance. The printhead is automatically positioned in the corresponding point. IRA3D User Manual: POETRY4... -
Page 62: 12.2.3 When To Perform The Plate Calibration
Bring the printing surface closer The filament does not adhere to the surface If one of the situations indicated should occur during printing, intervene on the affected area by adjusting the knob of the corresponding corner. User Manual: POETRY4 IRA3D... -
Page 63: Extruder Kit
NOTE: At the time of purchase, Poetry4 is supplied with the Standard Kit installed. Sharp Kit and Speed Kit are part of the “Infinity Kit” package and are supplied separately. Please contact Ira3D to request an Infinity Kit or other diameters. - Page 64 Then re-screw the air conveyor from the cooling fan. NOTE: Ira3D is not responsible for failures or unexpected results due to an incorrect kit replacement. User Manual: POETRY4 IRA3D...
-
Page 65: Ordinary Maintenance
The nozzles must not be in direct contact with the surface of the sheet, because they can damage it. Make sure the correct distance has been set using the calibration instructions (chap. 12.2.2). We strongly recommend starting the test printout to verify the correct calibration and adhesion of the material. IRA3D User Manual: POETRY4... -
Page 66: Replacing The Sheet
4. Then calibrate the plate by verifying that the nozzles are at the correct distance. User Manual: POETRY4 IRA3D... -
Page 67: Cleaning The Nozzle
3. NOTE: If after several attempts, it was not possible to unblock the nozzle, we recommend buying a new kit by contacting the Ira3D technical support. A clogged nozzle is not replaceable and is not covered by warranty. IRA3D... -
Page 68: Fans
6. After applying the lubricant at the various points, move all axes to the bottom of the stroke in both directions, until it is uniformly coated along all surfaces. User Manual: POETRY4 IRA3D... -
Page 69: Belt Tension (X And Y Calibration)
Y-axis), then proceed with the calibration by tensioning the motor belts. CAUTION! We recommend performing these operations exclusively when the printer is off and/or unplugged. Working on the apparatus while it is running can cause malfunctions and/or irreparable damage. IRA3D User Manual: POETRY4... -
Page 70: 13.6.1 Tensioning The Motor Belts
Push the motor downwards so as to tension the belt further. Keep the motor in position, then tighten the 4 screws to fix the tension. Make sure that the motor is not moving and that the 4 screws are tight. User Manual: POETRY4 IRA3D... -
Page 71: 13.6.2 Tensioning The Belts Of The X And Y Axes
5. Still keeping the printhead stopped, tighten the 4 screws on the tensioner and retighten the screws of the pulley. Repeat the same steps for all 4 main belts. Make sure that all the pulleys are well anchored to the axes, and verify that the print meets expectations. IRA3D User Manual: POETRY4... -
Page 72: Adjustment Of The Z Axis And Z End Stop
The warranty does not cover damage due to the nozzles being too close to the plate. Carefully follow the instructions in paragraph 13.2 for the correct use and maintenance of the printing plate. User Manual: POETRY4 IRA3D... -
Page 73: Important Information
14.2 Compliance with European directives This product carries the EC marking in accordance with the Directive 2014/35/EU and Directive 2014/30/EU. Please contact Ira3D for the complete declaration of conformity. IRA3D User Manual: POETRY4...
Need help?
Do you have a question about the POETRY4 and is the answer not in the manual?
Questions and answers